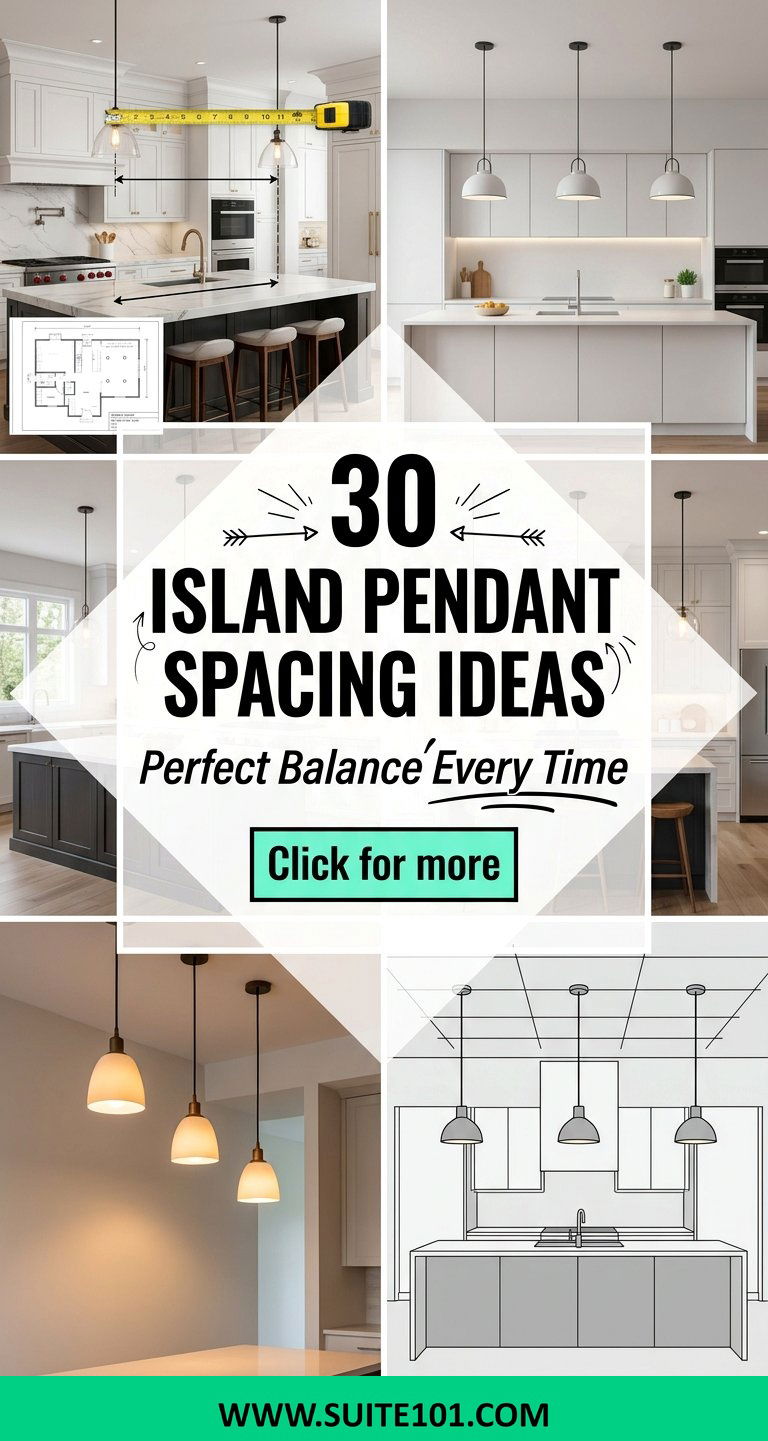
Choosing the right lighting for your kitchen island is a delicate balance of science and art that significantly impacts the room's overall aesthetic and function. When you stand in your kitchen, the island often serves as the central anchor where meals are prepared, homework is finished, and guests naturally congregate. Proper pendant spacing ensures that every inch of this workspace receives adequate illumination while maintaining a visually pleasing rhythm that complements your cabinetry and decor. Navigating the specific measurements for height, quantity, and distance requires a thoughtful approach to proportions. By following established design principles, you can transform a simple island into a sophisticated focal point that feels both professional and inviting.
1. Kitchen island pendant height
The vertical distance between your countertop and the bottom of your light fixture is arguably the most critical measurement in kitchen design. For most standard setups, maintaining a gap of thirty to thirty-six inches provides the ideal balance of focused task lighting and clear sightlines. If you hang them too low, you risk obstructing your view of guests across the counter or accidentally bumping into the shades while working. Conversely, placing them too high can cause unwanted glare from the bulbs and make the lighting feel disconnected from the island itself. Always consider the tallest person in your household to ensure the fixtures sit comfortably above their natural eye level during daily use.
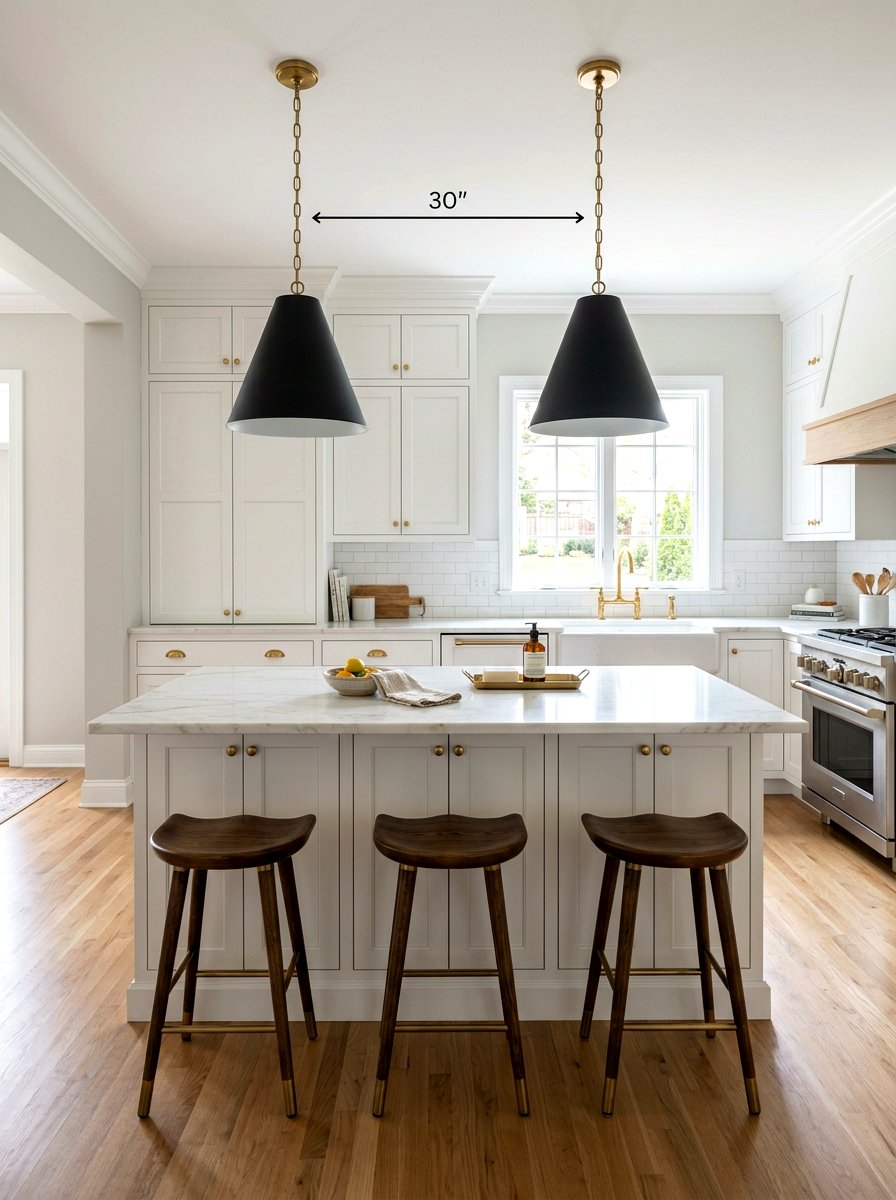
2. Two pendant spacing
When you are working with a pair of lights, the goal is to create a sense of symmetry that grounds the island. A common professional technique for two fixtures involves dividing the total length of the island into four equal parts. You then place the center of each light on the first and third quarter marks to achieve a balanced look that avoids the edges. This specific arrangement ensures that the light spread covers the entire surface without the fixtures appearing crowded in the middle or too spread out. If your pendants are particularly large, you might need to adjust this slightly inward to prevent them from dominating the island’s visual footprint.
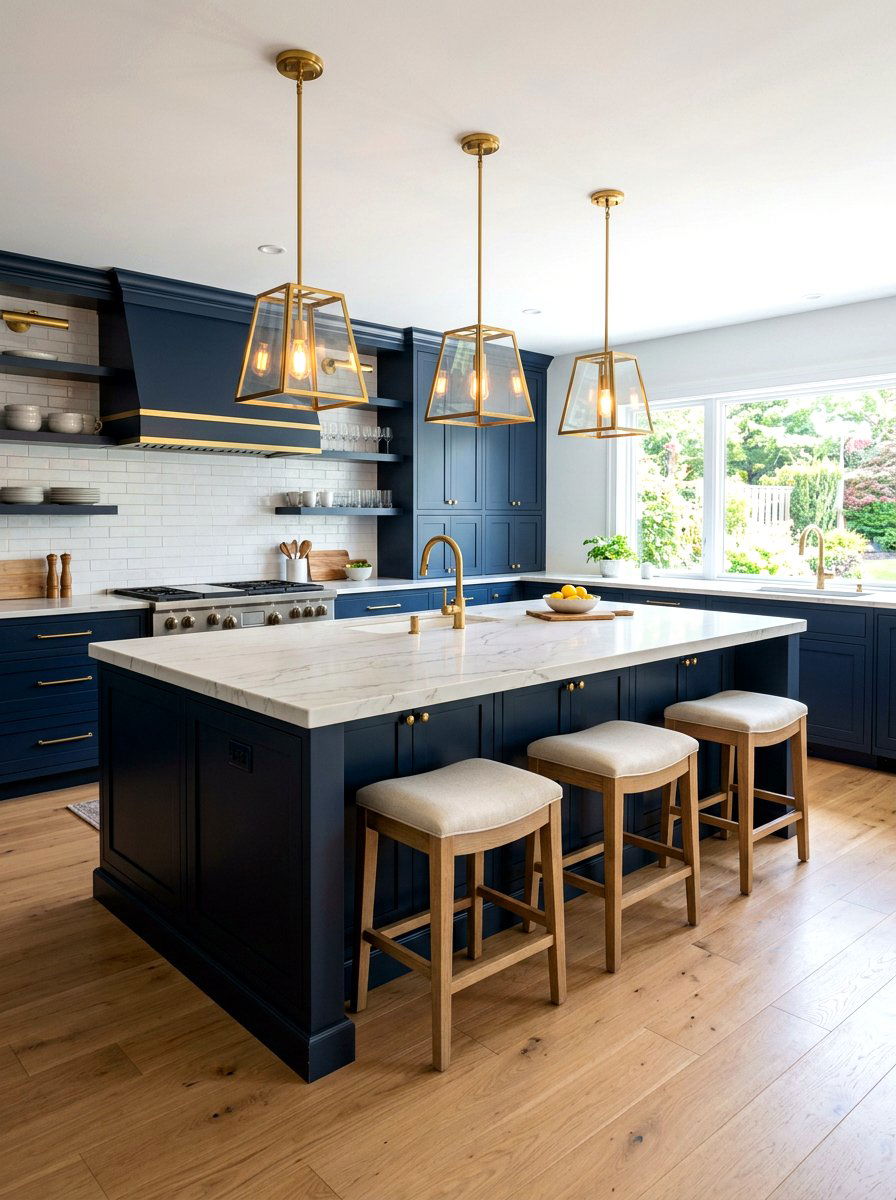
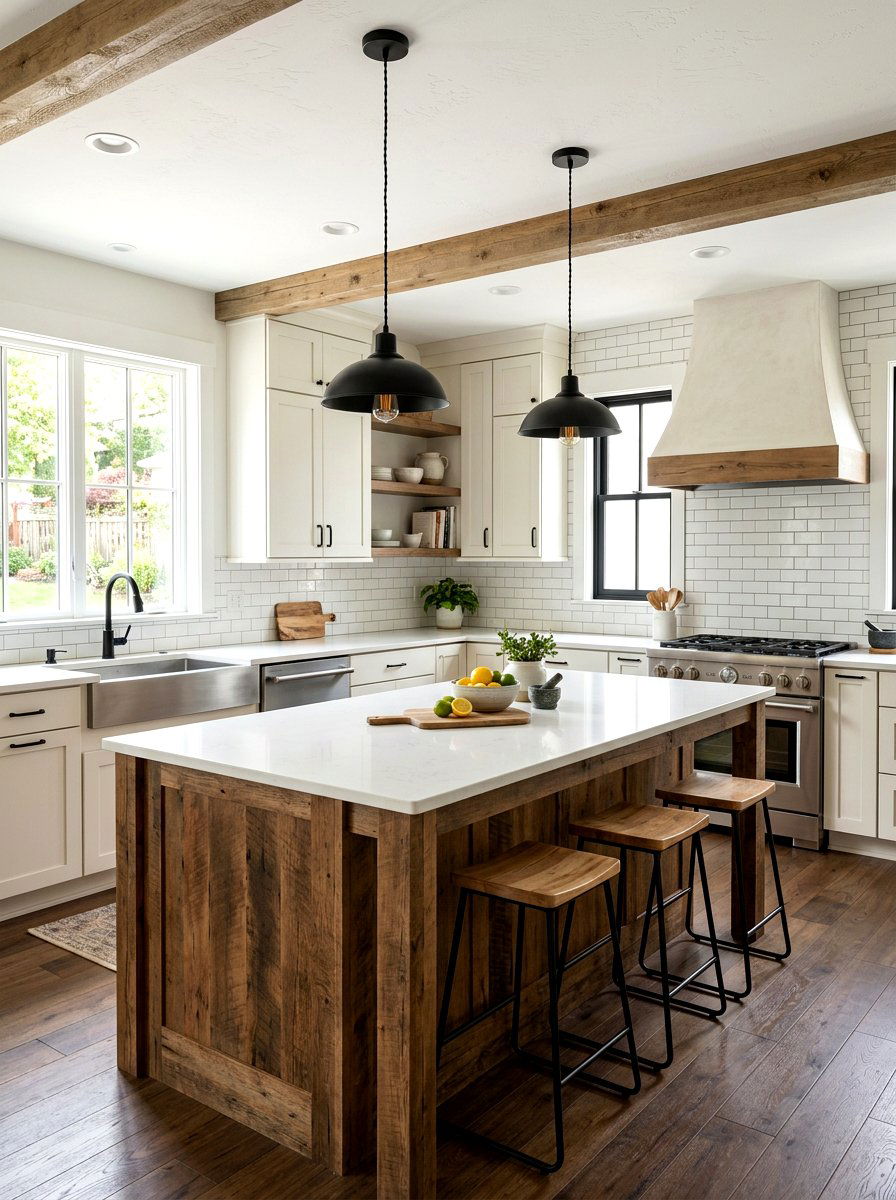
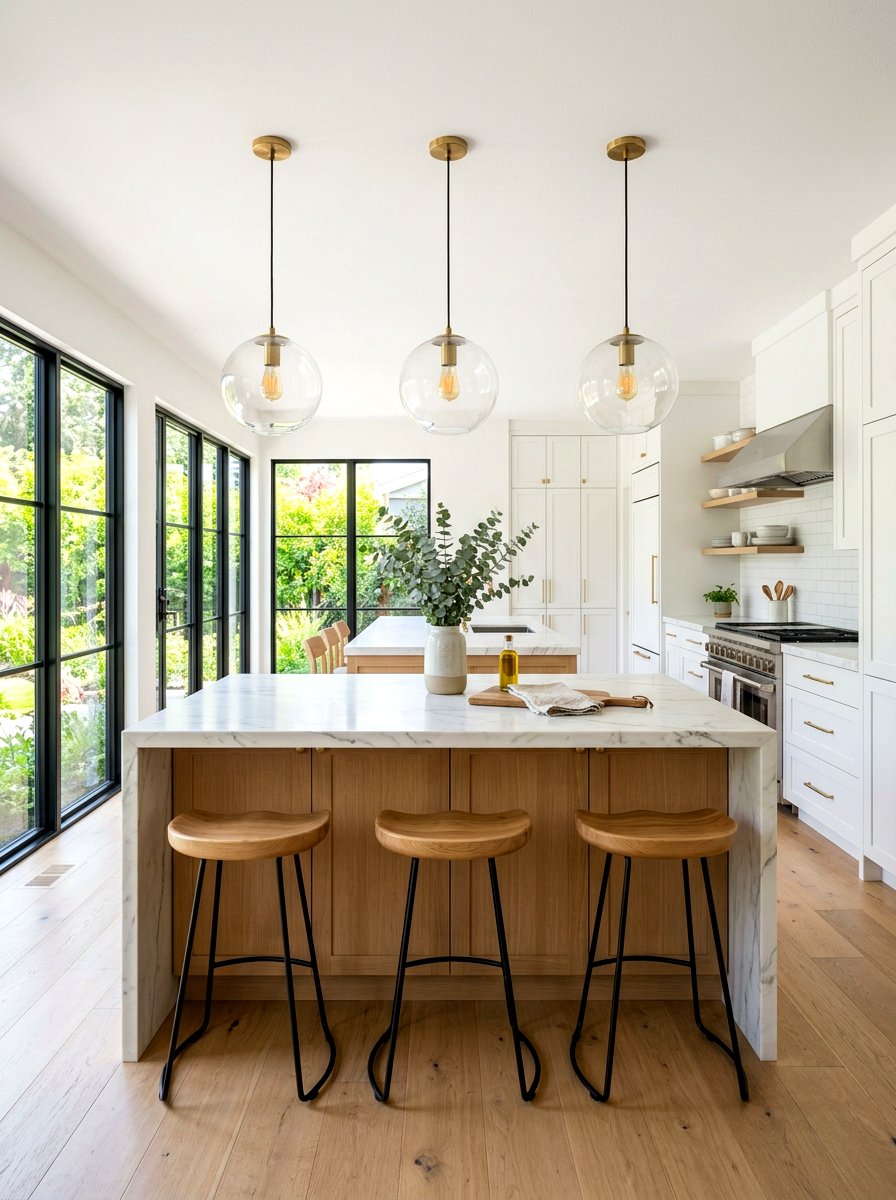
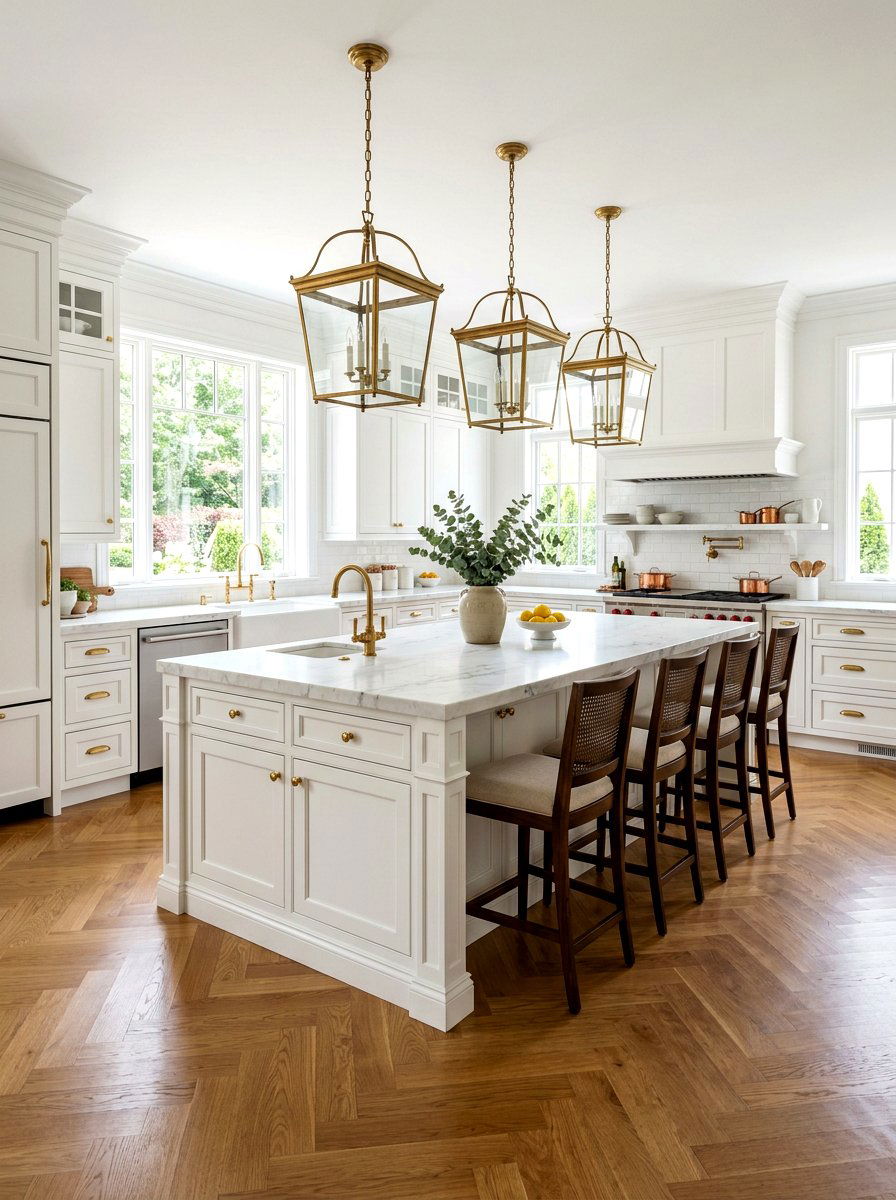
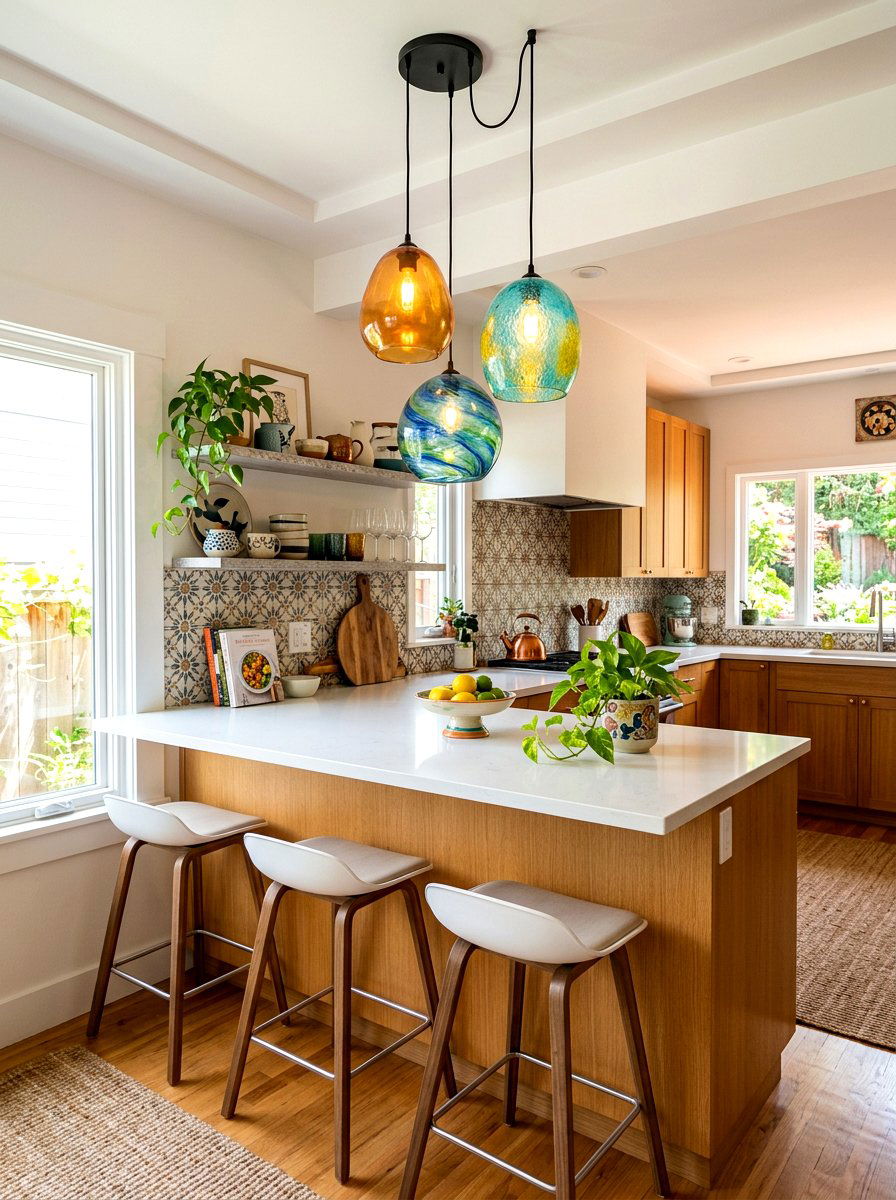
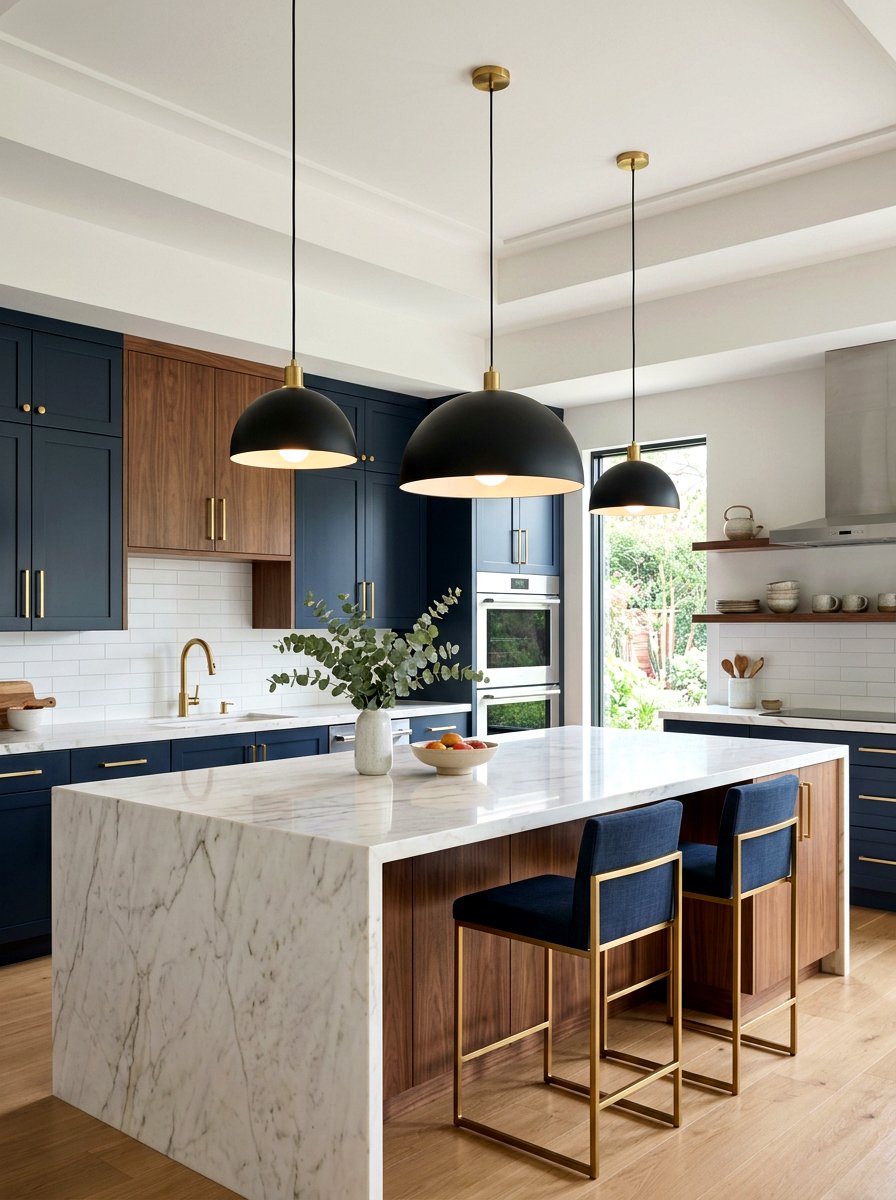
3. Three pendant spacing
Installing three lights follows the popular design principle known as the rule of odds, which often feels more natural to the human eye. To get this right, you should start by finding the exact center point of your island and mounting the middle fixture there. Once the center light is positioned, measure the distance to the ends and place the remaining two fixtures halfway between the center and the island edges. This creates a rhythmic pattern that looks intentionally planned and provides very even light distribution for food preparation. This layout is particularly effective for longer islands where a single pair of lights might leave dark spots in the middle.
4. Small island pendant placement

Decorating a compact kitchen island requires a careful touch to avoid overwhelming the limited surface area with bulky fixtures. For islands under five feet long, a single oversized pendant or two very small mini-pendants usually provide the best visual scale. If you choose the two-light route, keep the spacing tighter, often around eighteen to twenty-four inches apart, to ensure the arrangement stays contained within the island’s boundaries. Centering the fixtures is vital here because any slight misalignment will be much more noticeable in a smaller space. Using glass or open-frame styles can also help the area feel less cluttered while still providing the necessary task lighting for your tasks.
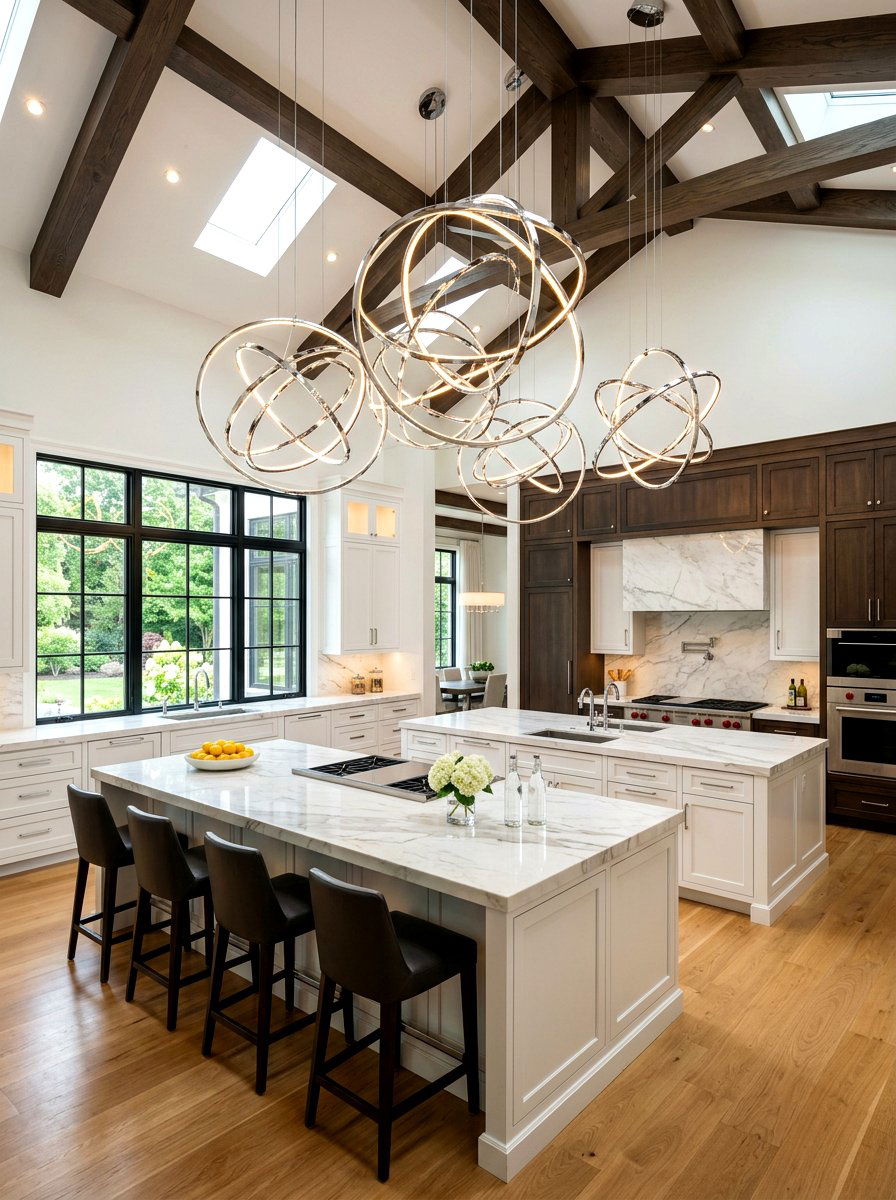
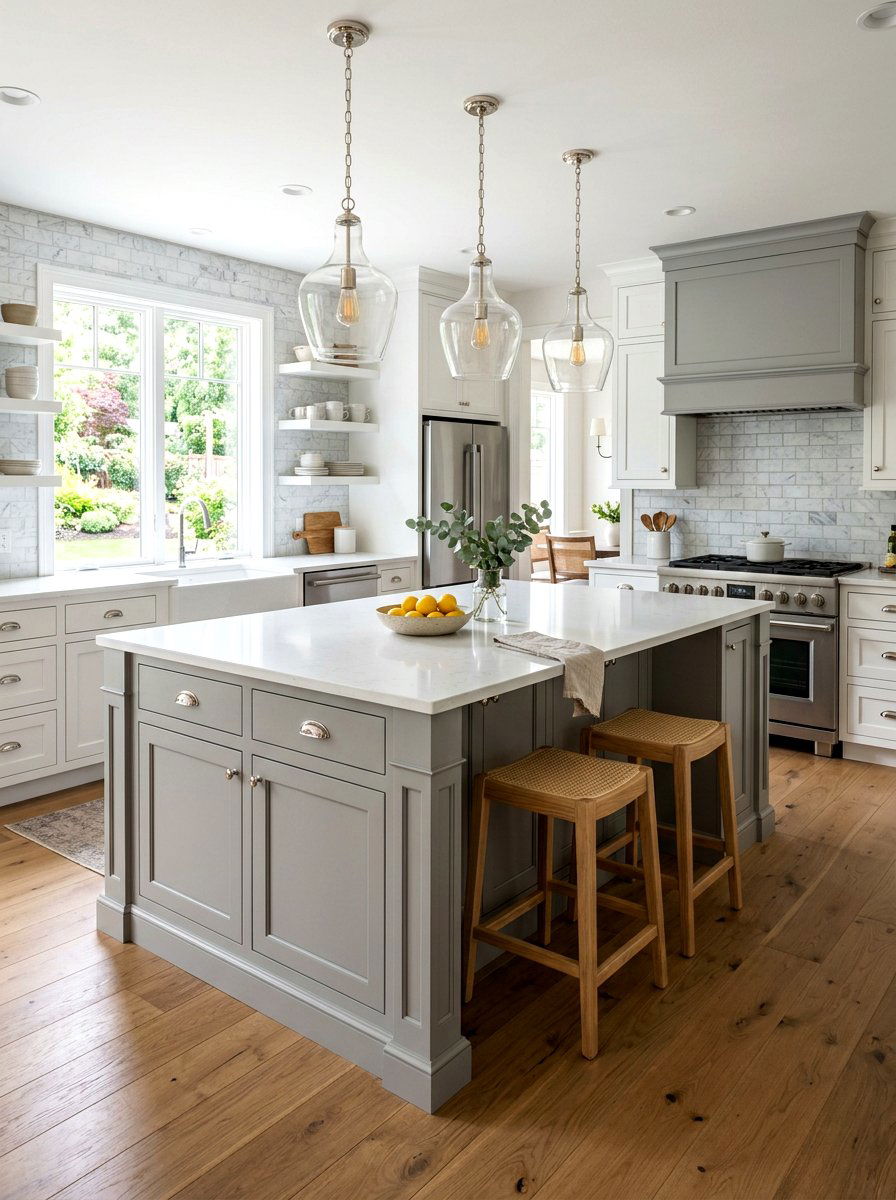
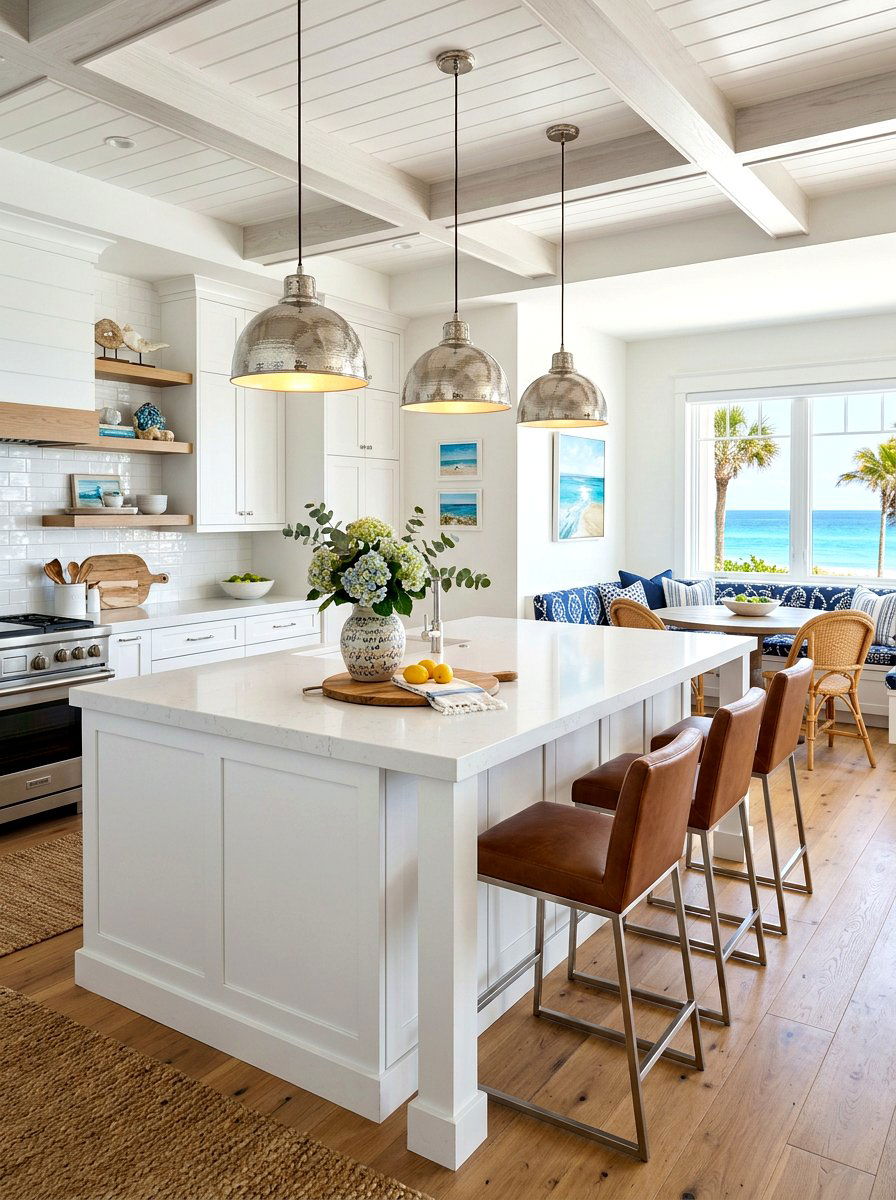
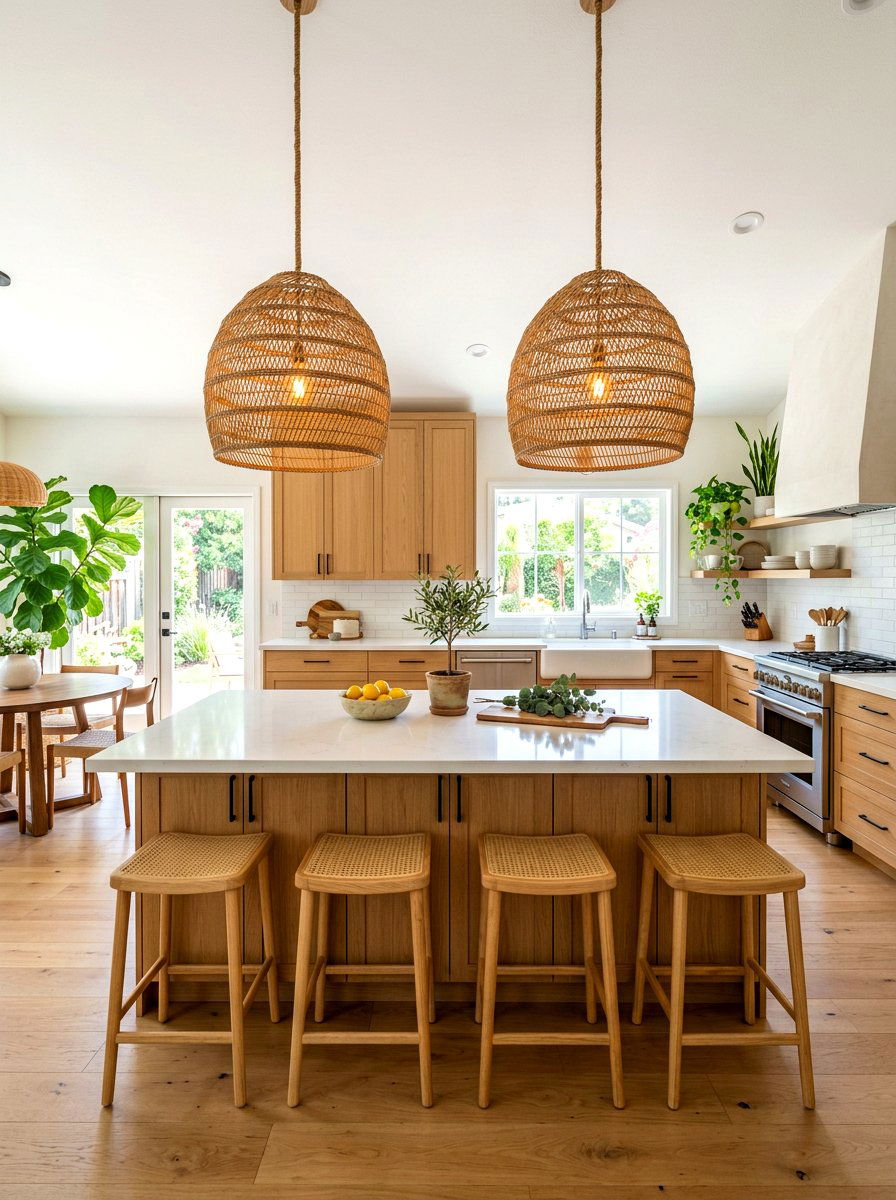
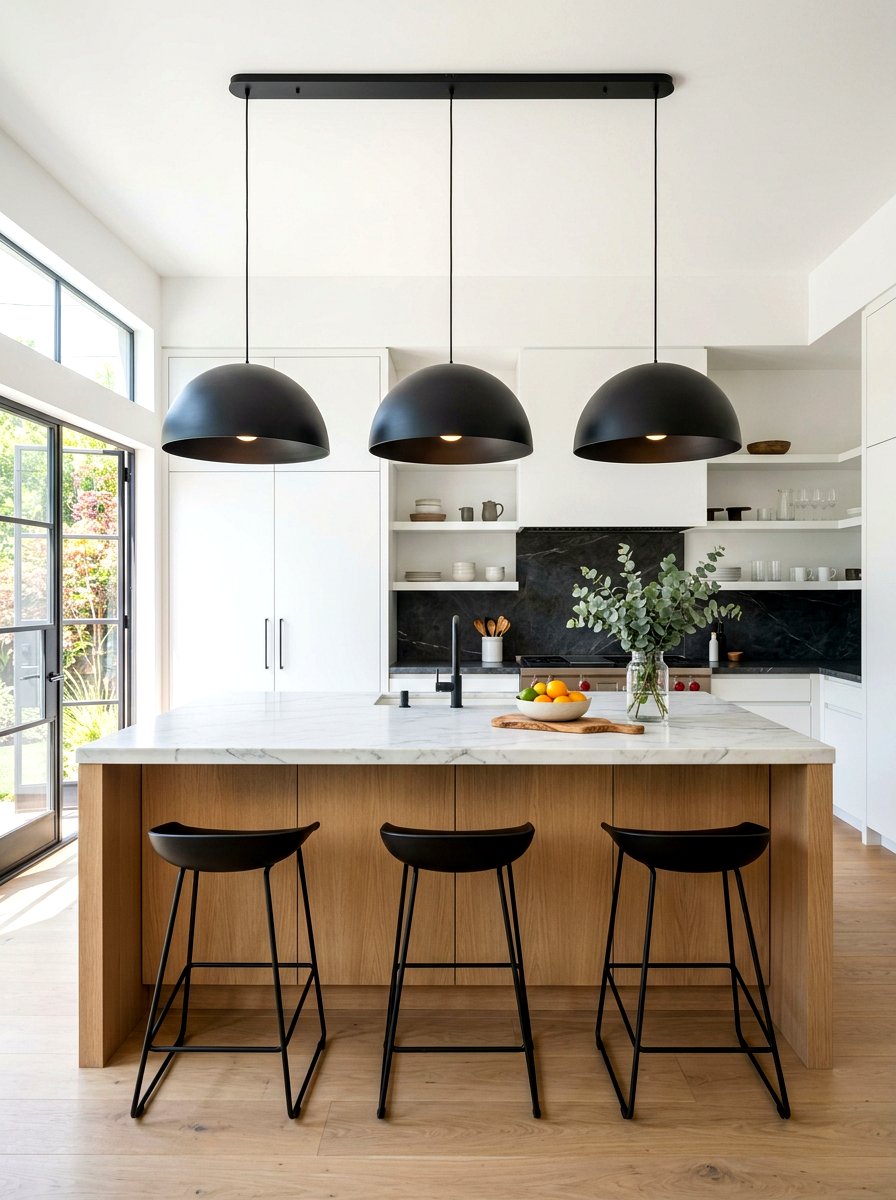
5. Large island lighting layout

Large kitchen islands offer a massive canvas for creative lighting, but they also require more power to illuminate the expansive countertop surface. For islands reaching eight feet or beyond, you generally have the choice between three substantial pendants or a single long linear fixture. If you opt for individual pendants, aim for a center-to-center distance of approximately thirty inches to ensure the light pools overlap correctly. This prevents the "spotlight" effect where some areas are bright while others remain in shadow. You should also ensure that the diameter of the fixtures is large enough to remain proportional to the island's substantial width and length for a balanced appearance.
6. Pendant distance from island edge
Safety and visual harmony both dictate how close your lights should get to the ends of the counter. As a general rule, the center of your outermost pendants should sit at least six to twelve inches away from the edge of the island. This buffer zone prevents the fixtures from looking like they are "falling off" the counter and protects them from being accidentally hit by someone walking past. If your island has a seating overhang at one end, you should still measure from the edge of the countertop rather than the base cabinet. This ensures the lighting remains centered over the actual usable surface where people will be sitting or working.
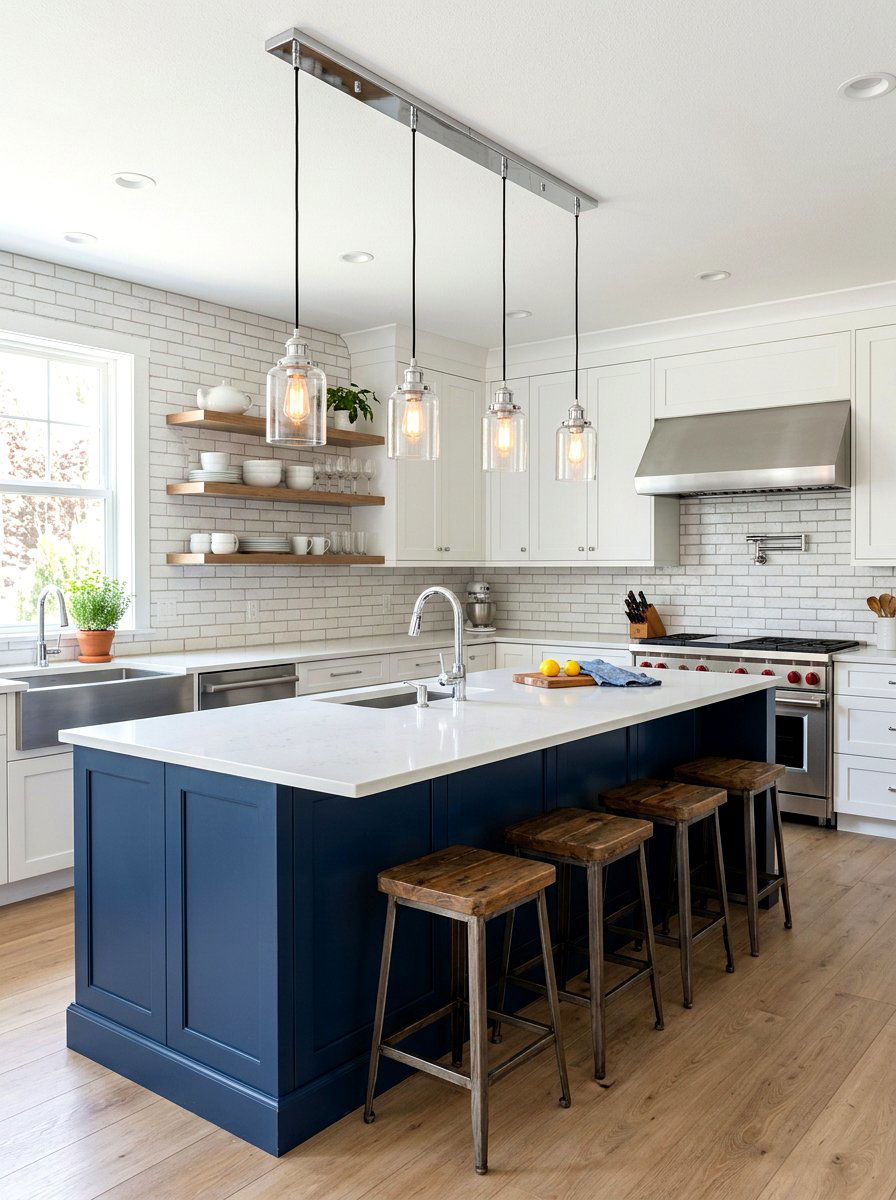
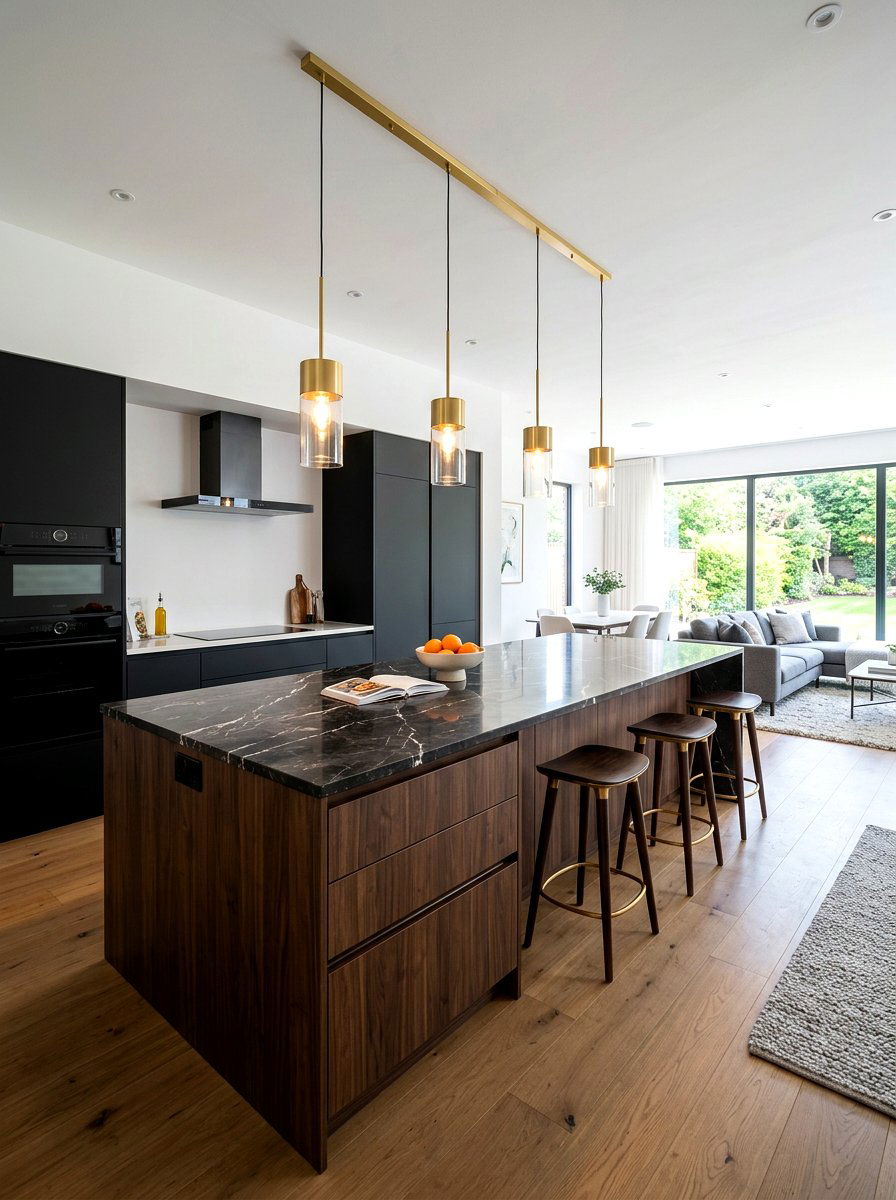
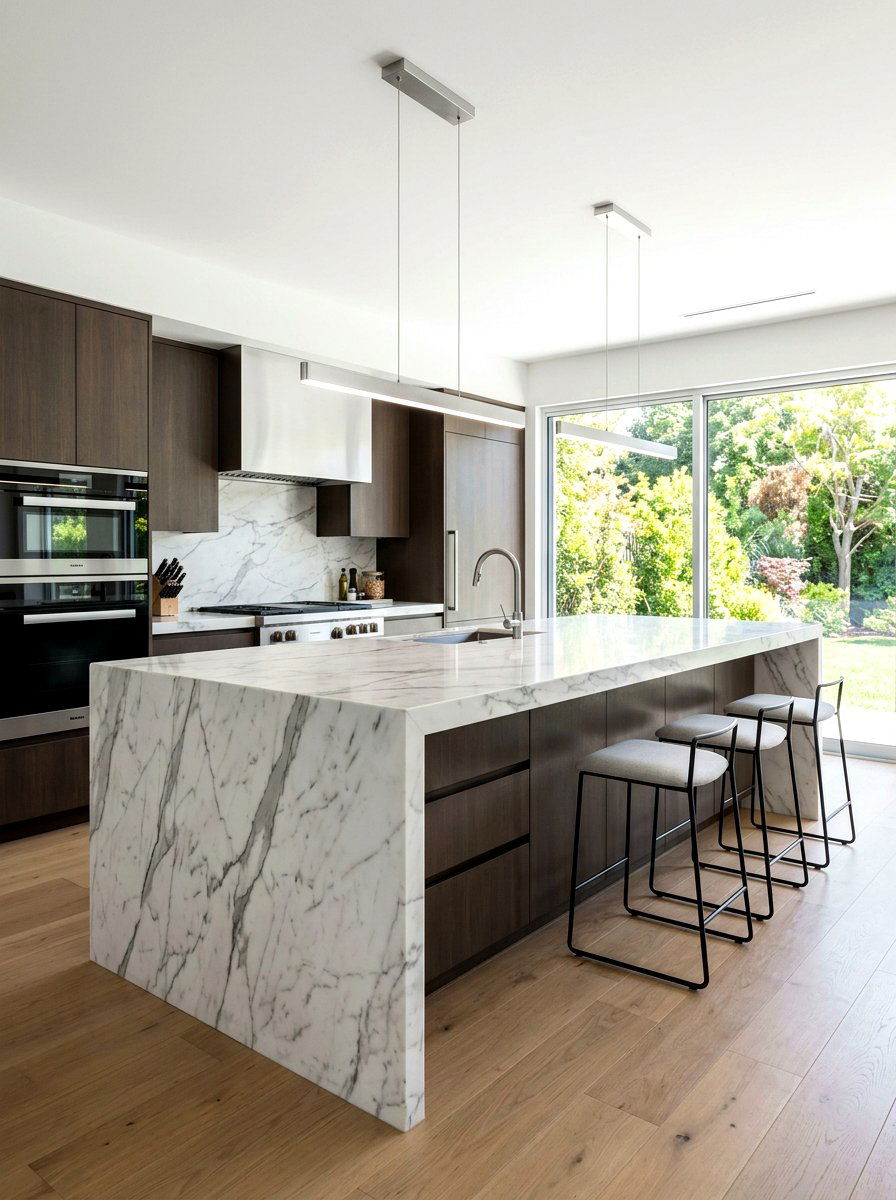
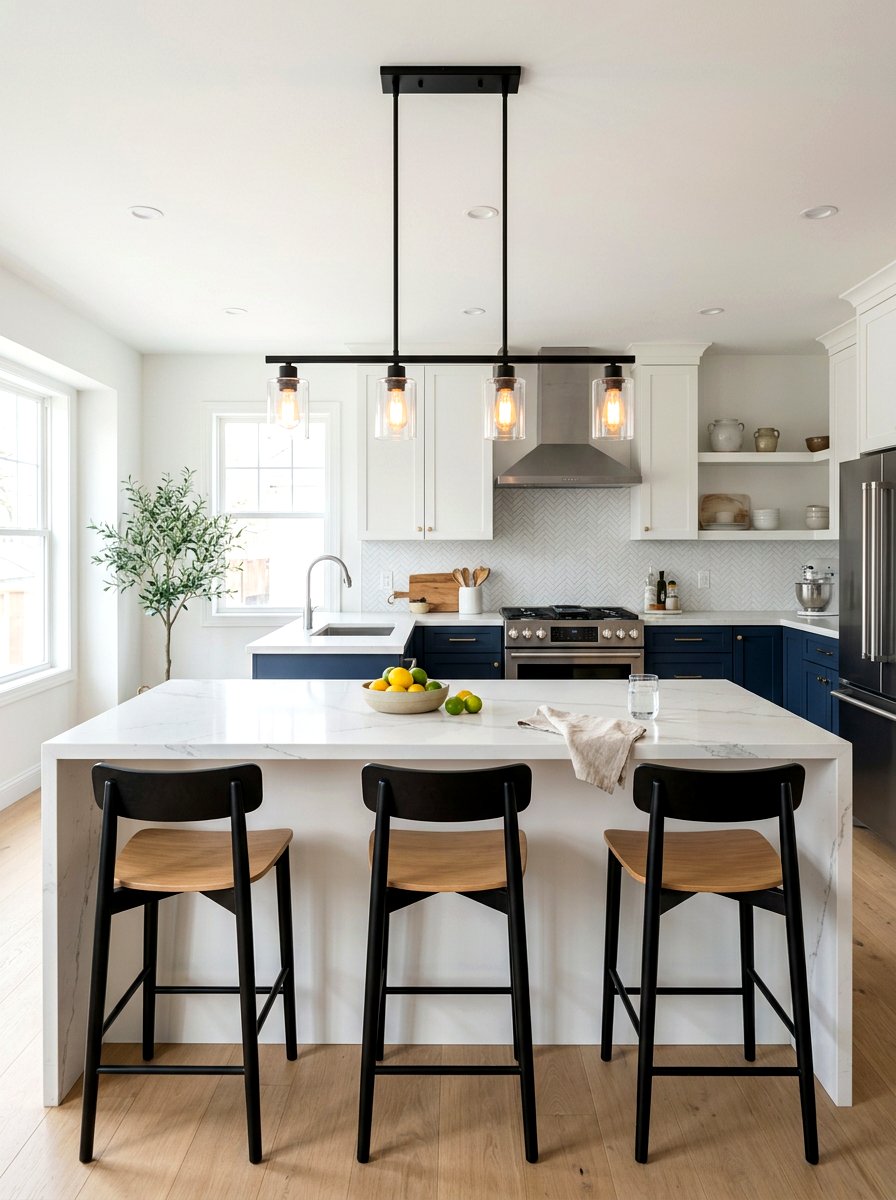
7. Linear pendant light centering

A linear chandelier or multi-light bar is a popular modern alternative to individual pendants, offering a streamlined look with a single mounting point. When installing these fixtures, the most important step is ensuring the entire unit is perfectly centered both lengthwise and widthwise over the island. Because these fixtures are often quite long, any tilt or offset will be immediately apparent against the straight lines of the countertop. You should aim for a linear light that covers roughly two-thirds to three-quarters of the island's length. This proportion ensures the fixture looks significant enough to anchor the space without extending so far that it crowds the surrounding kitchen traffic.
8. Oversized pendant light spacing
Using oversized lighting is a bold design choice that can make a kitchen feel high-end and luxurious, but spacing becomes even more sensitive. When the fixtures have a large diameter, you must increase the distance between them to prevent the kitchen from feeling claustrophobic. Instead of the standard thirty-inch gap, you might space the centers thirty-six to forty-eight inches apart. This extra room allows the unique silhouette of each large pendant to be fully appreciated without them competing for visual attention. Ensure that the distance between the shades themselves is at least equal to the width of the shade to maintain a clean and airy architectural feeling.
9. Mini pendant light intervals
Mini-pendants are excellent for adding delicate detail, but they often require closer spacing to provide enough light and visual impact. Because their light output is more focused, you should consider using a series of three or four fixtures rather than just two. For these smaller lights, a spacing interval of twenty to twenty-four inches from center to center is usually ideal. This tighter grouping creates a continuous line of light that effectively defines the island area. When using mini-pendants, it is also common to hang them slightly lower within the standard range to create a more intimate feel, as their smaller scale won't obstruct the view as much.
10. 4 foot island pendant spacing
A four-foot island is quite narrow, making it the perfect candidate for either one impactful light or two very slim fixtures. If you choose to go with two lights, they should be placed approximately twelve inches in from each end of the counter. This leaves exactly twenty-four inches between the two fixtures, creating a compact and efficient lighting arrangement. Since the island is short, look for pendants with a diameter of ten inches or less to keep the proportions in check. This layout provides plenty of light for a small prep station without making the ceiling area above the island look crowded or top-heavy in your kitchen.
11. 5 foot island pendant spacing
On a five-foot island, you have a bit more breathing room to play with slightly larger fixtures or different spacing configurations. Placing two medium-sized pendants fifteen inches from each end will leave thirty inches of space between them. This is often considered the "sweet spot" for visual balance on a mid-sized island. If you prefer the look of a single fixture, choose an oversized drum or a wide lantern to ensure the light reaches both ends of the counter. At this length, you want to avoid three lights unless they are very small, as the extra hardware can quickly make a five-foot island feel cluttered and busy.
12. 6 foot island pendant spacing
A six-foot island is one of the most common sizes and offers great versatility for two or three-light setups. If you prefer a cleaner look with two pendants, space them eighteen inches from the ends, which leaves thirty-six inches between the centers. For those who love the rhythmic look of three fixtures, place one in the middle and the others eighteen inches to the left and right. This creates twelve-inch gaps between the lights and twelve inches of clearance from the ends. This length allows you to use pendants with a diameter of up to fourteen inches comfortably while still maintaining an open and airy feel above the countertop.
13. 7 foot island pendant spacing
At seven feet, the island is long enough that three pendants often look more proportional than two. To calculate the spacing, mark the center of the island and then place the flanking lights twenty-four to twenty-eight inches away from that middle point. This ensures that the lights are spread evenly across the counter, providing consistent illumination for large-scale meal prep. If you choose to stick with two lights, they should be significantly larger to fill the extra space. Set them about twenty-one inches from the ends to leave forty-two inches between them, ensuring the central work zone doesn't end up in a shadow during the evening.
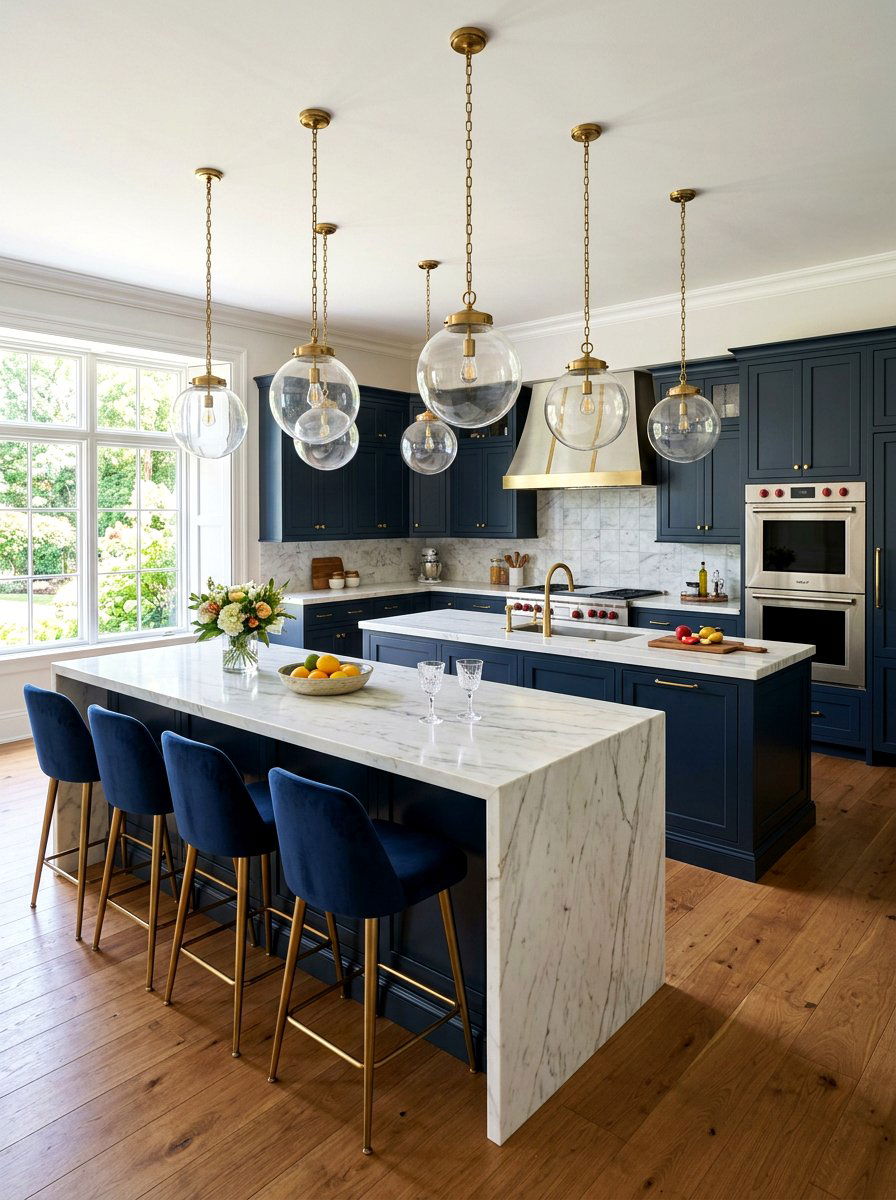
14. 8 foot island pendant spacing
Eight-foot islands are substantial enough to serve as the main architectural feature of a kitchen, requiring a confident lighting plan. Three large pendants are the standard choice here, typically spaced thirty to thirty-two inches apart from center to center. This arrangement leaves roughly sixteen inches of clearance from the island ends, which looks balanced and prevents the lights from feeling squeezed. For a more modern aesthetic, you could even consider four smaller pendants spaced twenty-four inches apart. This creates a very long, sleek line of light that emphasizes the impressive scale of the island while providing incredibly even brightness across the entire stone or wood surface.
15. 9 foot island pendant spacing
When you reach a nine-foot island, the spacing becomes more about filling the volume of the room as much as lighting the counter. Three oversized pendants are often the best fit, spaced thirty-six inches apart to cover the expansive length. This layout leaves eighteen inches of space on either end, which provides a very professional and high-end look. Alternatively, this is the perfect size for two very large, "statement" lanterns that are spaced about fifty-four inches apart. Because the island is so long, you must ensure your chosen fixtures have enough "visual weight" so they don't look like tiny dots floating in a massive kitchen space.
16. 10 foot island pendant spacing
A ten-foot island is a massive workspace that often acts as both a kitchen and a dining area, necessitating a robust lighting solution. Spacing three pendants forty inches apart is a common approach that centers the light perfectly while leaving twenty inches of breathing room at the ends. If your ceiling is high enough, you might even consider a grouping of five smaller pendants for a more dramatic and contemporary effect. In a ten-foot layout, the goal is to ensure the light reaches the very ends of the island where people might be sitting, so pay close attention to the beam spread of your chosen light bulbs.
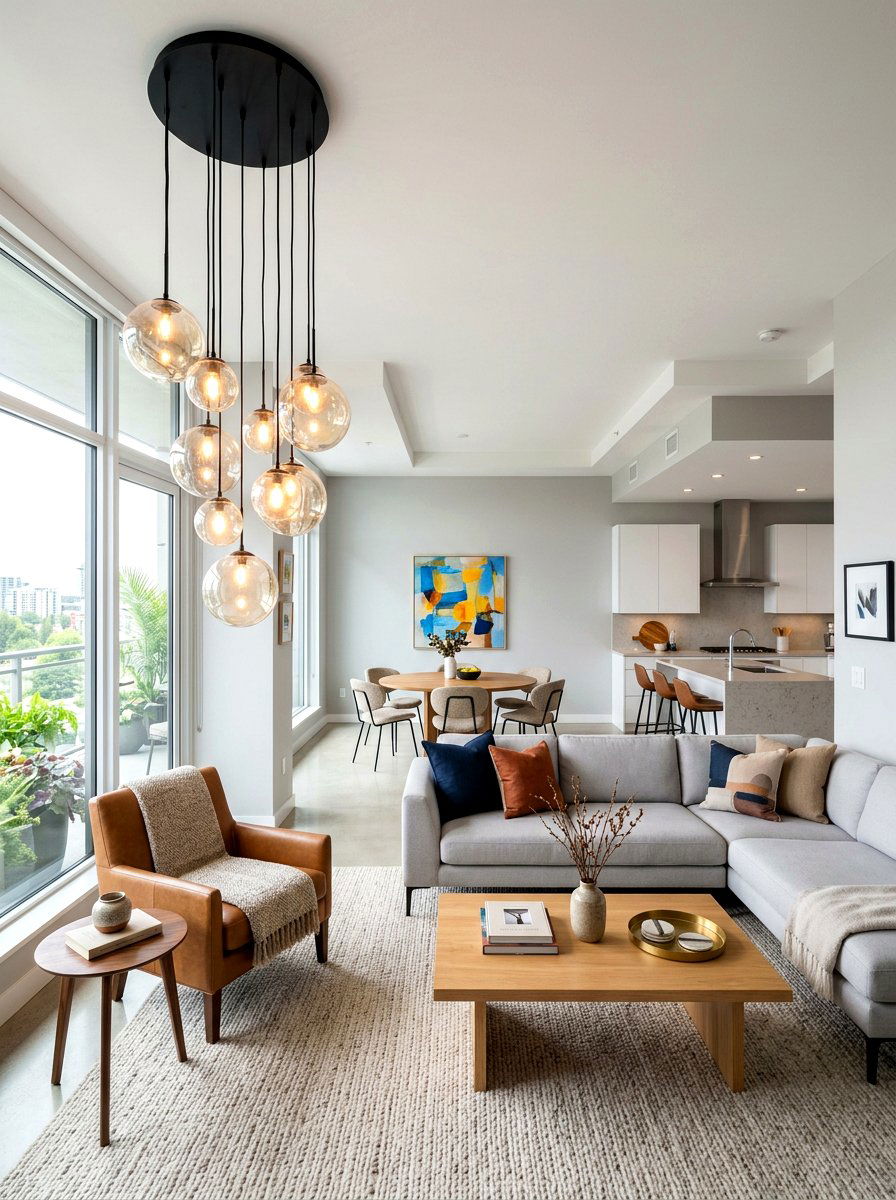
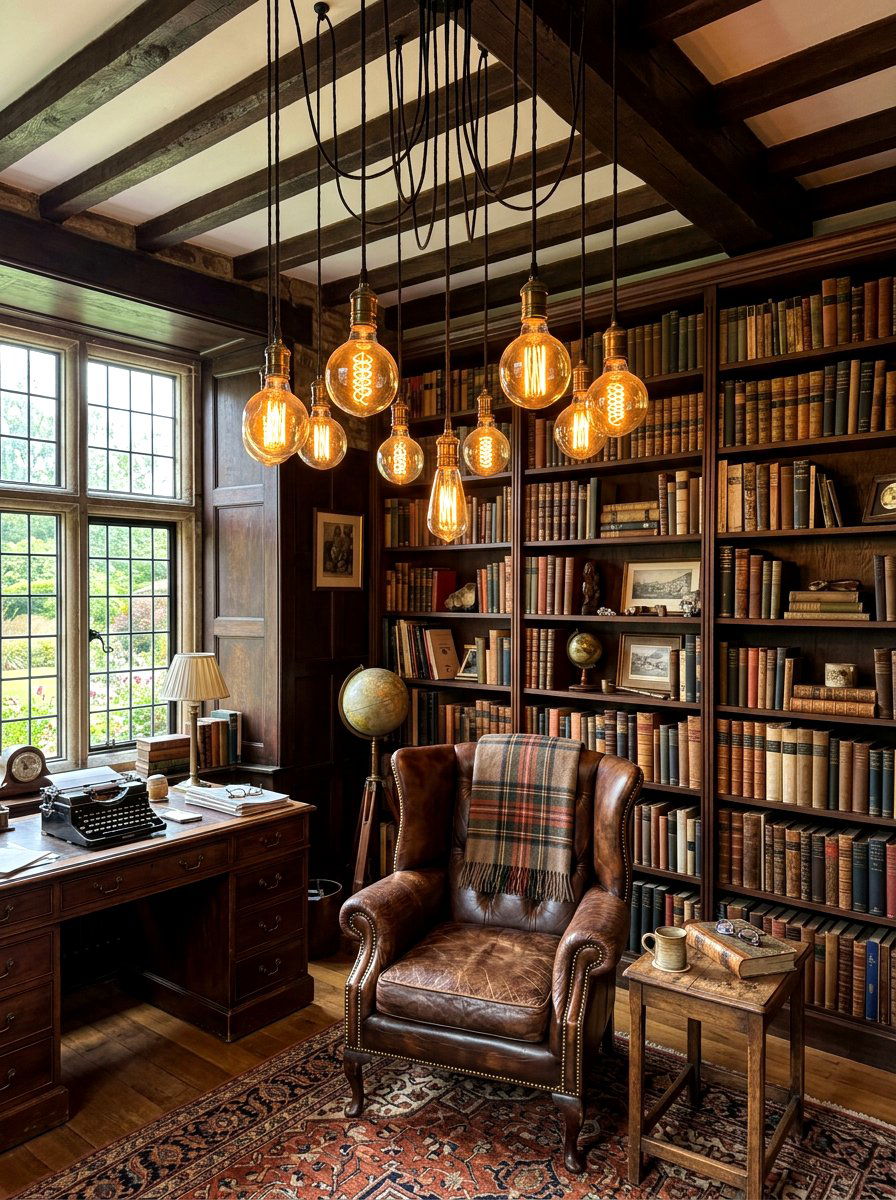
17. Staggered height pendant layout
For a more artistic and informal look, you can vary the hanging heights of your pendants rather than keeping them in a straight horizontal line. This staggered approach is often used with clusters of three or five similar lights. When spacing these, you should still maintain a consistent horizontal distance between the cords to avoid a tangled appearance. However, by hanging the middle light lower and the outer lights higher, or vice versa, you create a dynamic visual interest that breaks up the rigid lines of the kitchen. This style works exceptionally well in modern or bohemian homes where a less traditional and more playful vibe is desired.
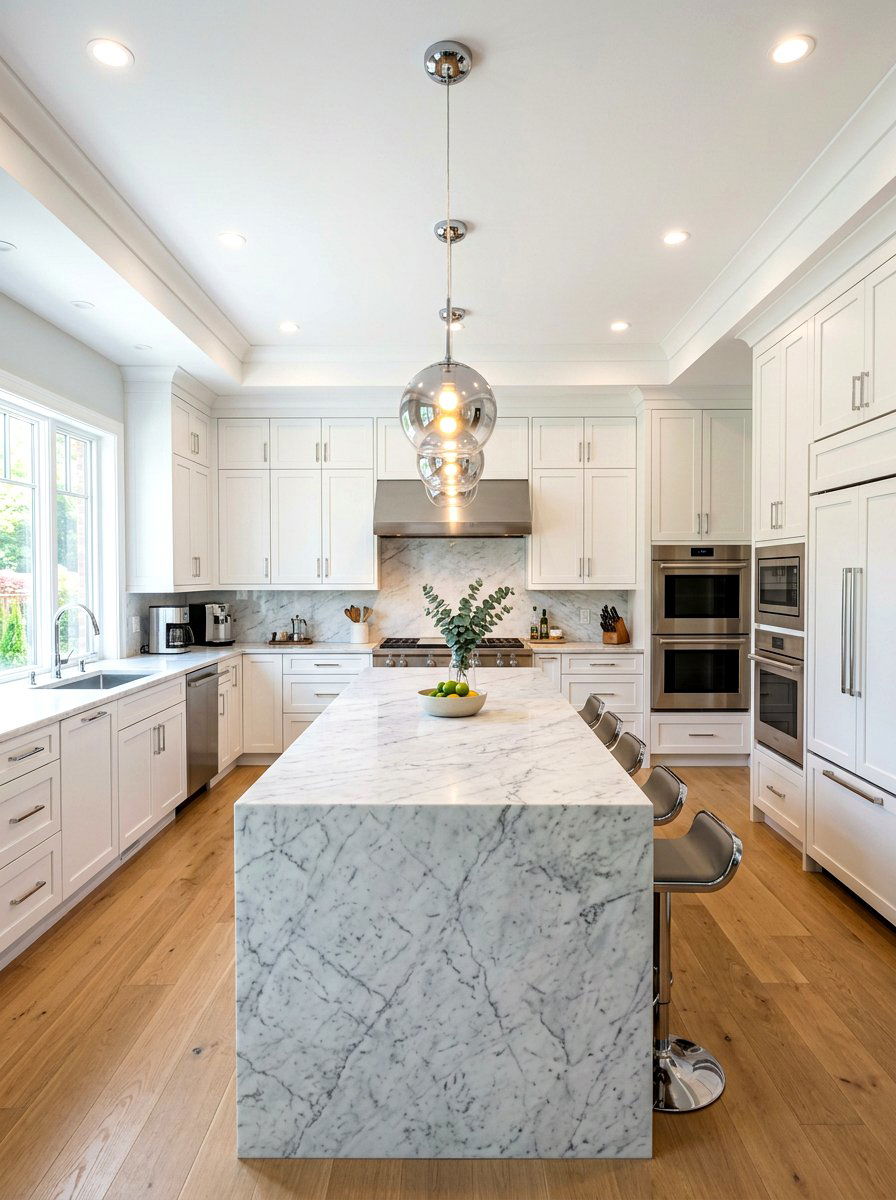
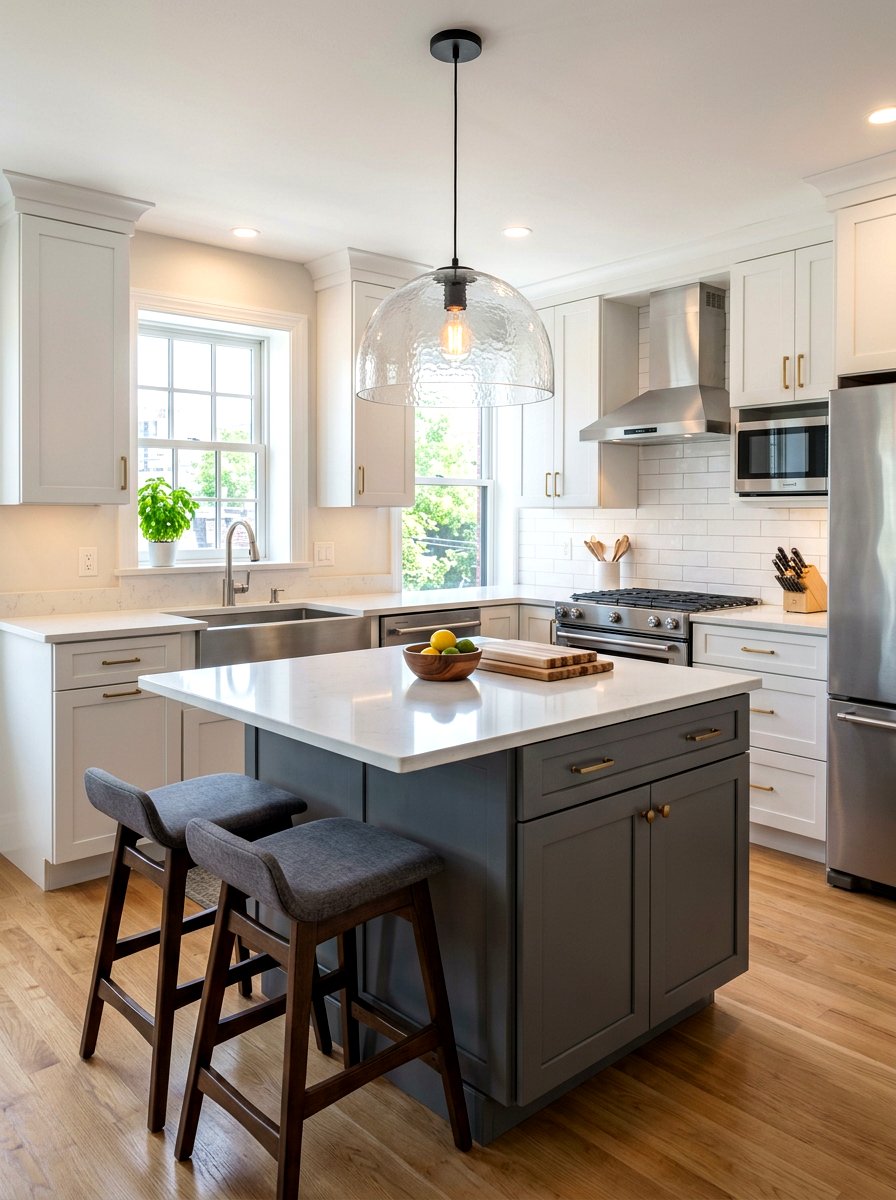
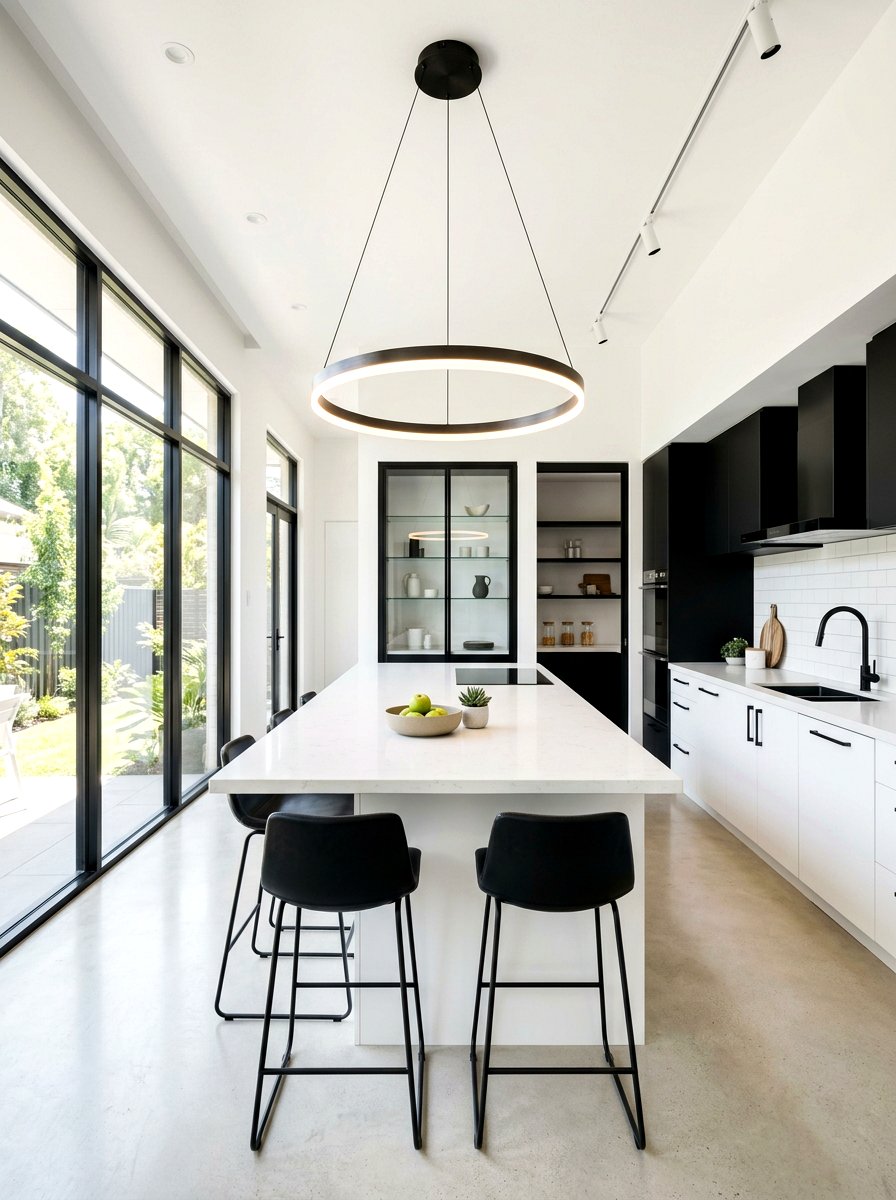
18. Single pendant light centering
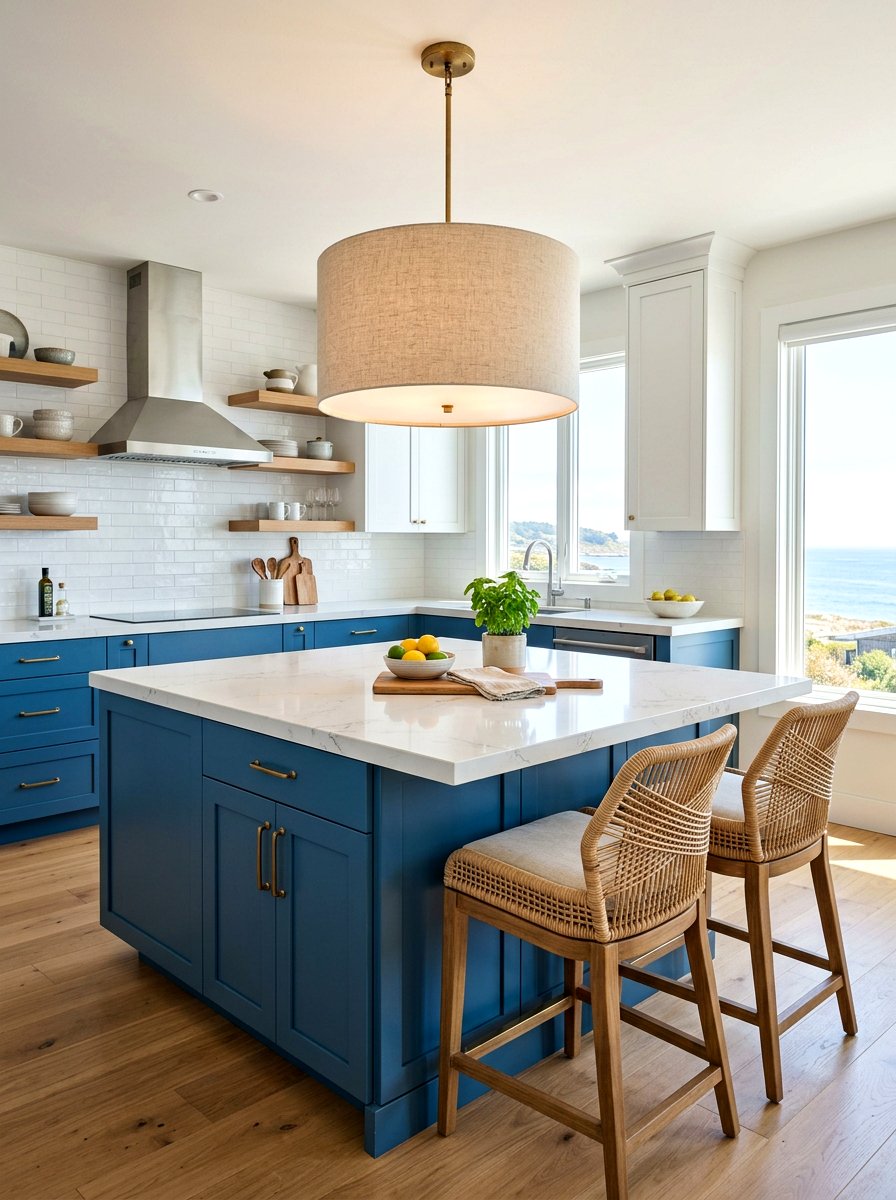
Using a single pendant light is a minimalist choice that works best for small islands or when you want to keep the kitchen view completely unobstructed. The golden rule for a single light is absolute centering — it must be exactly in the middle of both the length and the width of the island. Because a single fixture has to do all the work, it should be significantly larger than a standard pendant to provide enough light and maintain proper scale. Look for a fixture that is roughly one-third the length of the island to ensure it looks intentional rather than like a mistake or an undersized leftover light.
19. Double island light symmetry
In large luxury kitchens with two separate islands, creating a mirrored lighting plan is essential for a cohesive look. You should treat each island as its own zone but use identical fixtures and spacing to tie the two areas together. If both islands are the same size, simply repeat the same measurements for height and distance. If one island is for prep and the other is for seating, you might adjust the height slightly, but keeping the spacing intervals the same ensures the room feels balanced. Aligning the pendants so they form straight lines across the room when viewed from the side adds a professional touch.
20. High ceiling pendant length

Kitchens with ceilings over ten feet tall present a unique challenge because standard pendant cords often look too short and spindly. To fix the proportions, you should actually hang the pendants slightly higher than the standard thirty-six inches — perhaps closer to forty inches from the counter. This helps the lights feel like they belong to the room 's volume rather than just the island surface. You also need to select fixtures with more substantial mounting hardware, like thick rods or heavy chains, to ensure they don' t look lost in the vertical space. Adding three inches of hanging height for every extra foot of ceiling is a helpful guide.
21. Vaulted ceiling pendant mounting

Installing pendants on a slanted or vaulted ceiling requires specialized hardware and careful measurement to ensure the lights hang perfectly vertical. Most modern pendants come with sloped-ceiling adapters, but you must calculate the spacing based on where the lights will sit over the counter, not where they mount to the ceiling. Use a plumb bob or a laser level to mark the center points on the ceiling directly above your desired island positions. Because the cord lengths will be different for each light to reach the same horizontal plane, double-check that the bottom of every shade is perfectly level with its neighbor for a clean look.
22. Breakfast bar light spacing
If your island features a raised breakfast bar, the lighting needs to accommodate two different surface heights. Most designers recommend centering the pendants over the main workspace rather than the higher bar to ensure the cook has the best visibility. However, you must hang them high enough so that people sitting at the raised bar aren't staring directly into the light bulbs or hitting their heads. Spacing should remain consistent with the length of the island, but you might opt for narrower shades to keep the view clear between the kitchen and the adjacent living area where people usually gather.
23. Waterfall island pendant alignment
A waterfall island, where the countertop material continues down the sides to the floor, creates a very strong and sleek architectural statement. To complement this modern look, your pendant spacing should be equally precise and minimalist. Aim for a "less is more" approach, perhaps using two larger, clean-lined fixtures instead of three smaller ones. Aligning the outer edges of the pendants with the inner edges of the waterfall sides can create a beautiful framed effect. Using fixtures with simple geometric shapes and hidden mounting hardware helps maintain the seamless, high-end aesthetic that waterfall countertops are known for in contemporary kitchen renovations.
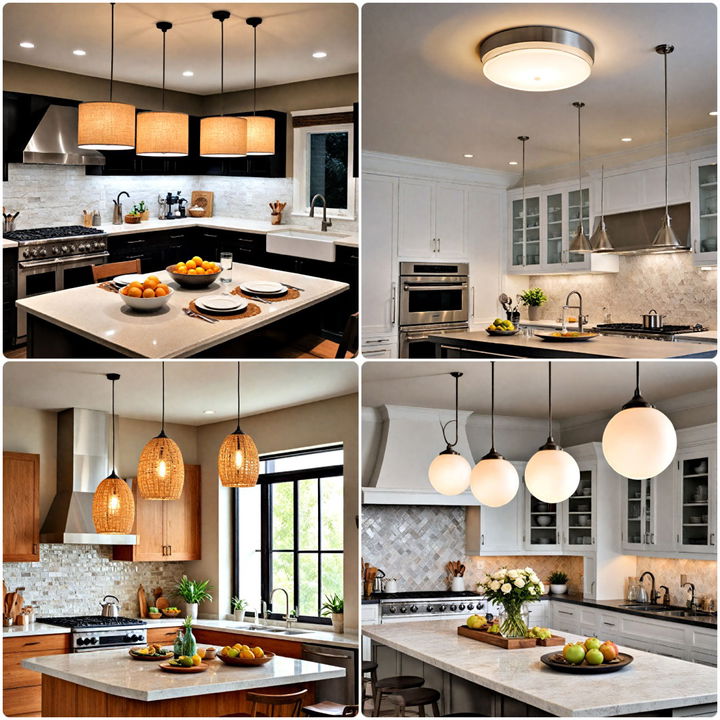
24. Globe pendant light spacing
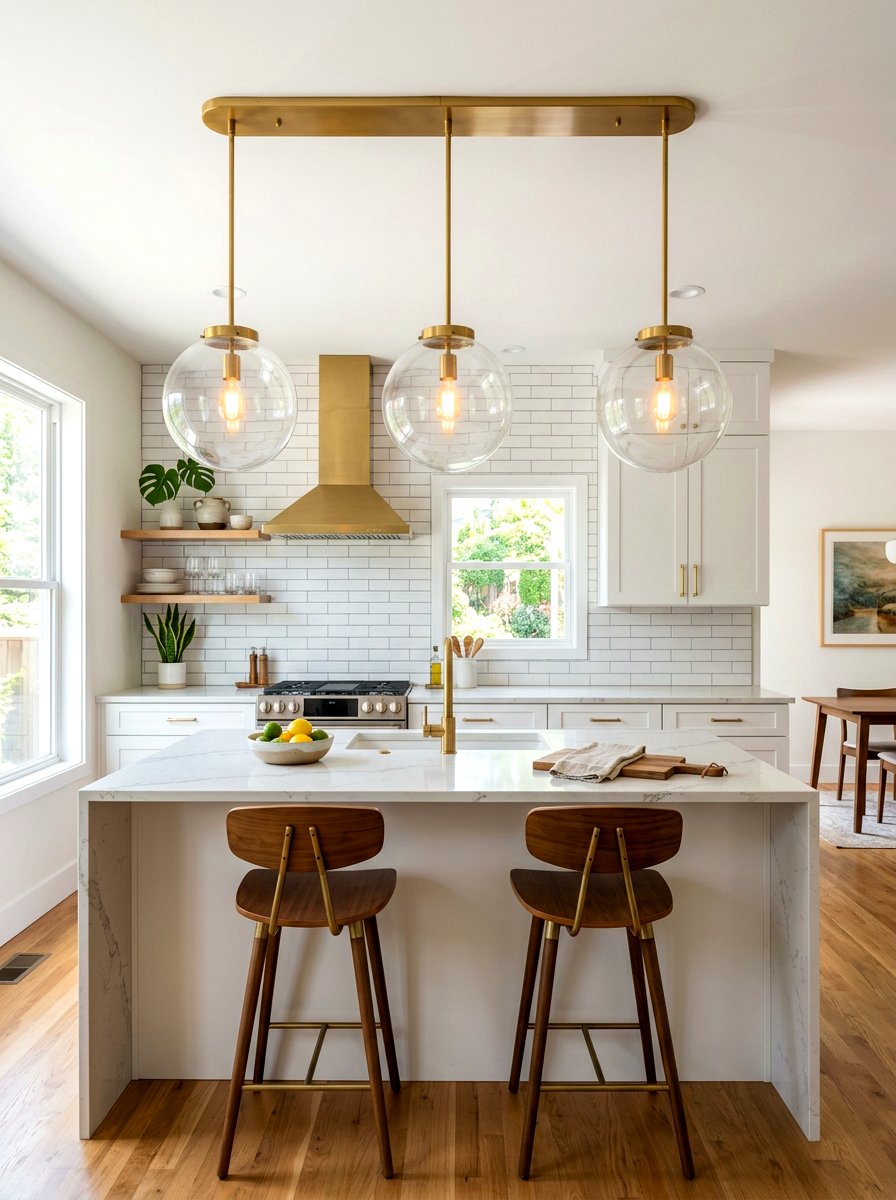
Globe pendants are a timeless choice that provides a soft, 360-degree glow, making them perfect for general kitchen ambiance. Because the light is diffused in all directions, you can often space them a bit further apart than metal shades that only point light downward. A gap of thirty-two to thirty-six inches between globe centers allows the soft light to overlap gently without creating harsh bright spots. When hanging globes, pay extra attention to the height; because they are often clear or opal glass, they can feel less "heavy" in the room, allowing you to hang them at the lower end of the height range.
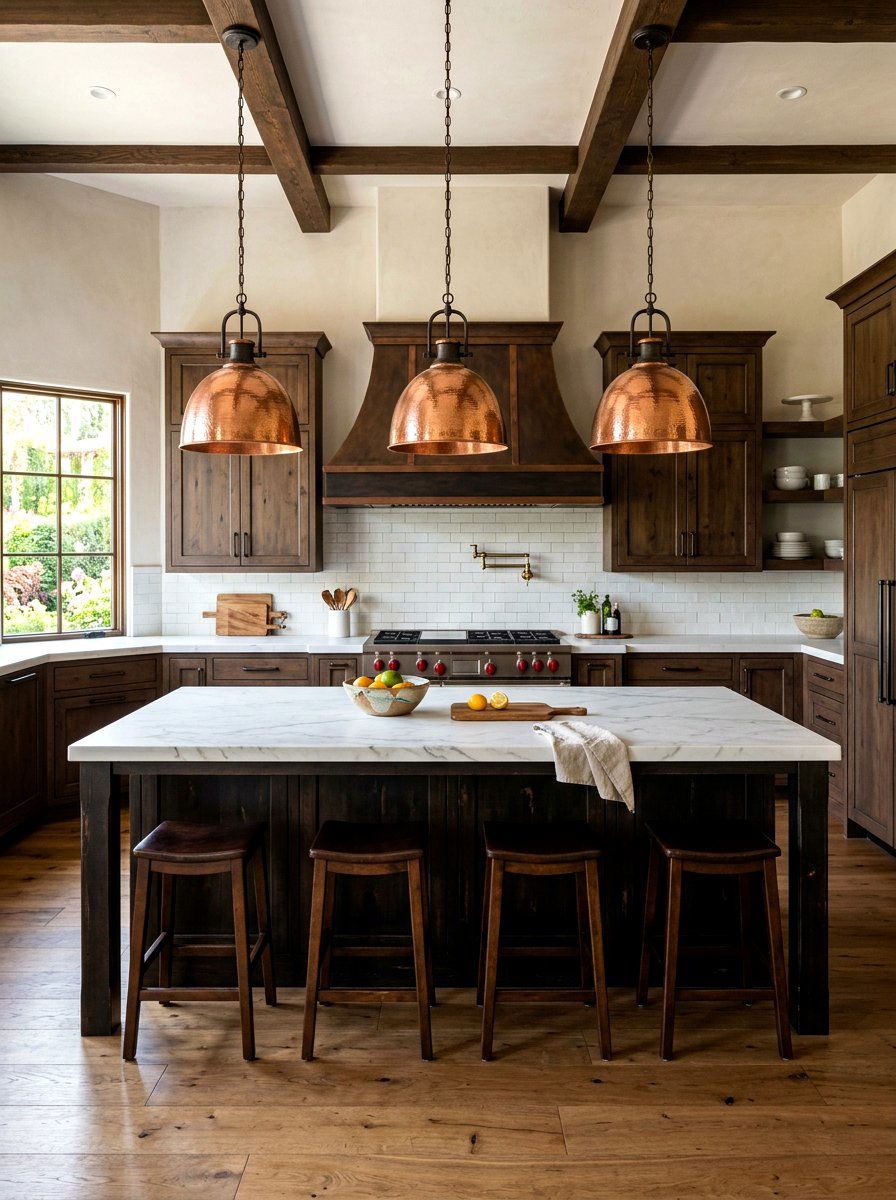
25. Industrial pendant light distance
Industrial-style lighting often features heavy metal, cage details, or Edison bulbs that give a kitchen a rugged and functional feel. These fixtures typically have very opaque shades that focus light directly downward in a tight cone. Because of this focused beam, you should space industrial pendants slightly closer together — around twenty-four to twenty-eight inches — to avoid dark gaps on your countertop. This closer spacing also emphasizes the "factory" aesthetic of a row of repeated lights. Since these fixtures often have a lot of visual weight, ensure they are balanced by sturdy cabinetry and substantial hardware elsewhere in the kitchen for a unified look.
26. Lantern pendant light spacing
Lantern-style fixtures bring a traditional and airy feel to a kitchen, often featuring glass panels and an open frame. Because they are transparent, you can use larger lanterns than you might expect without blocking the view across the room. When spacing lanterns, you should leave at least the width of one lantern between the two fixtures. For example, if your lanterns are sixteen inches wide, space them at least sixteen inches apart. This allows the architectural detail of the frames to be seen clearly. Lanterns are particularly effective when spaced in pairs on medium-sized islands to create a sophisticated, classic look.
27. Modern LED pendant centering
Integrated LED pendants offer incredibly slim profiles and unique shapes that weren't possible with traditional bulbs. These often come as long, thin bars or minimalist rings that provide a very clean and futuristic look. For long LED bars, centering is the absolute priority; the fixture should be placed exactly along the middle axis of the island. If you are using multiple small LED "dots, " you can experiment with more creative spacing, such as a tight cluster in the center or a very wide, sparse arrangement. The key with modern LEDs is to let the light itself be the design feature rather than the bulky hardware.
28. Glass pendant light intervals

Clear or seeded glass pendants are perfect for smaller kitchens because they provide necessary light without creating a visual wall. Because you can see through them, you can actually space them a bit closer together than opaque metal shades without making the area feel crowded. A spacing of twenty-four inches between centers is common for glass fixtures, as it creates a beautiful sparkling effect along the ceiling line. To keep this look clean, ensure you use decorative bulbs, as they will be fully visible. Also, keep in mind that glass requires more frequent cleaning to maintain that crystal-clear, high-end appearance.
29. Mixed pendant size spacing
Mixing different sizes of the same pendant style is a trendy way to add an eclectic and custom feel to your island lighting. This technique works best when you have a long island and a group of three lights. You might place a large version in the center and two smaller versions on either side. When spacing a mixed set, calculate the distance based on the edges of the shades rather than just the centers of the cords. Aim for a consistent gap of about six to eight inches between the widest parts of the different-sized shades to ensure the arrangement looks purposeful and balanced rather than random.
30. Multi light pendant bar spacing
A multi-light pendant bar features several small shades attached to a single horizontal rod, which simplifies the electrical installation significantly. Since the spacing between the individual lights is fixed by the manufacturer, your main job is to choose a bar that fits the scale of your island correctly. A good rule is to pick a bar that is about half to two-thirds the total length of your counter. When mounting it, ensure the entire bar is perfectly centered. This type of fixture is excellent for DIY projects because you only have to wire one ceiling box to get the look of three or four individual lights.
Conclusion:
Mastering the spacing of your kitchen island pendants is the final step in creating a space that feels both functional and professionally designed. Whether you prefer the classic symmetry of a pair of lanterns or the modern rhythm of three sleek globes, sticking to the core principles of height and distance will ensure a beautiful result. Remember that these rules are helpful guidelines, but your personal comfort and the unique architecture of your home should always have the final say. By taking the time to measure twice and visualize your layout, you can enjoy a perfectly illuminated kitchen that serves as the heart of your home for years to come.
Related posts: