Making a DIY gas fire pit can be a fun and rewarding project that adds a cozy element to your outdoor space. This guide will walk you through the necessary steps and tools you'll need to build your own fire pit. It's designed to be straightforward and easy to follow, ensuring you don't feel overwhelmed at any stage.
With some basic tools and materials, you can have your gas fire pit up and running in no time. Reading this guide will help you feel more confident about tackling this project right in your backyard. Ready to get started and see how simple it can be? Let's dive in deeper to learn more about making your very own DIY gas fire pit.
Materials Needed
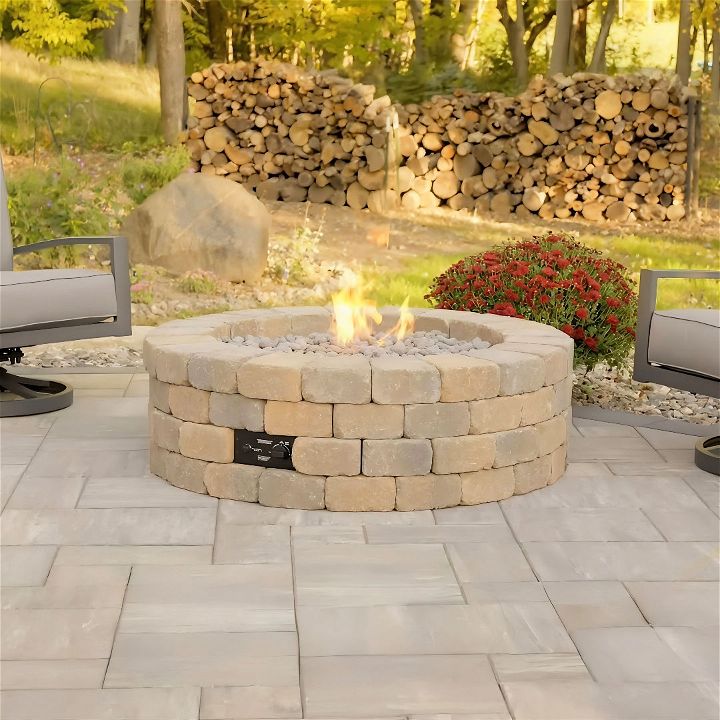
- Landscape Blocks: These form the outer structure of your fire pit.
- Crystal Fire Plus Burner Kit: Includes the burner, burner plate, control panel block, two vent blocks, and clear glass gems.
- Class V material: For making a firm surface, if installing on the ground.
- Outdoor Construction Adhesive: Optional but recommended for securing blocks.
- Gas Line: Depending on the size of your burner, you may need a larger propane tank or natural gas.
- Glass Media or Lava Rock: To spread over the burner for aesthetics.
Step-by-Step Process
Make your own gas fire pit with our step-by-step DIY guide! From choosing the location to adding final touches, build a cozy outdoor haven.
Step 1: Choose the Location of Your Fire Pit
The first step is selecting the right location. I chose an area in my backyard that offers enough clearance from combustible materials: 24 inches to the side, 4 inches below the burner, and 72 inches above the burner. Make sure there's enough space around the pit for seating and movement.
Step 2: Level the Surface
Next, ensure the surface is flat and allows for drainage. I installed a 1.5 to 2-inch layer of Class V material to make a firm base. If you're building on a slab or pavers, consider adding a drainage system to manage any water buildup.
Step 3: Install the Gas Line
For smaller fire pit models, a 20-pound propane tank suffices. However, for larger models like mine, a larger propane tank or a natural gas line is necessary. It's crucial to consult a licensed gas plumber to ensure the correct gas flow and pressure, as an inadequately sized gas line can result in lower flame quality.
Step 4: Dry Fit and Plan
Before permanently assembling the blocks, I dry-fitted them to ensure the design was appropriate. This step is crucial for planning vent and control panel locations.
Step 5: Assemble the Structure
Place the first layer of blocks, ensuring each one is level and secure. For added durability, I used outdoor construction adhesive between the layers.
Tip: Use vents in place of two blocks in the second layer for better airflow. You might need to cut the blocks to fit properly.
Step 6: Install the Burner
Position the burner plate in the center, making sure the notch for the burner electrode system aligns with the control panel. Follow the burner manual's instructions to connect the burner to the gas line. This step should be done by a licensed plumber to guarantee safety.
Step 7: Add Final Layers and Media
After installing the burner, add the remaining block layers until you reach the desired height of the fire pit. Typically, this means the burner plate is placed between the second-to-last layer and the final topping layer. Spread the clear glass media evenly over the burner, avoiding the wind guard area.
Step 8: Final Touches
Once your fire pit is assembled, test the burner to ensure it functions correctly.
Tips and Safety Measures
- Proper Ventilation: Ensure good airflow by installing vents opposite each other.
- Regular Maintenance: Clean the glass media and burner regularly to maintain performance.
- Safety First: Always consult professionals for gas line installations and any modifications.
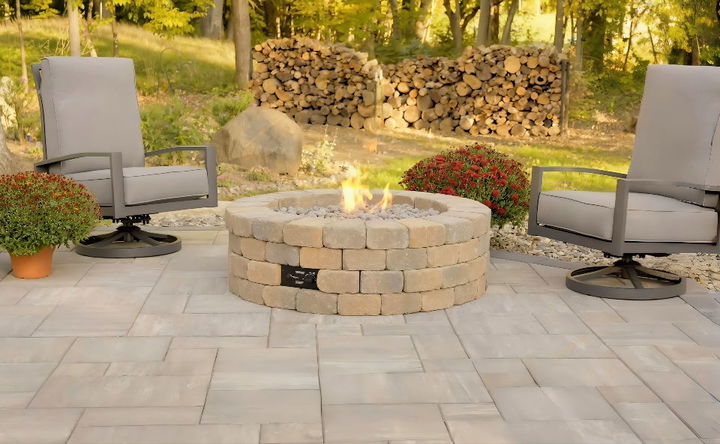
Building my own gas fire pit was not only a fulfilling DIY project but also a wonderful addition to my backyard. With the help of The Outdoor Great Room Company's Crystal Fire Plus Burner Kits, the process was simple and straightforward. Now, I have a beautiful, functional fire pit that my family and I enjoy throughout the seasons.
FAQs About DIY Gas Fire Pit
Discover everything you need to know with our faqs about DIY gas fire pit, from safety tips to installation guides. Perfect for any backyard project!
Safety is paramount when building a gas fire pit. Choose a location at least 20 feet away from structures and overhanging trees. Install a gas line according to local codes, use vents in your enclosure, and have a fire extinguisher nearby. Always follow the manufacturer’s instructions for the burner kit installation.
Yes, you can use either propane or natural gas for your fire pit. Propane is typically used for portable fire pits or where a natural gas line isn’t available. Natural gas is more convenient for permanent installations and doesn’t require refilling like propane tanks do. Decide based on availability and convenience.
The best way to start your fire pit will depend on the ignition system of your burner kit. Some kits come with a manual ignition, requiring you to light the gas with a long lighter, while others have electronic ignition systems that start with the push of a button. Always follow the specific instructions provided with your kit.
Regular maintenance includes checking for gas leaks, cleaning the burner and media, and ensuring the vents are clear of debris. Cover your fire pit when not in use to protect it from the elements. Consult your burner kit’s manual for specific maintenance recommendations and safety checks.
The burner size and shape should match the design and dimensions of your fire pit. Measure the inside diameter of your pit and select a burner that allows for at least 3 inches of clearance around the edge. Burners come in various shapes, such as round, square, or linear, to fit different pit designs. Consider the flame pattern you desire and the amount of heat output, which is measured in BTUs (British Thermal Units). Higher BTU ratings produce more heat.
Conclusion:
In conclusion, making your own DIY gas fire pit can be an exciting and rewarding project. It not only enhances your outdoor space but also provides a cozy setting for gatherings. With the right materials and guidelines, building a DIY gas fire pit becomes a straightforward task. So, gather your tools and start transforming your backyard into an inviting retreat. Enjoy the satisfaction and warmth of a custom-built fire pit right at home!

