Setting up a DIY treadmill desk can revolutionize the way you work and stay fit at the same time. It's a fantastic way to integrate movement into your daily routine, making your workspace more dynamic and healthy. By building your own treadmill desk, you get a personalized setup that suits your needs, providing the perfect balance between productivity and physical activity.
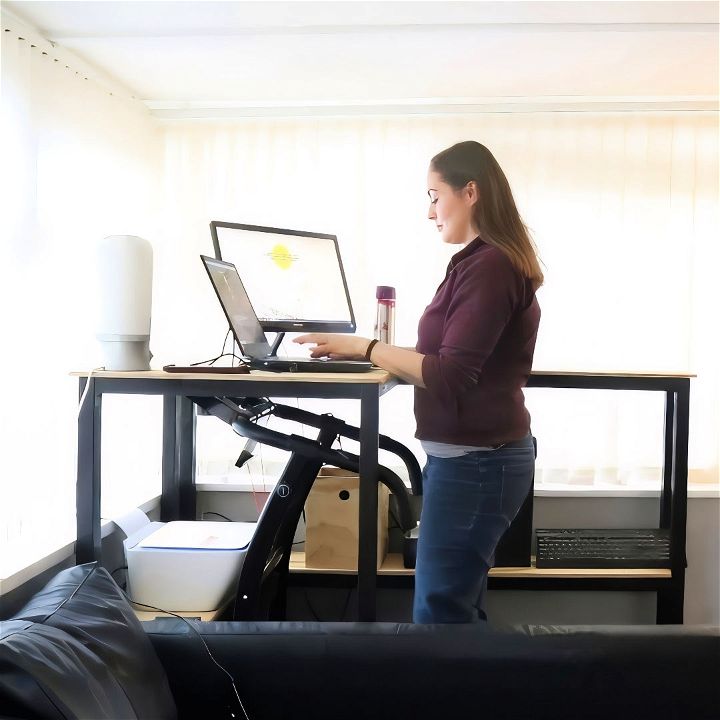
Building a DIY treadmill desk doesn't have to be complicated or expensive. With a few simple materials and basic tools, you can assemble a functional and effective desk in your home or office. This guide helps you understand the steps and gives you tips on how to make the most of your treadmill desk setup.
Materials Needed
Before diving into the build, let's talk about the materials and why they are essential:
- Treadmill (Nero Sports): A sturdy but affordable treadmill that suits your space and needs.
- Corner Shelf: Used for mounting monitors and peripherals.
- Scrap Wood: Useful for initial height testing and adjustments.
- CLS Timber: Structural wood for the main frame.
- Pocket Hole Jig: Essential for creating strong joints.
- Miter Saw: For precise cuts.
- Plywood: For the desktop surface.
- Screws and Wood Glue: To hold everything together.
- L-Brackets: For added stability.
- Wood Filler and Sandpaper: To smooth out rough edges and fill gaps.
- Furniture Paint: To give it a finished look.
Step by Step Instructions
Build your own treadmill desk with our step-by-step DIY instructions. Maximize productivity and fitness with this easy-to-follow guide.
Step 1: Choose and Set Up Your Treadmill
First, I chose the Nero Sports treadmill for its affordability and reliability. However, I made sure to check measurements and reviews on Amazon carefully before purchasing. Remember, some cheaper options can interfere with Wi-Fi signals, which was a non-starter for me as my work depends on a stable internet connection.
Tip: Ensure the treadmill's handrails or arm heights are comfortable for your posture, as you'll be spending a lot of time on it.
Step 2: Test Initial Setup
With the treadmill in place, I needed to determine the correct height for my laptop and monitors. I used a piece of scrap wood to test the ergonomics. My aim was to keep my elbows slightly below the desk level, similar to how I position myself at a standard desk.
Tip: It’s crucial to get this part right. If the desk height isn’t comfortable, you might end up with repetitive strain injuries.
Step 3: Design Your Desk
I designed a custom desk primarily from leftover CLS timber. My design included a spacious desk area to accommodate my laptop and an additional monitor, with options for extra shelving.
Tip: If your space is limited, you can simplify the design with just two side pieces holding up a single desk surface.
Step 4: Cut and Assemble the Frame
Using a miter saw, I cut the timber to my required sizes. Then, I used a pocket hole jig to drill pocket holes, making sure everything was aligned and sturdy. The pocket holes make assembly much easier and stronger.
Tip: Pre-drill holes to prevent wood from splitting, especially towards the ends of cuts.
Step 5: Assemble the Shelving System
I began assembling the shelving system by joining the side pieces with the cut timber. Using my jigsaw and additional clamps, I ensured the pieces were securely fastened. I kept the design modular so I could easily dismantle and move it if needed.
Tip: Avoid using glue if you plan to disassemble the desk in the future. Screws alone can offer ample strength.
Step 6: Build the Desktop
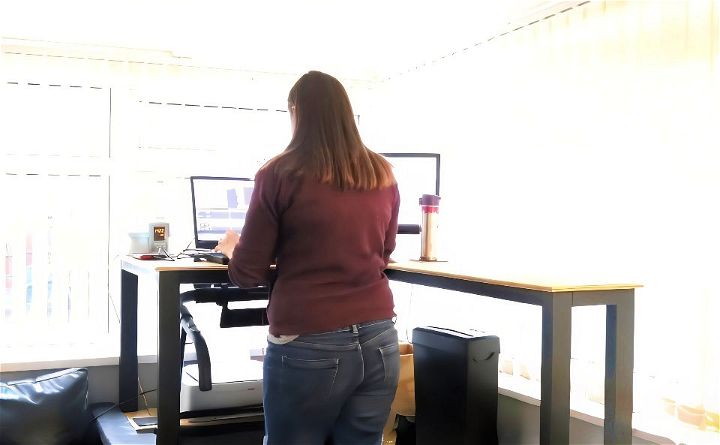
For the desktop, I used plywood cut to the width of my desk plus an additional three centimeters for an overhang. To cut out an access hole for the treadmill's control panel, I marked the underside and carefully used a jigsaw.
Tip: Take your time with measurements. A small error can throw off your whole setup.
Step 7: Finishing Touches
Once the entire frame was assembled, I sanded all the surfaces and edges to ensure smoothness. I even chamfered the edges with a router for a more polished look. The sanding helps to bring out the wood's natural grain, especially when you apply a finish.
Tip: Use a sanding barrel attachment for your drill to easily sand curved or hard-to-reach areas.
Step 8: Painting and Final Assembly
For the final touch, I chose Rust-Oleum furniture paint in a satin finish. This paint doesn’t require any primer and ensures a smooth finish. After the paint dried, I used L-brackets to secure the top and middle shelves.
Tip: If you’re planning to paint your desk, opt for paint that doesn't require sanding or priming to save time and effort.
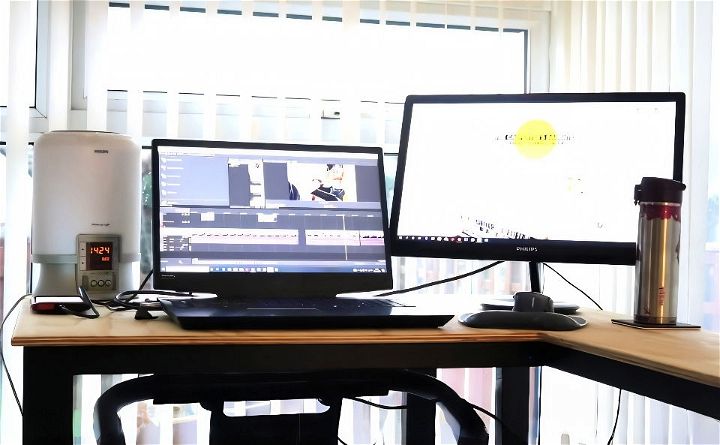
Building a DIY treadmill desk was not only a rewarding project but also a significant improvement to my daily work routine. I can now work and stay active, which has boosted my productivity and overall well-being.
FAQs About DIY Treadmill Desk
Discover everything you need to know with our faqs about DIY treadmill desk. Get answers, tips, and expert advice to create your own treadmill workstation.
Yes, most treadmills can be adapted to a treadmill desk setup. However, it’s important to ensure that the treadmill’s motor can handle prolonged usage at low speeds without overheating.
The desk should be at elbow height when you’re standing on the treadmill. This means your elbows should be at a 90-degree angle when typing. You may need to use blocks or a shelf to raise the desk to the correct height.
The ideal walking speed is typically between 1 to 2 mph. This allows you to walk comfortably without compromising your ability to work effectively.
No special tools are required for most DIY treadmill desk projects. Basic hand tools like a screwdriver, a drill, and a saw may be needed if you’re customizing the desk or installing additional supports.
To ensure stability, make sure the desk surface is securely attached to the treadmill. Use bungee cords or straps to fasten the board to the treadmill’s handlebars. Additionally, consider adding a non-slip surface under your keyboard and mouse to prevent them from sliding while you walk.
Conclusion:
In conclusion, building your own DIY treadmill desk can boost productivity, improve health, and save money. This project is fun and rewarding. Follow the steps in this guide and enjoy walking while you work. Thank you for choosing to learn about the benefits and steps of building a DIY treadmill desk.

