Building a DIY birdhouse is a great project for all skill levels. Start by choosing the right materials like wood, nails, and weather-resistant paint. Measure and cut the wood to make the birdhouse parts: the base, walls, roof, and entrance hole. Assemble the pieces with nails or screws, ensuring it's sturdy. Painting and adding decorative touches will make it both functional and attractive.
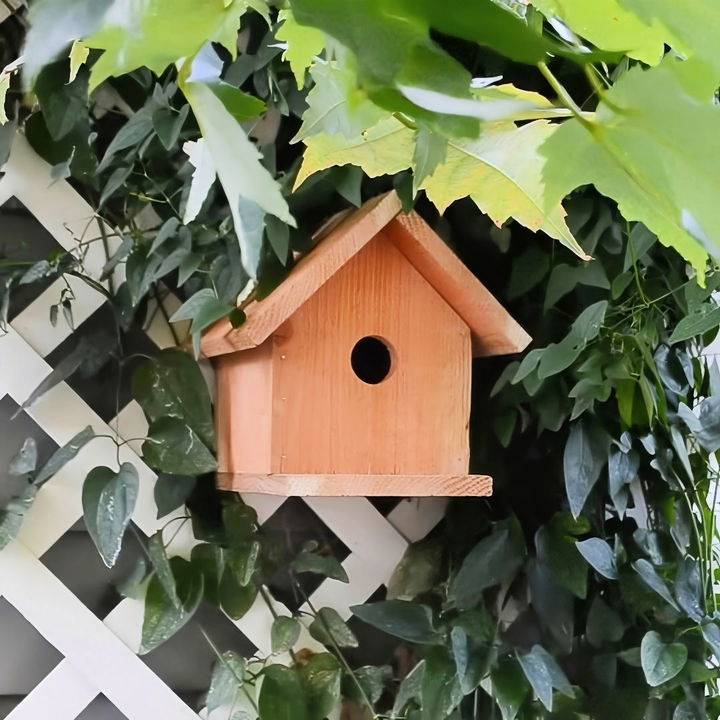
Making a birdhouse not only helps local bird populations but also adds charm to your garden. Make sure to place the finished birdhouse in a safe and suitable location, away from predators. Regular maintenance, like yearly cleaning, will keep it in good condition.
Materials and Tools You'll Need
Before we dive into the step-by-step guide, let’s gather all the necessary materials and tools.
Materials
- Cedar Picket Fence Plank: Cedar is naturally rot-resistant and will last a couple of years outside without any finish. You’ll need about four feet of it.
- Nails: About an inch long. Finishing nails work well.
- Scrap Wood: To support your work and prevent damaging your work table.
Tools
- Tape Measure or Ruler: For precise measurements.
- Pencil: To mark measurements on the wood.
- Saw: A circular saw is ideal, but you can use a jigsaw, hand saw, or even a hacksaw.
- Drill: Needed to make the entrance hole.
- Clamp (Optional): Holds the wood steady while cutting. Highly recommended for safety and accuracy.
- Square (Optional): For making perfect right angles and 45-degree cuts.
- Ear and Eye Protection: Safety first, always!
Step by Step Instructions
Learn how to build a DIY birdhouse with our step-by-step guide. Follow our instructions to prepare, cut, drill, and assemble for a perfect birdhouse.
Step 1: Preparing the Wood
Cutting the Sides
- Measure and Mark: Start from the squared-off end of the cedar plank. Using your tape measure, mark the wood 4 ¼ inches from the bottom. Use your square to draw a straight line across the plank.
- Clamp and Cut: Secure the plank to the edge of your table with a clamp. If you’re using a circular saw or jigsaw, you can clamp a square to guide the blade for a straight cut. Always wear ear and eye protection when using power tools.
- Repeat: After cutting the first side, use it as a template to mark and cut the second side. This ensures both sides are identical.
Step 2: Cutting the Roof and Bottom
Three Identical Pieces
- Measure and Mark: Mark three pieces each 8 ½ inches long. Use the same technique—measure, mark, clamp, and cut.
- Cut Roof Angle: Lay the two roof pieces side by side, edge to edge. Mark the overlap where one piece will lay over the other. Use this mark to trim one of the pieces for a perfect fit.
Step 3: Cutting the Front and Back
Shapes with a Peak
- Measure and Mark: For the two pieces, mark at 4 ¼ inches and use your square to draw a 45-degree angle. Cut both to shape.
- Matching Two Pieces: After cutting one, use it to mark and cut the second piece to ensure an identical match.
Step 4: Drilling the Entrance Hole
- Find the Center: Measure the center of one of your front pieces, about three inches from the side. Mark the spot.
- Drill the Hole: Using a 1 3/8 inch Forstner bit (or a hole saw), drill the entrance hole. Place scrap wood under your piece to prevent the drill bit from damaging your work table and to reduce splintering.
Step 5: Assembling the Birdhouse
Bringing Everything Together
- Attach the Roof: Start by nailing the two roof pieces together. Place the shorter piece inside the longer piece and nail them securely.
- Assemble the Sides: Nail the two side pieces to the back piece. Ensure the bottom edges are flush to keep the house stable.
- Attach the Front: Nail the front piece (with the hole) to the assembled structure. Make sure everything lines up correctly.
- Secure the Bottom: Nail the bottom piece so that it aligns with the back edge of the house, leaving a small overhang at the front as a perch.
- Finalize with the Roof: Place the roof on top. Make sure the back of the roof is flushed with the back of the house for wall mounting or centered if you prefer.
Tips and Safety Measures
- Wear Protective Gear: Always use ear and eye protection, especially when using power tools.
- Clamping for Stability: Clamps are optional, but they provide excellent stability, making your cuts safer and more precise.
- Straight Cuts: Using a square helps immensely in making straight, accurate cuts.
- Pre-Drill Holes: If your wood tends to crack when nailing, it might be helpful to pre-drill small holes.
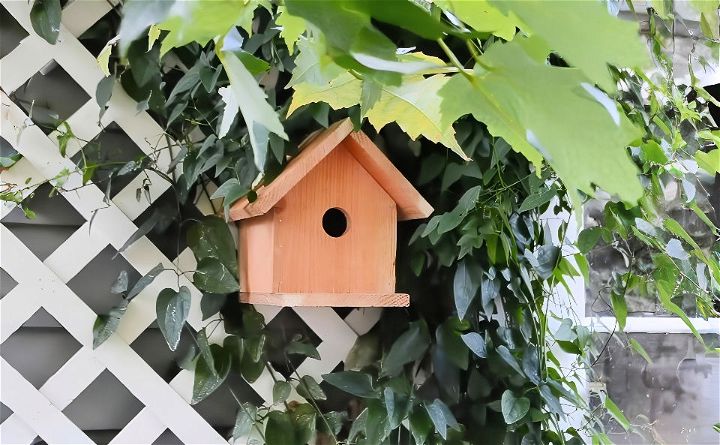
Building this birdhouse is not just a fulfilling project but also offers a wonderful opportunity to learn and teach basic woodworking skills. Whether you're a complete novice or looking for a fun activity for your kids, this easy DIY birdhouse project is a great place to start.
FAQs About DIY Birdhouse
Explore faqs about DIY birdhouses, covering materials, design tips, and troubleshooting advice for creating the perfect home for your feathered friends.
The location of your birdhouse is crucial for attracting birds. Here are some tips:
Place it 5 to 10 feet above the ground.
Ensure it’s away from predators and has a clear flight path.
Avoid busy human activity areas to provide a peaceful environment.
Yes, you can decorate your birdhouse, but keep these points in mind:
Use non-toxic paints and materials.
Bright colors may attract predators, so choose subtle shades.
The inside should be left natural and unpainted for the birds’ safety.
Birdhouses need regular maintenance to ensure they remain safe and inviting:
Clean out old nests at the end of the season.
Check for damage and make repairs as needed.
Reapply sealer or paint to protect from the elements.
To make your birdhouse safe, consider the following:
Ensure there are no sharp edges or points inside.
The entrance hole should be the correct size for the bird species you want to attract.
Ventilation holes are important to prevent overheating.
When designing your birdhouse, it’s important to consider features that will make it a safe and comfortable home for birds. Here are some best practices:
Entrance Hole Size: Make sure the entrance hole is just large enough for your target bird species to enter.
No Perches: Avoid adding perches, as they can assist predators.
Proper Drainage: Ensure the bottom has holes to drain any water.
Easy Cleaning: Design the birdhouse so it can be easily opened for cleaning.
Safe Materials: Use safe, non-toxic materials and avoid treated wood.
Conclusion:
In conclusion, building a DIY birdhouse is a rewarding activity that benefits both you and the environment. It's a perfect way to attract beautiful birds to your garden while adding charm to your outdoor space. Follow the steps, gather your materials, and enjoy the process.
Related DIY Projects and Ideas:
Explore related DIY projects and ideas: get step-by-step guides, creative inspiration, and budget-friendly tips for your next home project.
- Easy DIY Flagpole: Display your pride with this simple DIY flagpole project. Clear instructions for a quick and easy setup.
- Simple DIY Outdoor Bench: Create a stylish and functional outdoor bench with this easy DIY plan. Perfect for any garden or patio.
- Building a DIY Deck: Construct your own outdoor retreat with these free DIY deck plans and instructions. Ideal for creating a perfect backyard haven.
- How to Build a Pond in Your Yard: Transform your yard with this DIY pond. Step-by-step plans to create a serene water feature.
- DIY Pergola to Build Your Dream Space: Elevate your outdoor space with this free DIY pergola plan. Simple steps to create your ideal retreat.

