Building a DIY deck can transform your backyard into a functional and beautiful outdoor space. Whether for cooking, relaxing, or entertaining, a well-designed deck adds value and enjoyment to your home. Planning involves selecting the right materials, measuring the space accurately, and ensuring proper support structures. A solid foundation is crucial to prevent shifting and enhance stability, making the deck safe and long-lasting.
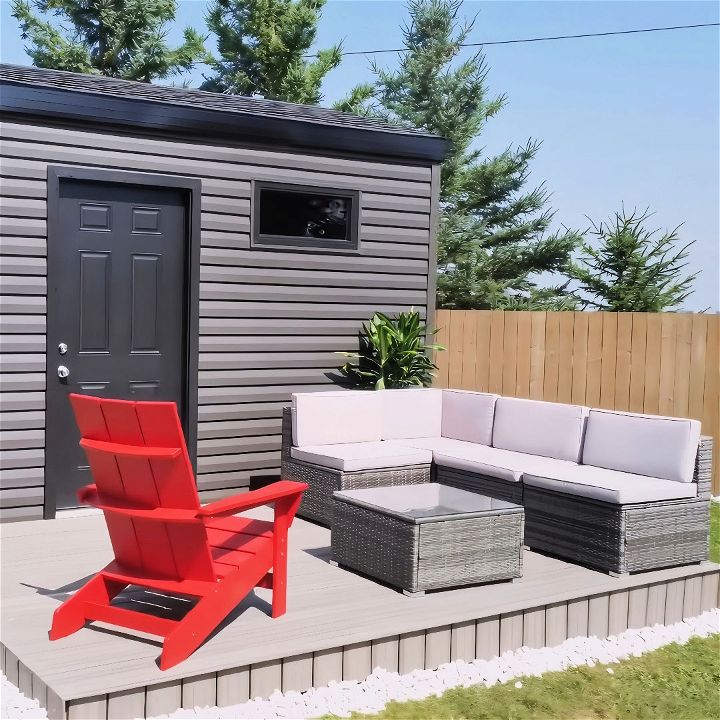
Learn how to build a deck with our easy step-by-step guide. Understanding the steps in building a deck can save you time and money. Start by gathering the right tools, such as a tape measure, saw, and power drill. Next, select high-quality wood or composite materials for durability. Follow guidelines for safe construction practices, ensuring your deck meets local building codes. With careful planning and attention to detail, your DIY deck will be a welcoming place for years to come.
Design Your Deck
Step 1: Plan Your Design
Before anything, settle on a simple design that fits your needs. I chose an 8 by 12 design because 12-foot composite boards were readily available at my local Home Depot. Keeping the design uncomplicated ensures you can get materials easily.
Materials Needed:
- Composite Deck Boards (12 feet for simplicity)
- Spray Paint (for marking)
- Joist Hangers
- 4x4 Posts
- 2x8 Lumber
Setting the Foundation
Step 2: Mark Your Corners
First, mark out the dimensions of your deck using spray paint. Use the “three-four-five” rule to ensure your corners are square.
- Measure and mark out 8 feet on one side and 12 feet on the other.
- Use a straight 12-foot board to extend your markings for a perfect rectangular shape.
Step 3: Dig Holes for Your Posts
To keep your deck from shifting, digging post holes is essential. Place a marker using spray paint at every corner where the posts will go.
- Dig about 2 feet deep for stability.
- Place cement deck blocks at each marked spot for your 4x4 posts.
Materials Needed:
- Shovel and post-hole digger
- Cement deck blocks
Build the Frame
Step 4: Install the Outer Frame (Rim Joist)
Now, it’s time to build the frame using 2x8s.
- Place the 2x8s along the 8-foot and 12-foot marked lines.
- Use joist hangers to secure your frame.
Materials Needed:
- 2x8 Lumber
- Joist Hangers
Step 5: Level Your Frame
Before securing everything in place, ensure your frame is perfectly level.
- Use a spirit level across multiple points.
- Adjust as needed by digging slightly deeper or adding a bit of gravel under the blocks.
Materials Needed:
- Spirit Level
Creating the Deck Surface
Step 6: Install Your Joists
With the outer frame in place and level, it's time to add your inner joists.
- Place 2x8 joists every 12 inches on center for composite decking.
- Secure each joist with four nails on each end to avoid using joist hangers and make the structure stronger.
Why this is important: Composite decking tends to be more flexible than wood, so the closer spacing ensures better support and durability.
Step 7: Adding Blocking for Extra Support
This step ensures your joists remain stable under weight.
- Measure and cut blocking pieces to fit snugly between each joist.
- Install the blocking between the joists, securing with nails.
Materials Needed:
- 2x8 Lumber (for blocking)
Step 8: Apply Joist Tape
Since we're aiming for a maintenance-free deck, applying joist tape will enhance longevity by preventing water damage.
- Roll the tape along the top of each joist.
- Smooth it down to ensure full adhesion.
Materials Needed:
- Deck Joist Tape
Laying the Decking Boards
Step 9: Start with the First Board
Begin with a precisely cut first board. This sets the tone for the entire deck.
- Position the first board snugly against the house or starting edge.
- Use stainless steel trim screws to secure it.
Step 10: Insert Hidden Fasteners
Hidden fasteners will give your deck a seamless look.
- Slide the hidden fasteners into the grooves of the composite boards.
- Screw them down into the joists to secure each board.
Why this is helpful: This avoids visible screws on your deck surface, giving a clean and professional finish.
Finishing Touches
Step 11: Complete the Surface
Continue placing and securing the decking boards across the entire surface. Use a rubber mallet to ensure they are tightly fitted.
Materials Needed:
- Composite Deck Boards
- Hidden Fasteners
- Rubber Mallet
Step 12: Install Fascia Boards
Once your deck boards are down, add fascia boards to cover the sides and give your deck a finished look.
- Measure and cut your fascia boards to size.
- Secure them using deck screws designed for composite materials.
Materials Needed:
- Composite Fascia Boards
- Deck Screws
Step 13: Final Touches
Inspect your deck to ensure everything is secure and level. Add any additional screws or fasteners if necessary.
Trustworthiness and Authoritativeness: Following these steps precisely ensures a long-lasting, maintenance-free deck. I've been doing this for years, and using these newer methods and materials can provide improvements and efficiency that meet modern standards.
Enjoy Your New Deck
Congratulations, you've built your new deck! Sit back, relax, and enjoy your maintenance-free outdoor space. This DIY approach not only saves you money but also gives you the satisfaction of creating something with your own hands.
Keywords Integrated:
- Composite Decking
- Maintenance-Free Deck
- Deck Joist Hangers
- Hidden Fasteners
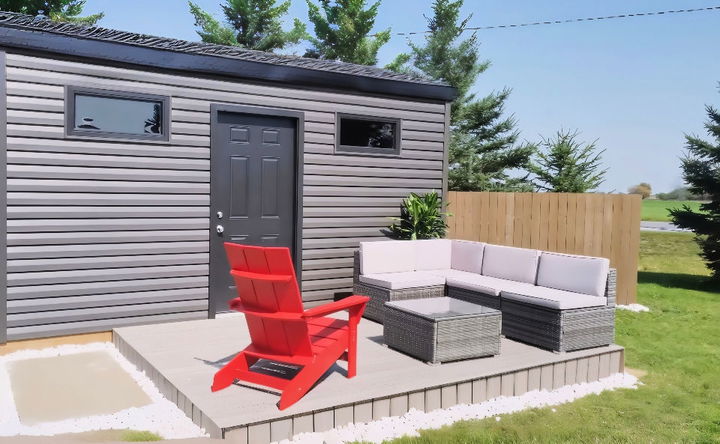
FAQs About DIY Deck
Discover answers to common questions about DIY deck building, maintenance, and materials in our comprehensive faqs about DIY deck.
Before you start building a deck, it’s important to plan your design, consider the purpose and function of the deck, and choose the right materials. Make a detailed sketch that includes the size, railing layout, and location of stairs. Always consider the overhang in your plan and pick the right hangers to connect joists to the ledger board securely.
To build a simple on-grade deck, you don’t need posts, steps, or railings. Start by determining the sizes of the framing material. For example, a rim joist spanning 10 feet requires two 2x10s. The ledger should be made from a single board of the same width. For interior joists, take half the span then add two.
Do not choose the cheapest decking materials as they may not offer long-term satisfaction. Consider composite decking for its durability and low maintenance. If you opt for wood, pressure-treated softwood is the least expensive but requires more upkeep. Always buy materials from reputable suppliers to ensure quality and warranty coverage.
Use a guide when building your deck to ensure all components are properly aligned and secured. Pick the right hangers for connecting joists to the ledger board, which helps prevent sagging decks in the future due to weak connections. Regular maintenance, such as cleaning and checking for loose boards or railings, also extends the life of your deck.
Yes, you can build a deck in a sloping yard or around mature trees. A sloping yard might require a raised deck with stairs or a multi-level deck. If you have mature trees, consider incorporating them into your design. Always plan the deck’s relationship to your house and think about scale based on your available space.
Conclusion:
Wrapping up, building a DIY deck can be a rewarding project that enhances your outdoor space and adds value to your home. By following these steps and tips, you can create a beautiful, functional deck that you can enjoy for years to come. Remember to prioritize safety, choose the right materials, and pay attention to design details.
Related DIY Projects and Ideas:
Discover creative DIY projects and ideas for every skill level, perfect for home improvement, crafting, and more. Get inspired and start your next project today!
- How to Build a Pond: Make a serene oasis with our guide on how to build a pond in your yard. Easy steps for a perfect water feature.
- DIY Pergola: Transform your outdoor space with this DIY pergola. Build a stylish pergola and enhance your backyard.
- DIY Outdoor Bench: Make your garden cozy with a simple DIY outdoor bench. Follow our easy plans for a perfect seating area.
- DIY Birdhouse: Attract birds to your yard with our DIY birdhouse plans. Simple steps to create a cozy home for birds.
- DIY Flagpole: Show your pride with an easy DIY flagpole. Follow our guide for a simple and sturdy flagpole.


