Making your own DIY Ballet Barre can be a fun and rewarding project! Ballet barres are not only great for dancers to practice their techniques at home, but they also provide a versatile and effective piece of fitness equipment for anyone. With just a few materials and some basic tools, you'll have a custom barre set up in no time, and you can adjust the height to suit your needs.
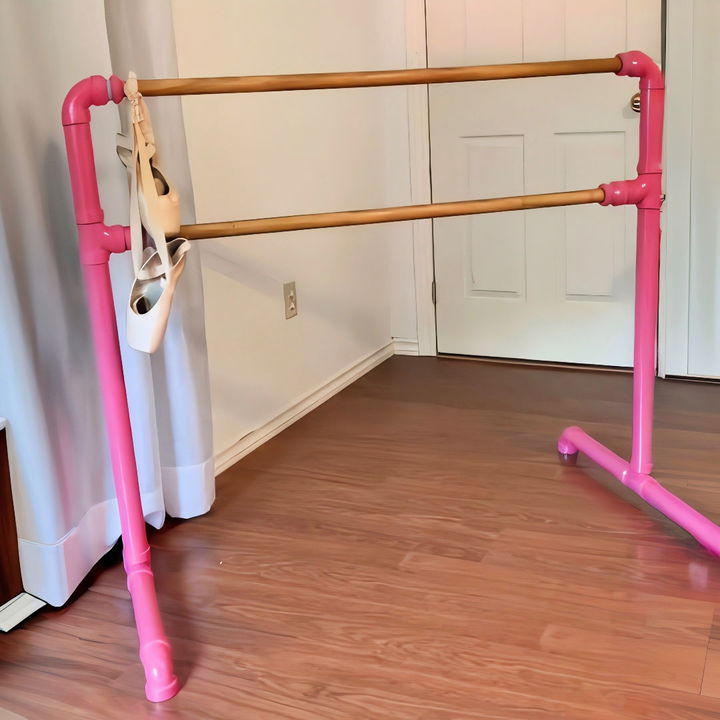
The beauty of a DIY Ballet Barre is in its simplicity and versatility. You can install it in a bedroom, living room, or a dedicated workout space. Constructing your ballet barre yourself allows you to build a product that fits your specific space and requirements perfectly. Ready to gather your materials and start building? Keep reading to find out exactly what you'll need and the step-by-step instructions to get the job done!
Materials Needed
Before I get started, let’s go over the materials you’ll need for this project and why they are important:
- One and a Quarter Inch Wooden Dowel (96 inches long): This will be the main ballet bar where one can hold for ballet exercises.
- 1.5 Inch PVC Pipes (Two 6-foot pieces): For the structure that will hold the wooden dowel.
- Four T Connectors, Six Elbows, and Four Reducer Connectors: These are crucial to connect the PVC pipes together.
- Spray Paint: To give the ballet barre a nice finish, I chose Jasmine’s favorite color which is pink.
- Sandpaper (60 and 120 grit): For smoothing the wooden dowel.
- Wood Stain and Varathane: To treat and protect the wooden dowel.
- ABS Cement: Used for gluing the PVC pieces together.
- Safety Glasses and Gloves: Essential for protection during the process.
- Tape Measure: To ensure accurate measurements.
- Saw: For cutting the dowel and PVC pipes.
With all these materials in hand, let's move on to building the ballet barre.
Step-by-Step Guide
Learn how to make a DIY ballet barre with our step-by-step guide, covering everything from cutting and sanding to assembling and painting.
Step 1: Prepare and Cut the Wooden Dowel
First things first, I needed to cut the 96-inch wooden dowel in half. This would build two 48-inch pieces.
- Measure: Using a tape measure, I marked the halfway point at 48 inches.
- Make Shift Saw Horses: I used chairs to support the dowel while cutting. If you have saw horses, that would be even better.
- Cut: Carefully saw through the dowel at the marked point.
Pro Tip: Ensure the dowel is secured to avoid any unwanted movement while cutting.
Step 2: Sand the Wooden Dowel
Next, it’s crucial to sand the dowel to avoid any splinters.
- Start with Coarser Sandpaper (60 Grit): This helps smooth out any rough edges.
- Move to Finer Sandpaper (120 Grit): For a finer finish.
Keep sanding with progressively finer grits until you’re pleased with the smoothness.
Step 3: Stain and Treat the Dowel
Although this step is optional, I wanted the dowel to have a nice wood finish.
- Apply Wood Stain: With a cloth, apply the wood stain following the grain of the wood.
- Let Dry: Allow the dowel to dry completely.
- Apply Varathane: Finally, I applied a coat of Varathane to protect the wood.
Step 4: Cutting the PVC
For the PVC structure, you'll need to cut:
- Two 12-inch pieces
- One 26-inch piece
- One 8-inch piece
Use a saw to cut these pieces accurately.
Step 5: Assemble the PVC Structure
Now let’s start assembling the PVC cuts with the connectors.
- Dry Fit: Before applying any glue, dry fit the pieces to ensure proper fit and alignment.
- Glue the Pieces: Using ABS cement, glue the pieces together as planned. This will be the framework that holds the wooden dowel.
Step 6: Painting the PVC Structure
Once assembled, give the structure a nice finish with spray paint.
- First Coat: Apply a light coat of spray paint and allow it to dry.
- Second Coat: Apply another coat for a smoother finish.
Pro Tip: Apply in a well-ventilated area to avoid inhaling paint fumes.
Step 7: Final Assembly
After the paint has dried:
- Insert Wooden Dowels: Slide the sanded and stained dowels into the PVC structure.
- Secure: Ensure everything is snug and stable. You might add screws for additional sturdiness at the joints if needed.
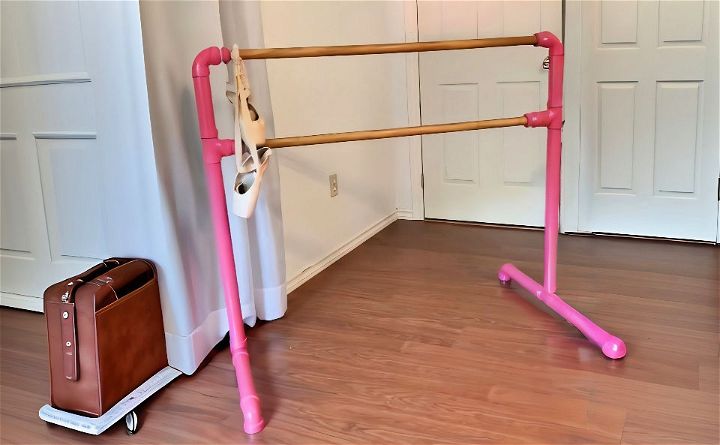
There you have it! A homemade ballet barre specially crafted for Jasmine’s birthday. This DIY project was fairly straightforward and didn’t require any power tools, making it an easy project for anyone to undertake at home.
FAQs About DIY Ballet Barre
Discover answers to common questions about DIY ballet barre in our faqs guide. Learn how to build, install, and use your own ballet barre at home.
The height of your ballet barre should be at the elbow or lower ribs of the person using it. For children, it will be lower than for adults. It’s important to consider the height of the main user when installing the barre.
Yes, you can make a portable ballet barre using galvanized pipes or PVC. For a simple version, you’ll need pipes, T-connectors, and elbow joints. This allows you to assemble and disassemble the barre as needed, making it easy to move and store.
To install a wall-mounted ballet barre, first, decide where to place it and measure the length. Prepare the wooden dowel by sanding it and then finish it with stain or paint. Attach the brackets to the wall using a level to ensure they are straight. Secure the dowel to the brackets, and make sure everything is firmly in place before use.
The time it takes to build a DIY ballet barre can vary depending on the complexity of the design and your skill level. Generally, it can take a few hours to gather materials, measure, cut, and assemble everything. If you’re painting or staining the barre, allow additional time for drying.
To ensure the stability of your DIY ballet barre, it’s crucial to securely fasten all connections, whether you’re using wooden dowels or PVC pipes. If you opt for a freestanding barre, make sure the base is wide enough to prevent tipping. For wall-mounted barres, use a stud finder to attach the brackets directly into the wall studs. Additionally, you can use anchor bolts for extra support. Regularly check all parts for any signs of wear or loose fittings and tighten them as needed.
Conclusion:
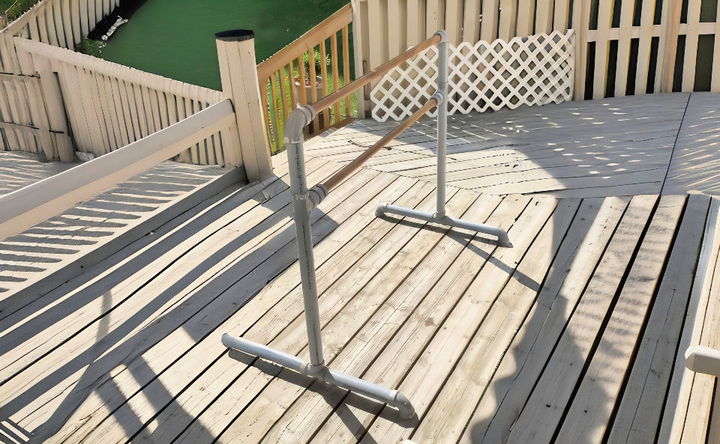
Wrapping up, making a DIY ballet barre is a rewarding project. It offers the flexibility to practice ballet exercises at home with ease. Remember to choose sturdy materials and follow safety guidelines. With your DIY ballet barre, improving your ballet techniques will be more convenient and fun.
Related DIY Projects and Ideas:
Discover inspiring DIY projects and creative ideas. Get step-by-step guides and tips for home decor, crafts, and more. Start your DIY adventure today!
- DIY Cat Bed: Craft cozy DIY cat beds with these easy-to-follow ideas. Make a comfortable spot for your feline friend.
- DIY Chicken Feeder: Build effective DIY chicken feeders for every flock size. Ensure your chickens are well-fed with these simple plans.
- DIY Gun Rack: Construct a sturdy DIY gun rack with our detailed step-by-step guide. Perfect for safe and organized firearm storage.
- DIY Hat Rack: Create a practical DIY hat rack with these straightforward instructions. Keep your hats organized and accessible.
- DIY Disc Golf Basket: Build your own DIY disc golf basket with our simple ideas. Enjoy endless games with this homemade setup.


