Redoing your bathroom can be an exciting and rewarding project. By tackling a DIY bathroom remodel, you have the opportunity to personalize every aspect according to your needs and taste. It doesn’t have to be overwhelming; breaking the project down into manageable steps will make the process more enjoyable. Planning is key to ensuring you have all the right tools and materials before starting.
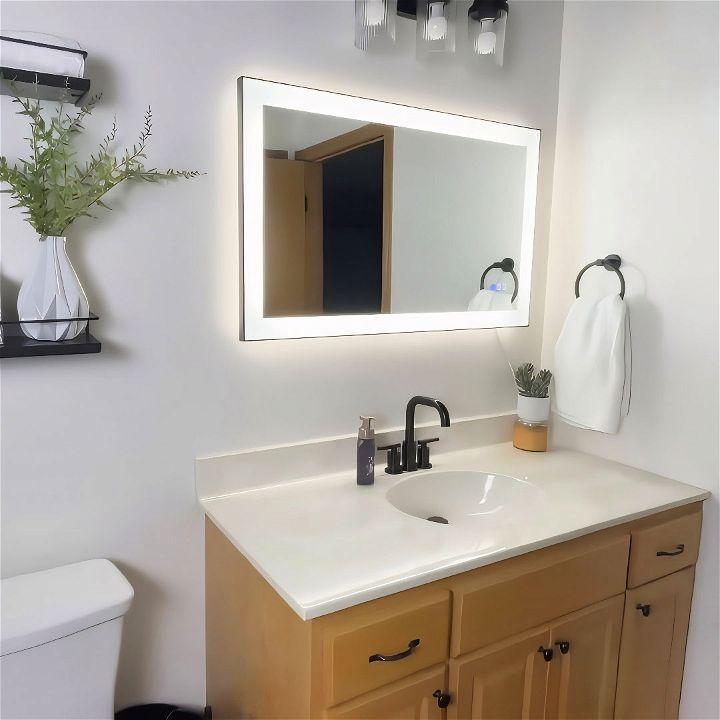
A DIY bathroom remodel can save a significant amount of money compared to hiring professionals. It offers you the freedom to experiment with various styles and materials. From installing new tiles to updating fixtures, you can build a space that reflects your personality. By following detailed guides and tips, your renovated bathroom will be both functional and stylish.
Materials Needed for a Budget Bathroom Makeover
Before diving into the project, let’s talk about the materials we used and why they were essential for this bathroom makeover.
- Paint (Warm White): To brighten up the small, windowless bathroom.
- 400 Grit Sandpaper: For scrubbing mildew and stains from the tub.
- Bleach and Metal Scrubby: To deep clean the textured floor.
- LVT Click-Together Floor: Budget-friendly flooring option with a real tile look.
- New Toilet: Necessary due to the old one being cracked and leaking.
- Black Painted Drop Ceiling Tiles: Aesthetic and still accessible for plumbing.
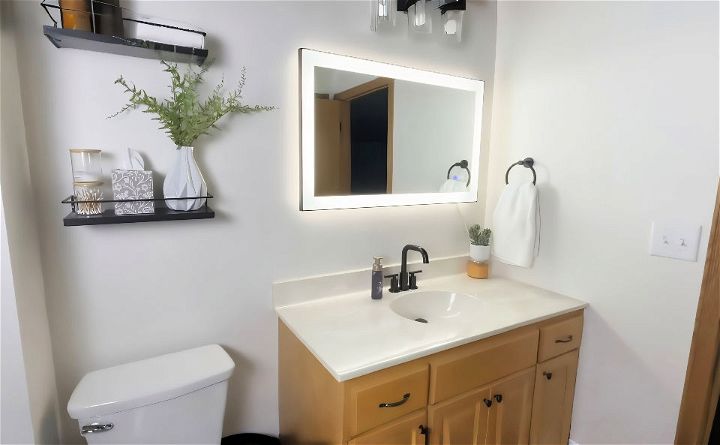
- Vanity Light with Fluted Glass & LED Mirror: To enhance the modern look.
- Matte Black Faucets & Shower System: For a cohesive, contemporary feel.
Step by Step Instructions
Transform your space with our step-by-step instructions for DIY bathroom remodeling. Learn painting, cleaning, flooring, and more for a stunning bathroom makeover!
Step 1: Painting the Bathroom
The first step was to change the wall color to a warm white. This brightened up the small, windowless space and made it feel larger. Although it took three coats to cover the existing brown color, it was well worth the effort.
Why Use Warm White?
- Enhances Space: Light colors reflect more light, making the bathroom appear larger.
- Brightens the Room: Ideal for a bathroom without windows.
Step 2: Tub and Surround Cleaning
While I tackled the painting, Savannah took on the dirty job of cleaning the tub. She used sandpaper to scrub the fiberglass surround and a combination of bleach and a metal scrubby for the textured floor.
Tips for Effective Cleaning
- Use 400 Grit Sandpaper: Ideal for scrubbing mildew and stains off fiberglass.
- Deep Cleaning with Scrubby: For heavily textured surfaces, manual scrubbing delivers the best results.
After cleaning, we polished the surround to seal the porous fiberglass, ensuring it would be easier to clean in the future.
Step 3: Laying New Flooring
For the flooring, we chose a click-together LVT that was on clearance. This type of flooring is budget-friendly, easy to install, and gives the appearance of real tile.
Why Choose LVT Click-Together Floor?
- Cost-Effective: Our entire floor cost only $135.
- Easy Installation: No underlayment needed, and can be cut with a scroll saw.
Step 4: Installing a New Toilet
Due to the cracked and leaking old toilet, a new one was essential. We found a clearance deal for $140 and I installed it myself.
Why a New Toilet?
- Leakage Issues: The old toilet was no longer functional.
- Modern Upgrade: A new toilet can instantly uplift the bathroom’s appearance.
Step 5: Updating the Ceiling
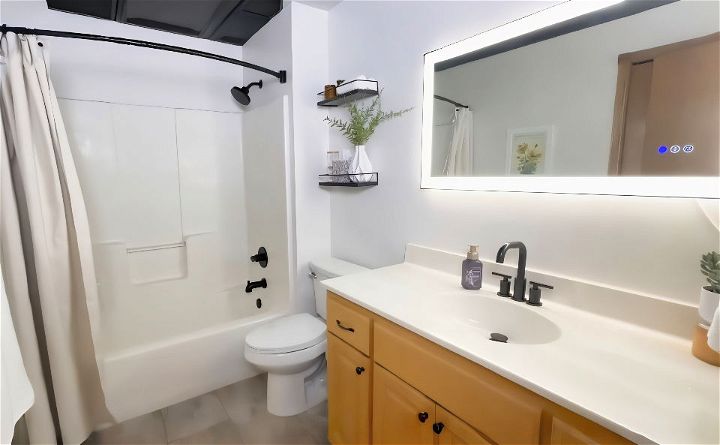
We needed to replace the old acoustic drop ceiling tiles but still wanted easy plumbing access. We rolled the grid with black paint and installed new, budget-friendly PVC tiles that cost $154.
Why Black Ceiling Tiles?
- Aesthetic Appeal: Contrasts nicely with the white walls.
- Accessibility: Easy to remove if plumbing access is needed.
Step 6: Installing Lights and Mirrors
We chose a beautiful new vanity light and an LED mirror, which I was lucky to be gifted. Savannah loved the fluted glass on the vanity light.
Lighting Choices
- Vanity Light: Adds elegance to the bathroom.
- LED Mirror: Modern and functional with dual lighting options (hardwired or plugged in).
Step 7: Updating Faucets and Shower System
We opted for matte black faucets and a new shower system to match the modern theme. The shower system cost $175, and the sink faucet was $52.
Matte Black Fixtures
- Cohesive Look: Matches other modern elements in the bathroom.
- Cost-effective: Good quality without breaking the bank.
Step 8: Final Touches
Savannah learned to use my nail gun to put back the honey oak trim which matched other woodwork in her house. These final touches added a personalized and cohesive look to the space.
The Reveal and Special Surprise
Before unveiling the finished bathroom, I surprised Savannah with a painting I buildd for her. It was her favorite color, and the emotional moment reminded us both why this project was so important.
Surprise Element
- Personal Touch: Handmade gifts add sentimental value.
- Emotional Impact: Strengthens friendships during tough times.
After everything came together, the total cost slightly overran the budget at $1,326, largely due to a plumber’s bill of $480 for replacing the corroded tub drain piping. However, the transformation was worth it. Savannah was thrilled with her modern, beautiful bathroom, and I was proud of how budget-friendly and DIY-focused our project was.
This bathroom makeover proves that with a little creativity and a lot of elbow grease, you can achieve a stunning result without spending a fortune. Whether you’re prepping your house for sale or just want a fresh new look, this guide shows that it’s possible to do it on a budget.
FAQs About DIY Bathroom Remodel
Explore faqs about DIY bathroom remodel for tips, costs, and step-by-step guidance to transform your bathroom efficiently and affordably.
Before you begin, measure your space to ensure that new fixtures will fit. Locate all water shutoff valves to prevent flooding when removing fixtures. Plan for a backup bathroom if necessary, and decide whether to donate or dispose of old fixtures. Also, consider the cost of materials, the time commitment, and whether you have the necessary skills and tools to complete the project.
Select surfaces that can withstand moisture. Porcelain tile is a popular choice for flooring, walls, and sinks because it resists staining, bacteria, and odors. Larger tiles can minimize grout lines, making maintenance easier. Always opt for non-slip surfaces to ensure safety.
Yes, it’s crucial to follow all local building codes and have inspections done to avoid costly mistakes. If you’re doing the remodel yourself, don’t skip permits and inspections. They ensure that your remodel meets safety standards and can prevent future issues.
If you’re adding a soaker tub or multi-head shower, you may need a larger water heater. Calculate your family’s hot-water consumption to determine your needs. For example, showering uses about 12 gallons per person, and bathing uses about 9 gallons per person.
Do choose moisture-resistant surfaces, follow building codes, and add storage. Don’t move fixtures unless necessary, as it can significantly increase costs. Also, don’t forget about proper ventilation and lighting to prevent mold and ensure visibility.
Conclusion:
Wrapping up, this DIY bathroom remodel offers a fantastic way to upgrade your home on a budget. By following these tips and tricks, you can transform your bathroom into a stylish and functional space. Remember, planning and attention to detail are key to a successful remodel. Enjoy the satisfaction of making a beautiful and personalized bathroom.
Related DIY Projects and Ideas:
Discover inspiring, related DIY projects and ideas. Get creative with easy, fun, and cost-effective home improvement tips and tutorials.
- DIY Upholstered Headboard: Upgrade your bedroom with this easy DIY upholstered headboard guide. Easy steps to create a stylish and comfy focal point.
- DIY Tufted Headboard: Transform your bed design with this wonderful DIY tufted headboard tutorial. Add elegance and comfort to your bedroom.
- DIY Wood Countertops: Build your own wood countertops with this DIY guide. Perfect for adding a rustic touch to your kitchen.
- How to Hang a Door: Learn how to hang a door with this comprehensive DIY guide. Step-by-step instructions for a perfect fit.
- DIY Self-Watering Planter: Create a simple DIY self-watering planter with these ideas. Keep your plants hydrated and thriving effortlessly.

