Making your own DIY disc golf basket can be a rewarding project that adds fun to your home or local park. This guide will help you build a sturdy and functional basket using common materials you might already have or can easily find. You'll save money and customize it to your liking, enhancing your disc golf game experience right in your backyard.
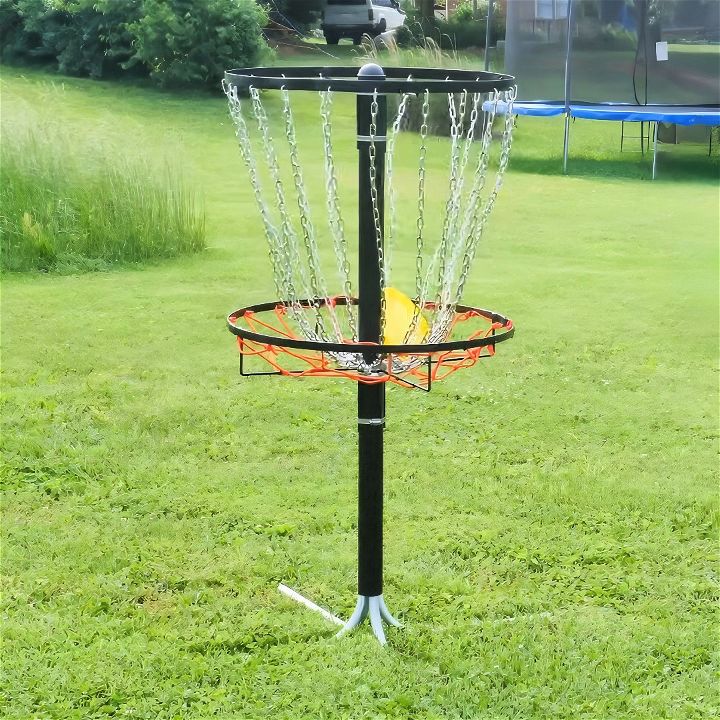
This project is not only budget-friendly but also quite simple to follow. From gathering materials to assembling the parts, the step-by-step instructions ensure you can make your own disc golf basket with ease. Ready to enhance your playtime? Explore the next section to get started on this exciting DIY project.
Materials Needed
Before we get started, here's a list of materials and why each is necessary:
- Round Steel Bar and Flat Stock: For the structure of the basket and the top ring.
- EMT Conduit: To make the legs for the basket.
- Enameled Black Post: Acts as the main support column.
- Conduit Bender: Essential for bending the conduit into the shape we need.
- Mat Pro Torch: To heat the steel for bending.
- Metal Cutting Bandsaw: For cutting the steel bars (you can also use a hacksaw or angle grinder).
- Hose Clamps: For holding the structure in place.
- Quick Links and Chains: To make the catching mechanism for the flying disc.
- Cargo Net: Acts as the basket to catch the discs.
- Spray Paint: To give the basket a uniform look and protect it from the elements.
- Measuring Tape and Marking Tools: For accurate measurements and markings.
Step by Step Instructions
Build your own disc golf basket with our step by step instructions DIY disc golf basket guide! Learn cutting, bending, assembling, painting, and more in simple steps!
Step 1: Cutting the Steel Bars
First, we need to cut the round steel bars into the appropriate lengths. I used a metal cutting bandsaw for this task, but you can use a hacksaw or angle grinder if that's what you have at home.
Step 2: Marking and Bending the Steel Bars
After cutting, lay the bars next to each other and mark the spots where you'll bend them. Each bar needs to be bent into a hook shape. To do this, I used a Mat Pro torch to heat the steel until it's red-hot, then bent it using a vise. This makes sure the bars will form part of the basket's structure.
Step 3: Creating the Legs
Next, we’ll make the legs using the EMT conduit. Cut the conduit into sections using the bandsaw. Use the conduit bender to bend the sections to the correct angles. These legs will help the basket stand upright.
Step 4: Assembling the Legs and Column
Now that we've got our legs ready, it’s time to attach them to the enameled black post. Slide the legs into the base of the post and ensure they're tight. You may need to add some weight or pressure to make sure they fit snugly.
Step 5: Creating and Attaching the Rings
For the basket, we need rings. To make these, use a ring roller. Roll your steel stock into semi-circles, then weld these halves together to form a complete ring. Attach this ring to the main column using hose clamps to hold it temporarily.
Step 6: Drilling Holes for the Chains
To attach the chains, drill small holes evenly spaced around the top ring. The holes should be just big enough for the Quick Links to fit through.
Step 7: Painting the Basket
Before assembling everything, give the entire structure a coat of black enamel spray paint. This will protect the metal from rust and give it a uniform look.
Step 8: Assembling the Chains
Cut the chains into sections long enough to reach from the top ring to the basket. Attach them using Quick Links through the holes you drilled. Secure the other end of the chains to the center column using another larger hose clamp.
Step 9: Adding the Basket Net
Finally, add the cargo net around the lower ring to act as the basket catching the discs. You might need to cut the net to fit perfectly.
There you have it! Your very own disc golf basket ready for practice. It’s sturdy, adjustable, and, most importantly, it brings the fun of disc golf to your backyard. This project not only saves money but also gives you the satisfaction of building something useful with your own hands.
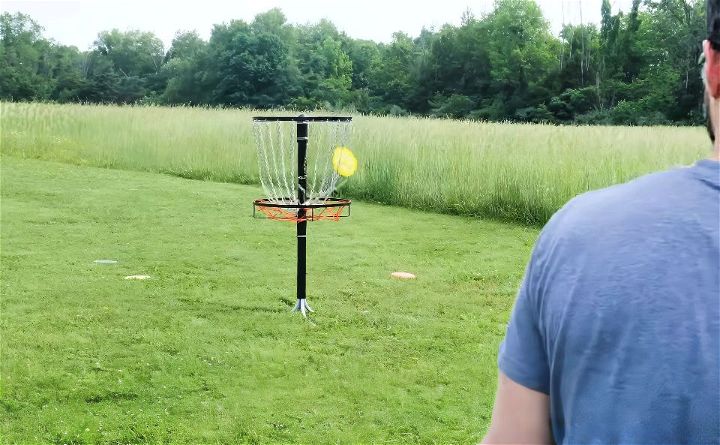
FAQs About DIY Disc Golf Basket
Discover the top faqs about DIY disc golf baskets, including tips, materials, and design ideas to enhance your disc golf experience in your backyard.
To make sure your DIY disc golf basket meets regulation size, refer to the PDGA disc golf basket dimensions. These dimensions will guide you in creating a basket that replicates the size and experience of playing on a professional course.
Yes, you can! While having some familiarity with tools is helpful, the process can be a fun learning experience. If you’re unsure about your skills, consider enlisting the help of a friend or family member who is more experienced with DIY projects.
A DIY disc golf basket can be used for practice in your backyard, as a fun activity with family and friends, or even as a feature at fundraisers or tournaments. It’s a versatile addition to any outdoor space and can help improve your disc golf skills.
Yes, there are many step-by-step guides available online that provide clear instructions and visual illustrations to help you build your own disc golf basket. These guides cover everything from gathering materials to assembling the basket, ensuring a successful DIY project.
Attaching the chains to your DIY disc golf basket is a crucial step to ensure it functions properly. You’ll need to attach both inner and outer chains. For the outer chains, space them about five inches apart. Use zinc-plated quick links to connect the chains to the eye bolts installed on the basket’s rim. Ensure the chains hang evenly and are secured tightly to prevent them from detaching during play.
Conclusion:
Wrapping up, making a DIY disc golf basket is an enjoyable project that brings both crafting satisfaction and functional use. This affordable and creative task is perfect for enhancing your backyard setup or honing your disc golf skills. By following these straightforward steps and gathering the necessary materials, you can easily construct a personalized disc golf basket. So, grab your tools and start your project today to experience the thrill of playing disc golf anytime at home.
Related DIY Projects and Ideas:
Explore creative DIY Projects and Ideas! Discover step-by-step guides, tips, and inspiration to transform your home and unleash your inner craftsman.
- DIY Ballet Barre: Build your own ballet barre at home with this creative DIY ballet barre, perfect for aspiring dancers.
- DIY Cat Bed: Craft a cozy cat bed with this simple DIY cat bed. Give your feline friend the perfect spot to relax.
- DIY Chicken Feeder: Create an efficient chicken feeder for your flock with this easy-to-follow DIY chicken feeder plan.
- DIY Gun Rack: Construct a custom gun rack with our step-by-step guide. Keep your firearms organized and secure with this DIY gun rack plan.
- DIY Hat Rack: Organize your hats stylishly with this DIY hat rack. Follow our instructions for a neat and functional solution.

