Making a DIY faux fireplace can add warmth and charm to any room without the hassle of real flames. This project is perfect for those looking to enhance their home decor on a budget. You’ll find that building a faux fireplace involves using simple materials like wood, drywall, and paint. The best part is that it allows you to personalize it to fit your style and space needs.
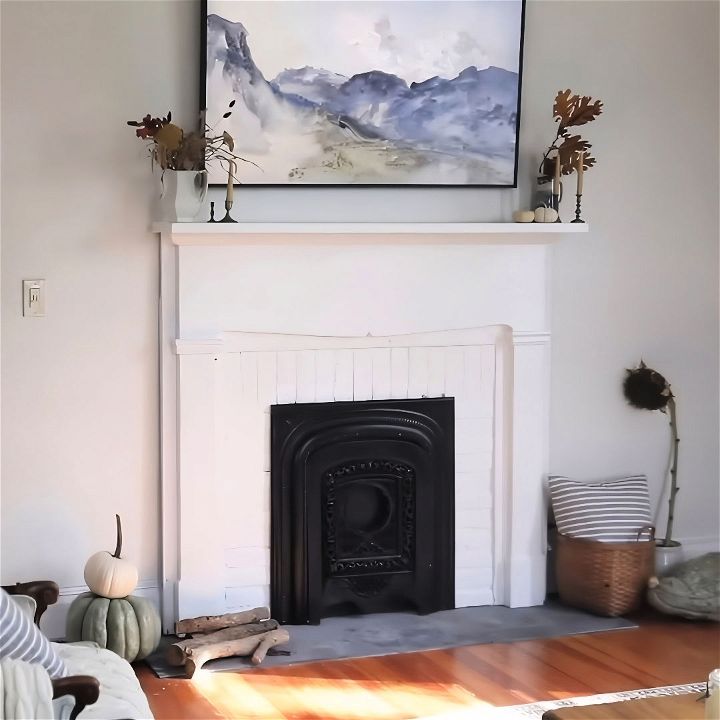
Among the numerous DIY faux fireplace options, you can choose one that suits your preferences. You might want to incorporate features like a mantel for decorations or an electric insert for added realism. This guide will take you through each step, ensuring you understand the process and can execute it confidently.
Materials and Why They’re Needed
Here’s a list of materials I used for the faux fireplace and why each one is essential:
- Mantle: The centerpiece of your faux fireplace. It sets the stage for everything else.
- Antique Surround and Summer Cover: Adds authenticity and the illusion of a real chimney.
- Brick Veneer: Creates a realistic brick look without the weight of real bricks.
- Slate Tiles: Used for the hearth, providing a natural, rustic feel.
- Plywood: To make a surface for attaching bricks.
- Black Spray Paint: To paint the surround, making it look like it’s been used.
- Grout: Secures the tiles and bricks in place.
- Sticky Tile Sheets: Simplifies placing the tiles and minimizes the need for messy adhesives.
- Screws and Drill: For assembling and securing the mantle and other components.
- Sandblaster: Cleans and prepares the antique surround and cover.
- Adhesive: For attaching the veneer bricks.
- Stud Finder: Locates the studs for securely mounting the mantle.
Step-by-Step Process
Let me walk you through how I built my faux fireplace step by step.
Step 1: Acquiring a Mantle
The first step in building a faux fireplace is finding the right mantle. I found mine on Facebook Marketplace. Since it wasn’t in my area, I used a shipping company called Uship. This added to the cost but made it accessible even though it wasn’t local. My mantle needed repainting but was otherwise perfect for our 1860s farmhouse.
Step 2: Finding an Antique Surround and Summer Cover
I wanted the fireplace to look authentic, so I searched for an antique surround and summer cover. These were typically used in the Victorian era to cover the chimney when it wasn't being used in summer. After much searching, I found a matching set at a salvage place for a great price. I had them sandblasted to remove the rust and then spray-painted them black to achieve a fresh, clean look.
Step 3: Preparing the Hearth
To start, we removed the shoe molding to ensure everything would lay flat. I laid out pieces of slate tile on the floor to create a border for the hearth. My friend provided some old slate shingles from a church, which we decided to use.
Step 4: Installing the Hearth
To adhere the tiles to the floor without causing damage, I used sticky tile sheets from Lowe’s. These sheets are usually used for quick backsplash projects but worked perfectly for this application. We laid them out, stuck the tile on top, and then grouted with black grout.
Step 5: Adding Plywood to the Mantle
Next, we attached plywood to the back of the mantle. This was necessary to provide a surface where we could attach the brick veneer. We painted the plywood black so that when we placed the summer cover over it, it would look like a dark chimney behind it.
Step 6: Attaching the Surround and Summer Cover
We needed to drill holes into the surround and secure it with screws. Since we wanted it to be very secure, we made sure to find the studs in the wall and screw directly into them.
Step 7: Applying Brick Veneer
We only applied the brick veneer around the outer edges to save on materials since the surround and summer cover would cover the inner part. Adhesive was used to stick the bricks in place, and then we grouted with gray grout to give it that aged look.
Step 8: Painting the Bricks
Initially, when I painted the brick veneer, it looked too uniform. I wanted it to have an old, rustic feel. So, I scooped out some of the grout to create deeper lines between the bricks, then painted over them with a coat of white paint.
Step 9: Centering and Securing the Mantle
Once everything was mostly assembled, we centered the mantle on the hearth and screwed it into the wall for added security.
Step 10: Installing the TV and Hiding the Wires
We added a TV that looks like art above the mantle. Luke cut a hole with a drill bit above and below where the TV would go to hide the cords. We fished the wires through, giving it a clean, polished look.
Step 11: Finishing Touches
After securing the mantle and installing the brick veneer, the final step was to attach the surround and the summer cover. We used wire to keep the summer cover in place securely.
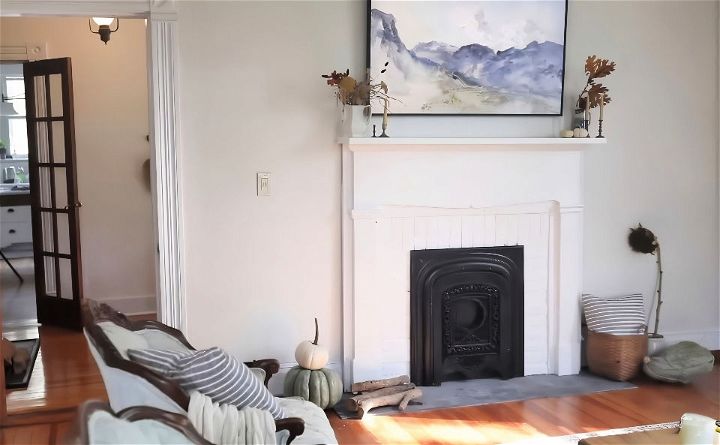
I'm thrilled with the faux fireplace. It looks so real, I want to add logs and light a fire! Though not everyone can do this project exact, you can adapt it for any space. Whether in a farmhouse or a modern home, it adds a cozy touch.
Tips for Success
- Plan Ahead: Write down the steps before you start.
- Take Your Time: It’s better to go slow and do it right.
- Be Resourceful: Use materials you already have to keep costs low.
I hope you found this guide helpful. Building a faux fireplace is a rewarding project that transforms your living space. For more details and a concise version of these instructions, visit my blog, farmhouseonboone.com. There, you'll find printable instructions and more valuable tips.
FAQs About DIY Faux Fireplace
Explore faqs about DIY faux fireplaces. Get answers on materials, construction tips, and design ideas to make your perfect faux fireplace.
A DIY faux fireplace is a decorative feature that mimics the appearance of a real fireplace. It can be built using simple materials like wood, molding, and paint. It adds warmth and charm to a room without the need for actual flames or heat.
To build a faux fireplace, you’ll need basic tools like a tape measure, jigsaw, sandpaper, drill, and screws. Start by cutting wood to the required lengths to make the structure of the fireplace. Sand the edges, assemble the pieces into a U-shape, and secure them with wood glue and screws. You can then add decorative elements and paint or stain to finish.
Absolutely! A DIY faux fireplace is highly customizable. You can choose the size, color, and decorative details to match your room’s decor. Whether you prefer a modern farmhouse look or a classic brick design, you can tailor your faux fireplace to your personal style.
Yes, a faux fireplace is safe as it does not involve real flames or heat. It’s purely decorative and can be a safe addition to any home, including those with children or pets. Just ensure it’s securely built and properly anchored to the wall if necessary.
To give your faux fireplace a realistic look, consider the following tips:
Use realistic-looking materials such as brick wallpaper or textured paint to mimic the interior of a traditional fireplace.
Add a mantel on top to display decorative items and give it a finished look.
Place candles or an electric fireplace insert inside the opening to simulate the glow of a fire.
Incorporate accessories like a fireplace screen or tools to enhance the illusion of a real fireplace.
Conclusion:
Wrapping up, building your DIY faux fireplace can transform your living space into a cozy and stylish haven. This project is not only fun but also an affordable way to enhance your home's aesthetics. By following the steps and tips outlined, you can build a fireplace that suits your design preferences and brings warmth to any room. So gather your materials, get creative, and enjoy your beautiful DIY faux fireplace! It's a fantastic way to add a personal touch to your decor.
Related DIY Projects and Ideas:
Discover a wealth of creative and practical DIY projects and ideas to enhance your home, garden, and lifestyle. Get inspired and start crafting today!
- DIY Welcome Sign: Create a charming DIY welcome sign to greet guests in style with these creative ideas. Start your project today!
- DIY Macrame Plant Hanger: Craft a simple DIY macrame plant hanger with these easy patterns. Add a touch of elegance to your home decor!
- DIY Succulent Planter: Follow these 13 steps, complete with pictures, to make a beautiful DIY succulent planter. Perfect for any home or office.
- DIY Console Table: Maximize space and style with a DIY console table. Discover easy-to-follow plans and transform your entryway!
- DIY Tufted Headboard: Upgrade your bed design with a DIY tufted headboard. Get started with these detailed instructions.

