Making your own DIY fog machine can be a fun and rewarding project. This guide will show you how to build a fog machine using everyday items, providing an affordable alternative to purchasing one. You will learn what materials you need and the steps to put everything together, making the process straightforward and easy to follow.
Building a fog machine at home is a great way to enhance parties, Halloween displays, or theatrical events. Our guide covers everything from the materials required to the step-by-step assembly instructions. Ready to dive in and bring your spooky visions to life? Let’s get started with the next section and explore the detailed steps!
Materials Needed
1. Cheap Fog Machine
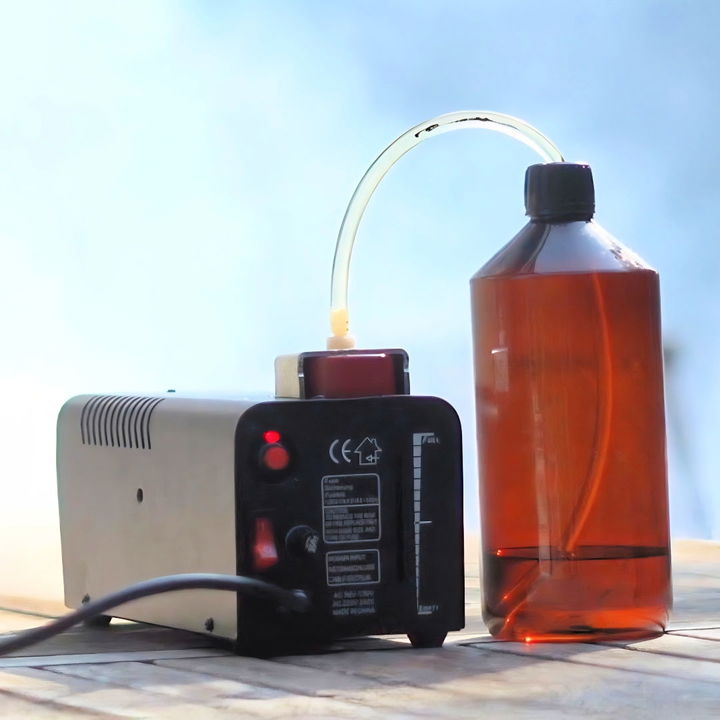
I started with the cheapest 400-watt fog machine I could find. These machines are weak but perfect for experimentation. You can usually find one for around $30 online.
2. Pure Vegetable Glycerin
Glycerin is one of the main ingredients in fog juice. It’s thick and viscous, which helps make thick clouds of fog. Make sure to get food-grade or pharmaceutical-grade glycerin to avoid any impurities.
3. Pure Propylene Glycol
This is another key ingredient in fog juice. It’s less viscous than glycerin and helps the fog dissipate more quickly. Just like with glycerin, make sure it’s food-grade or pharmaceutical-grade to ensure safety.
4. Water
Water helps dilute the fog juice mixture a bit and keeps the fog machine from getting clogged.
5. 48-watt Vibration Pump
The original pump in the cheap fog machine is too small to handle the thicker fog juice I planned to use. A 48-watt vibration pump from an old espresso machine works perfectly. You can also buy these new.
6. Brass Fittings, Solder, and Flux
I needed to attach the new pump to the existing tubing in the fog machine, which required some brass fittings and soldering.
Step-by-Step Process
Learn the step-by-step process to DIY your own fog machine, including assessing your machine, experimenting with fog juice, and making a custom blend.
1. Assess Your Fog Machine
First, I took apart my cheap fog machine to understand its inner workings. These machines have a small reservoir that holds the fog juice, a pump that pushes the liquid through a heating block, and a controller board.
2. Experiment With Fog Juice
The first step in making the machine more powerful was experimenting with different fog juices. I tried pure vegetable glycerin first, but it was too thick, and the pump struggled to push it through. Pure propylene glycol worked better, but the fog dissipated too quickly.
3. Make a Custom Fog Juice Blend
After experimenting, I found that a 50/50 mix of vegetable glycerin and propylene glycol created the best fog. The clouds were thick and lasted a decent amount of time. To make 2 liters of fog juice, I mixed one liter of glycerin and one liter of propylene glycol. For added fun, I included 10 milliliters of strawberry perfume to give the fog a pleasant smell.
Formula For Homemade Fog Juice:
- 1 Liter Vegetable Glycerin
- 1 Liter Propylene Glycol
- 10 Milliliters Perfume (optional)
Mix everything together and give it a good stir.
4. Upgrade the Pump
The next step was to replace the weak 15-watt pump with a 48-watt vibration pump. Here’s how I did it:
- Remove the Old Pump: First, I unsoldered the old pump from the controller board.
- Attach the New Pump: The new pump was too big to fit inside the machine, so I removed the liquid container to make space. Using brass fittings and solder, I attached the pump to the existing tubing. Make sure to use Teflon tape on the fittings to prevent leaks.
- Position the Pump: Be careful not to damage the tubing. Position the new pump where the old liquid container used to be.
- Connect to Controller Board: Finally, I soldered the new pump to the same pads on the controller board that the old pump used.
5. Cutting the Casing
The new pump sticks out from the original fog machine casing. I used a Dremel tool to cut a hole in the casing, allowing the pump to stick out without any issues.
6. Test the Machine
Take the machine outside and test it with your new fog juice. First, try it with the regular fog juice as a control test, and then switch to your homemade blend. The difference should be noticeable immediately.
7. Maintenance Tips
Because the new fog juice is thicker, it can leave more residue inside the fog machine. You may need to clean it more often. An easy way to clean your fog machine is with a mixture of clear vinegar and distilled water. Pump this cleaning solution through the machine every few uses to keep it running smoothly.
Cleaning Solution Formula:
- 1 Part Clear Vinegar
- 1 Part Distilled Water
Pump this mixture through the machine for a few minutes to clean out any residue.
Why Not Commercially Available Fog Liquids?
You might wonder why commercially available fog liquids don’t just use less water if it makes such a significant improvement. There are a few reasons:
- Cost: Glycerin and propylene glycol are more expensive than water.
- Residue: Glycerin leaves more residue, potentially clogging the machine faster.
- Pump Life: Thicker liquids can reduce the lifespan of smaller, weaker pumps used in cheap machines.
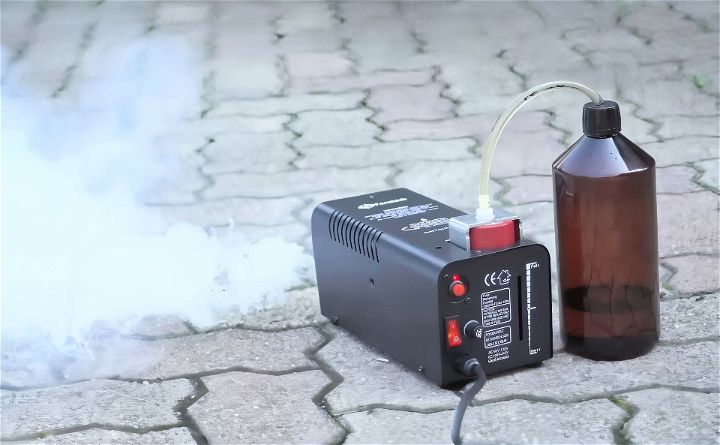
And there you have it—a step-by-step guide to making your cheap fog machine 10 times more powerful. While these methods worked well for me, remember that this can be experimental and may potentially damage your machine. Always proceed with caution and at your own risk. With that said, have a spooky and fog-filled Halloween!
FAQs About DIY Fog Machine
Discover frequently asked questions about DIY fog machines! Learn how to make, maintain, and troubleshoot your homemade fog machine.
Fog juice is made by mixing one part glycerin with three parts distilled water. This mixture, when heated, will produce the fog effect. It’s important to use distilled water to prevent any mineral buildup in your machine.
Yes, you can use an ultrasonic atomizer method, which doesn’t require glycerin. This method involves using ultrasonic waves to make fog from water without heat. However, this might not produce as dense a fog as the glycerin method.
Yes, it’s safe if you follow the instructions carefully. Make sure to use food-grade glycerin and keep the heat source away from flammable materials. Always supervise the machine when it’s in use to prevent accidents.
After each use, clean the reservoir if you’re using tap or distilled water instead of commercial fog juices. Replace the water every few uses to prevent mold and bacteria growth. If you’re using glycerin, ensure there’s no residue left that could clog the machine.
For a low-lying fog effect, you’ll need to cool the fog after it’s produced. You can achieve this by using a DIY fog chiller. To make one, you’ll need a plastic container, flexible dryer hose, and ice. The fog passes through the hose filled with ice, cooling it down before it exits, causing it to stay close to the ground. This is perfect for making a spooky ambiance at events.
Conclusion:
Wrapping up, making your own DIY fog machine can be both fun and rewarding. This simple project brings excitement to events and offers a unique touch to Halloween decorations. Follow the steps carefully, ensure safety, and enjoy the mystical atmosphere your new fog machine creates.
Related DIY Projects and Ideas:
Explore creative and inspiring DIY projects and ideas. Transform your space with unique, budget-friendly crafts and home improvement tips.
- DIY Charging Station: Power up your devices for less with this creative and affordable DIY charging station idea.
- DIY Tablet Stand: Create a practical tablet stand with these three different DIY methods.
- DIY Subwoofer Box: Build a subwoofer box for perfect sound quality with our comprehensive guide.
- DIY Epoxy Countertops: Transform your kitchen into a work of art with stunning DIY epoxy countertops.
- DIY Magnetic Board: Organize your space with this innovative DIY magnetic board idea.

