Making your own DIY tablet stand is a simple and fulfilling project. With just a few common materials and basic tools, you can craft a custom stand that fits your tablet perfectly. This stand can enhance your experience whether you’re reading, watching videos, or working. Plus, it’s an affordable and creative solution.
These DIY tablet stands come in various designs, allowing for flexibility and personalization. You can make one from wood, cardboard, or even Legos, depending on what you have at hand. By building a tablet stand yourself, you not only save money but also get a functional and unique piece tailored to your preferences.
Materials You Need
Before we start, let’s make sure you have all the materials you’ll need for these projects:
- Wood pieces (various sizes)
- Table saw
- Dado blade
- Chamfer bit
- Stain
- Polyurethane
- Glue
Each of these materials plays an essential role in building sturdy and visually appealing tablet stands. The wood pieces form the structure, the table saw and dado blade make precise cuts, the chamfer bit adds a decorative touch, and the stain and polyurethane provide a nice finish. Now, let’s get started.
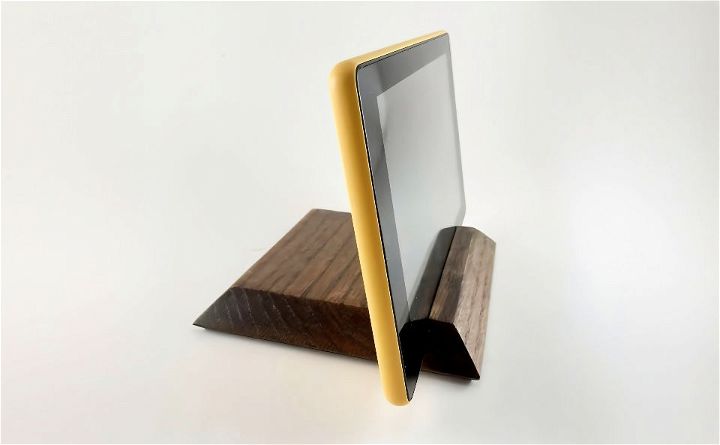
Tablet Stand #1: The Single-Board Stand
Learn how to easily make a DIY tablet stand with our step-by-step guide: cut the wood, create a dado cut, add a chamfer, and stain & seal.
Step 1: Cut the Wood
For the first stand, you only need one piece of wood. For my stand, I cut a piece of wood to be seven inches by seven inches. For my wife’s stand, I went with six inches by six inches.
Step 2: Create the Dado Cut
I set my table saw blade to 10 degrees to create a dado cut where the tablet will sit. I made this cut about one inch from the side of each piece of wood.
Step 3: Add a Chamfer
As an afterthought, I added a chamfer all the way around the edges. This small detail gives the stand a floating effect, making it look sleek and modern.
Step 4: Stain and Seal
Finally, I applied a quick coat of stain to each stand and followed it up with a couple of coats of polyurethane. This enhances the wood’s appearance and adds a protective layer.
And there you have it! In about 10 minutes, you can have a functioning and stylish tablet stand.
Tablet Stand #2: The Two-Piece Stand
Build a sturdy DIY tablet stand with a two-piece design. Follow simple steps: cut wood, create a notch, add a lip, and adjust the angle.
Step 1: Cut Two Pieces of Wood
For the second stand, I used two pieces of half-inch plywood, each cut to seven inches by four inches.
Step 2: Create the Notch
I made a notch about one inch in from the end of each board and cut halfway across each board.
Step 3: Add a Lip
As an afterthought, I decided to add a scrap piece of wood as a small lip. This prevents the tablet from sliding off the stand.
Step 4: Angle Adjustment
I took a bit off the end of the bottom board to allow the tablet to sit at a more comfortable angle. I ended up removing about an inch and a half.
And that’s stand number two! It’s simple but functional, and the added lip ensures your tablet stays securely in place.
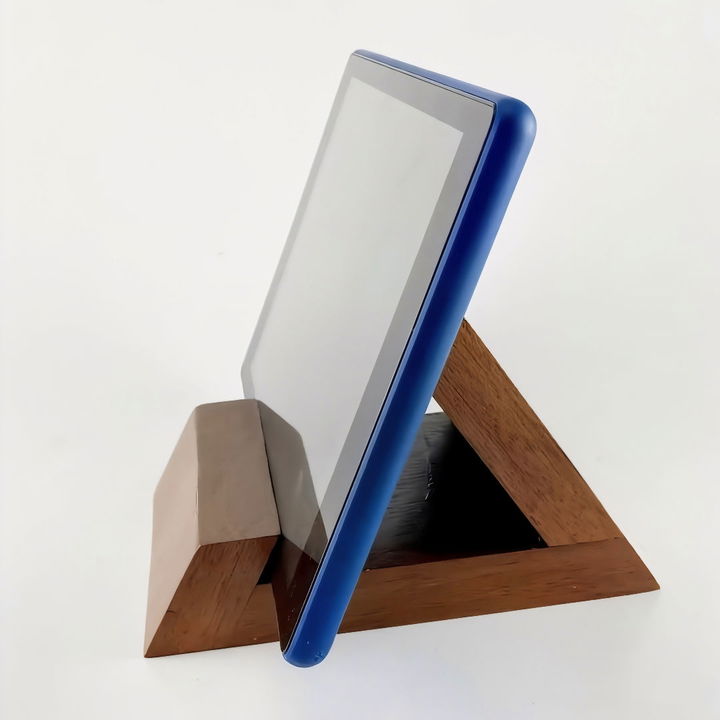
Tablet Stand #3: The Complicated-Looking but Simple Stand
Build a DIY tablet stand that looks complex but is easy to make. Follow our guide for a stylish, functional tablet holder.
Step 1: Cut the Angled Pieces
This stand looks a bit more complex but is surprisingly easy to make. I used a single five-inch-wide board for all my cuts and set my table saw blade to 30 degrees to achieve the correct angles.
Step 2: Glue the Joints
The key to this stand is to glue only two of the joints, leaving one joint unglued. This unglued joint will later be cut off.
Step 3: Make the Final Cuts
After the glue dried, I made two more cuts to finalize the shape of the stand.
And that’s it for stand number three! It’s that simple, and the end result is a stylish and functional tablet stand.
All of these tablet stands can be completed in about 10 minutes each. While the ones with glued joints might take a bit longer to allow the glue to dry, they are still quick projects overall.
Personally, I love the first stand for its simplicity and minimalist design. The chamfered edges give it a modern touch, making it visually appealing. The second stand is great for its versatility, especially if you need to disassemble it for travel. The third stand might look complex, but it’s straightforward and offers a unique design.
Additional Tips
- Safety First: Always wear protective gear when working with power tools.
- Customization: Feel free to adjust the dimensions to better fit your tablet.
- Finishing Touches: Experiment with different stains and finishes to match your decor.
If you enjoyed this guide, don’t forget to like and subscribe to our channel. We’d love to hear your thoughts and see your own creations in the comments below. Happy woodworking, and have a great day!
FAQs About DIY Tablet Stand
Discover everything you need to know in our faqs about DIY tablet stand, including materials, steps, and tips for creating your own functional stand.
Stability is key for a good tablet stand. Make sure the base is wide enough to support the tablet’s weight and the angle of the stand is not too steep. Using materials like plywood can add strength, and adding a non-slip surface can prevent sliding.
Yes, you can make an adjustable stand by creating a design that allows for different viewing angles. This might involve hinges or movable parts. For example, a stand with a movable back support can be adjusted to various angles for optimal viewing.
Absolutely! Some designs are specifically made to be folded and carried easily. Using fabric and a simple folding design, you can create a stand that’s both functional and portable, perfect for travel.
Many DIY projects are suitable for beginners and don’t require special tools or skills. Look for projects that use simple shapes and require minimal cutting or sewing. Instructions for these projects are usually very clear and easy to follow.
Personalizing your DIY tablet stand is a great way to make it uniquely yours. Consider painting it in your favorite colors, adding decorative elements like stickers or decals, or even engraving it if you’re using wood. You can also tailor the size and shape to fit your tablet perfectly or to match your home decor.
Conclusion:
Wrapping up, making a DIY tablet stand is a fun and rewarding project that combines practicality with creativity. With easy-to-follow steps, you can craft a unique stand that meets your needs. This engaging activity offers a perfect blend of functionality and personalization. Try making your own tablet stand and enjoy the satisfaction of using something you created.
Related DIY Projects and Ideas:
Discover a world of creativity with our related DIY projects and ideas. Get inspired and start your next do-it-yourself adventure today!
- DIY Fog Machine: Create an eerie atmosphere at your parties with this simple DIY fog machine. Get creative and elevate your celebrations now!
- DIY Charging Station: Power up your devices efficiently with this budget-friendly DIY charging station idea. Keep your gadgets organized and charged.
- Build a Subwoofer Box: Achieve perfect sound quality with this easy DIY subwoofer box plan. Enhance your audio experience with custom-built solutions.
- DIY Epoxy Countertops: Transform your kitchen with stunning DIY epoxy countertops. Follow these easy steps to create durable and beautiful surfaces.
- DIY Magnetic Board: Organize your space with a stylish DIY magnetic board. Perfect for notes, photos, and more.

