Making a DIY ladder plant stand is a simple and rewarding project that adds charm and functionality to any space. This practical guide will show you how to make a sturdy ladder stand to showcase your favorite plants. It's great for organizing potted plants in a visually appealing way, enhancing both outdoor and indoor areas.
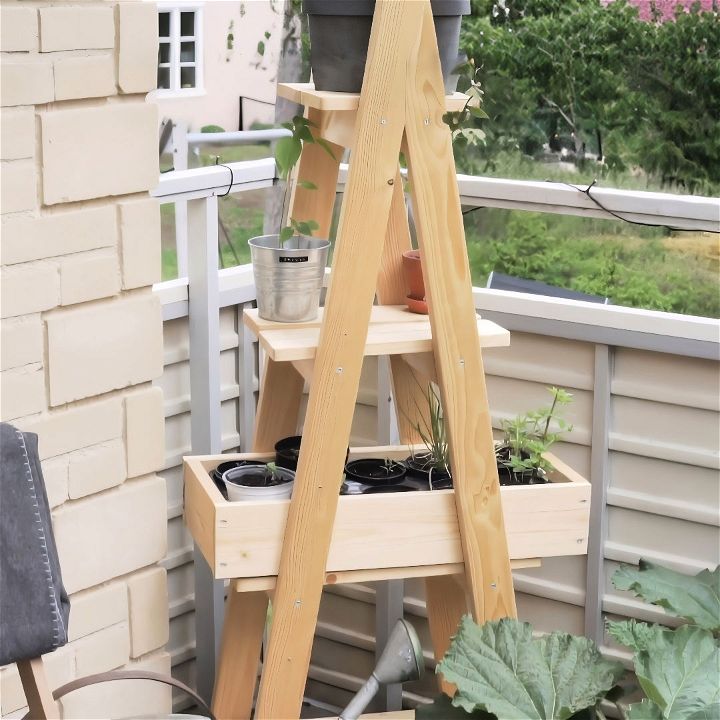
This step-by-step tutorial ensures that building your ladder plant stand is hassle-free. You'll need basic materials like wood, nails, and paint, and the process is straightforward. Follow these instructions, and you'll have a beautiful and functional plant stand in no time.
Materials You'll Need
Wooden Bars and Wood Panel
These will form the main structure and shelves of your plant stand. Using solid and durable wood ensures that your stand can support the weight of several plants.
90 mm C4 Wood Screws for Outdoor Use
These screws are designed for outdoor conditions. They are strong and resistant to rust, ensuring your plant stand remains sturdy over time.
Tools:
- Screwdriver: For driving screws.
- Rasp: To smooth out the edges of your cuts.
- Joint Saw: For precise cutting of the wooden bars.
- Angle Hook and Pen: To mark accurate measurements.
- Brush: For applying linseed oil to protect the wood.
Step by Step Instructions
Learn to build a DIY ladder plant stand with step-by-step instructions. Perfect for adding a stylish touch to your space.
Step 1: Measure and Cut the Legs
First, I measured and cut the wooden bars that would serve as the legs of the ladder.
- Measure and Mark: I marked four bars at the desired length for the legs. To make the ladder stable, I decided on an angle for the bottom end and marked it on the first leg.
- Cutting the Legs: Using the joint saw, I cut the first leg and used it as a template for the other three legs.
- Pre-Drill Holes: Before assembling, I pre-drilled holes to prevent the wood from splitting when I screwed the legs together.
Step 2: Attach the Studs
Next, I cut eight studs to join the pairs of legs.
- Cutting Studs: I cut each of the studs to 28 cm in length.
- Attach the Studs: I screwed the studs into the legs at 40 cm intervals using the 90 mm C4 wood screws. This added stability to the structure and began to create the ladder shape.
Step 3: Make the Shelves
Now it was time to create the shelves that would hold the plants.
- Measure and Cut: I cut shelves in varying lengths. The shortest was 25 cm and the longest was 64 cm, ensuring the shelves provided ample space and staggered height for the plants.
- Screw the Shelves: I affixed the shelves to the studs using the C4 screws, making sure they were level and securely attached.
Step 4: Secure the Structure
To ensure that the ladder plant stand could handle the weight of multiple plants and remain stable:
- Final Checks: I double-checked all screws and joints to make sure they were securely fastened.
- Stabilize: I added an extra pair of legs to the opposite side of the main structure for added stability.
Step 5: Protective Finish
Finally, to extend the longevity of my plant stand and protect it from weather elements, I applied a protective finish.
- Linseed Oil Application: I brushed on a layer of linseed oil. Once the first layer dried, I applied a second coat. This not only protected the wood from moisture but also gave it a nice polished look.
Bonus: Decorative and Functional Tips
- Wheels for Mobility: I added wheels at the bottom of the legs, making it effortless to move the plant stand around my patio.
- Paint or Stain: Personalize your plant stand by painting it to match your outdoor décor, or staining it to enhance the natural wood grain.
- Hooks and hangers: Installing small hooks on the side can accommodate hanging plants or garden tools.
Maintain Your Plant Stand
- Regular Cleaning: Make a habit of wiping down the shelves to prevent dirt from accumulating.
- Reapply Linseed Oil: Depending on the weather exposure, reapplying linseed oil annually can keep your plant stand in great shape.
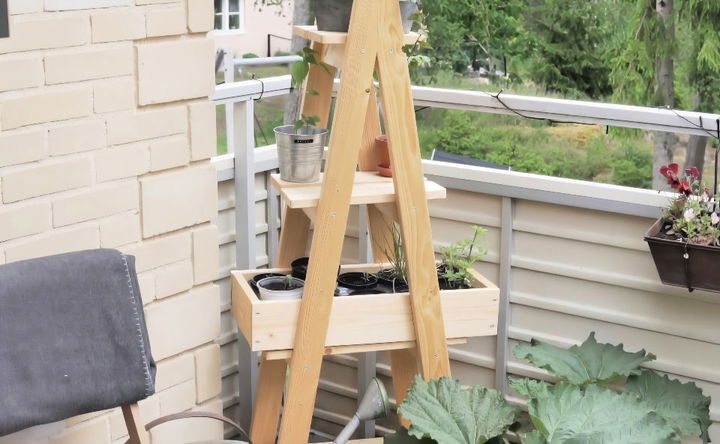
Building this plant stand ladder was a rewarding project that added charm to my patio. It not only displayed my plants beautifully but also made it easier to care for them. Each step was straightforward and didn't require any fancy tools, making it accessible for anyone keen on a DIY project. Give it a try and enjoy a personalized touch to your outdoor space!
FAQs About DIY Ladder Plant Stand
Find answers to your faqs about DIY ladder plant stand. Simple, creative ideas to enhance your indoor garden space. Get tips and inspiration now!
A DIY ladder plant stand is a creative way to display plants in your home or garden. It’s made by repurposing an old ladder or building one from scratch, adding shelves or trays to hold plant pots. This stand is great for saving space and can be designed to fit any style or size of living space.
Yes, you can use any type of ladder, but make sure it’s sturdy enough to hold the weight of the plants. Wooden ladders are popular for their rustic look, but metal ladders can also be used for a more industrial style. If you’re using an old ladder, ensure it’s clean and free from damage before adding plants.
Ladder plant stands can accommodate a variety of plants. For indoor stands, houseplants that thrive in your home’s light conditions are ideal. For outdoor stands, consider plants that can withstand the local climate. It’s also important to consider the size and weight of the plants to ensure the stand remains stable.
To care for your ladder plant stand, keep it clean and check regularly for wear and tear, especially if it’s placed outdoors. If it’s made of wood, you might need to reapply a protective coat of paint or sealant periodically to protect it from the elements. Always ensure that the plants have adequate water and sunlight based on their specific needs.
Ensuring the safety and stability of your DIY ladder plant stand is crucial, especially if you have pets or children around. Here are some tips:
Choose the Right Ladder: Select a ladder that is sturdy and in good condition. If it wobbles or has damaged parts, it might not be safe to use.
Secure the Shelves: Make sure the shelves are securely attached to the ladder rungs. Use screws or bolts rather than nails for a stronger hold.
Balance the Weight: Distribute the weight of the plants evenly across the shelves to prevent tipping. Avoid placing heavy pots on the topmost shelf.
Add a Base: If necessary, add a wider base to the bottom of the ladder to increase its footprint and stability.
Regular Checks: Periodically check the stand for any loose screws or signs of wear and tear, and tighten or repair as needed.
Conclusion:
Wrapping up, building your own DIY ladder plant stand is a fun and fulfilling project. It not only adds a touch of nature to your space but also showcases your creativity. Remember, a DIY ladder plant stand is more than just a display; it’s a beautiful piece of home decor that reflects your style. So, gather your materials, follow the steps, and enjoy building a charming stand for your plants.
Related DIY Projects and Ideas:
Discover a wide array of related DIY projects and ideas for home improvement, crafting, and decor. Get inspired and start creating today!
- DIY Vertical Garden: Step-by-step guide to creating a stunning DIY vertical garden.
- DIY Vertical PVC Pipe Garden: Innovative ideas for crafting a DIY vertical PVC pipe garden.
- DIY Planter Box: Build a versatile DIY planter box to grow anything you love.
- DIY Rain Barrel: Save money and conserve water with this DIY rain barrel guide.
- DIY Mason Jar Herb Garden: Follow this step-by-step guide to create your own mason jar herb garden. Perfect for small spaces!

