Learning how to build a subwoofer box can improve your audio experience and give you a sense of accomplishment. Constructing the right enclosure is crucial for enhancing sound quality and protecting your subwoofer. This guide provides clear, step-by-step instructions to ensure you create a box that meets your specifications and suits your subwoofers.
You’ll find essential tips on choosing the right materials, measuring dimensions accurately, and assembling the box correctly for optimal performance. The process is straightforward, even if you haven't done similar tasks before. Keep reading to explore detailed guidelines and build a quality subwoofer box effectively.
Materials Needed
- Plywood or Birch/Blonde Wood: Strong and easy to work with, these materials form the structure of your box.
- Sawzall or Table Saw: Essential for cutting wood accurately.
- Brad Nailer and Screws: Helps in securing the wood pieces together.
- PL 3X Adhesive: Ensures a tight seal, filling any minor gaps or imperfections.
- Router with Flush Trim Bit: For precise cutouts and a professional finish.
- Measuring Tape and Marking Tools: Accuracy is key in building the box to the correct dimensions.
- Carpet and Spray Adhesive: For a neat, finished look.
- Jigsaw and Drill: For making precise cuts and holes.
- Car Audio App: To calculate box dimensions and port length.
Step by Step Instructions
Learn how to build a subwoofer box step by step, from gathering supplies to installing and testing. A perfect DIY guide for straight cuts, sealing, and carpet tips.
Step 1: Gathering Supplies
First, head to your local hardware store. I love using Birch or Blonde wood for its durability and ease of use. This time, I opted for it over MDF despite it being a bit pricier. Grab PL 3X adhesive, screws, and a router with a flush trim bit. Trust me, these will make your project a lot smoother.
Step 2: Cutting the Wood
It's important to ensure everything fits in my car, so I had to cut the large wood sheets to manageable sizes in the parking lot using a Sawzall. This may feel tedious, but precise cutting is key to a sturdy box. Here’s how you go about it:
How to Get Straight Cuts with a Sawzall
- Draw straight lines with a measuring tape and pencil.
- Place the wood on some sacrificial blocks for stability.
- Carefully cut along the lines, ensuring you maintain a steady hand.
Step 3: Box Dimensions and Design
Now, let’s get technical. I used a car audio app to calculate the optimal box dimensions. Here’s the breakdown:
- Box Width: 24 inches
- Subwoofer Displacement: 0.2 cubic feet
- Box Bracing: 0.5 cubic feet
- Wood Thickness: 3/4 inches
- Port Dimensions: 3 inches wide by 15.5 inches tall, and 36.5 inches long for a tuned frequency of 31 Hz.
These calculations ensure the box is the right size and the port provides the needed airflow, optimizing the subwoofer’s performance.
Step 4: Assembling the Box
Start with the largest cuts and move to the smaller ones. Lay your pieces out before assembly to double-check the dimensions.
- Layout and Label: Label each piece to avoid confusion during assembly.
- Glue and Nail: Use PL 3X adhesive along the edges, press the wood together, and secure temporarily with a brad nailer.
- Screw for Stability: Drive screws into the wood to ensure a tight, secure fit.
Tip for Sealing
Make sure beads of adhesive squeeze out slightly when clamping or screwing pieces together. This indicates a tight seal.
Step 5: Installing the Port
Before sealing the box completely, we need to install the internal port.
- Measure and Cut: Use the car audio app dimensions to cut the port pieces.
- Dry Fit: Assemble the port inside the box without adhesive to ensure correct fitment.
- Secure the Port: Glue and screw the port pieces inside the box, ensuring they align perfectly.
Step 6: Adding Internal Bracing
Bracing is crucial in preventing vibrations and ensuring structural integrity.
- Cut Dowels: Measure and cut hardwood dowels to fit snugly inside the box.
- Install Bracing: Glue and screw the braces from wall to wall inside the box, especially in areas that will bear the most stress.
Step 7: Finishing the Box
The last woodworking step involves creating a professional look with a flush trim and a precise subwoofer cutout.
- Flush Trim the Edges: Use a router to clean up any overhanging wood for a smooth edge.
- Subwoofer Cutout: Measure the subwoofer cutout area, mark it, and use a jigsaw to cut the hole.
Step 8: Carpeting the Box
Carpeting can be tricky, but it gives the sub-box a finished look.
- Apply Spray Adhesive: Spray both the wood and the carpet with adhesive for a strong bond.
- Lay the Carpet: Start from one the ported end and work your way around, pulling it tight to avoid wrinkles.
Tips for Seaming
Overlap seams slightly and trim the excess for a neat finish. If edges start to fray, a little more adhesive can help seal them down.
Step 9: Installing the Subwoofer and Testing
Finally, drop the subwoofer into place, wire it up, and then test your creation.
- Double-Check Wiring: Ensure the connections are secure and the impedance matches the subwoofer specs.
- Seal and Secure: Place the subwoofer in the cutout and secure it with screws.
Testing
Play a range of frequencies to ensure the subwoofer operates smoothly without unwanted vibrations.
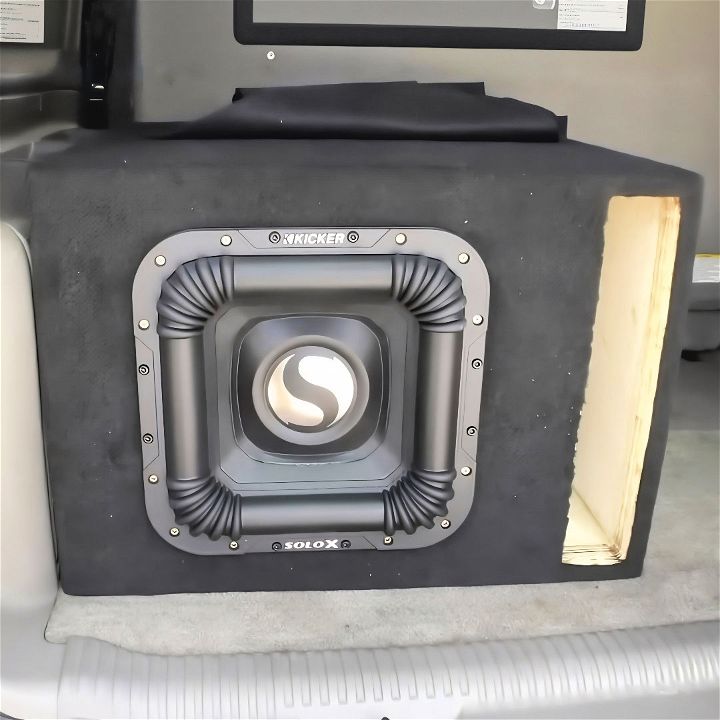
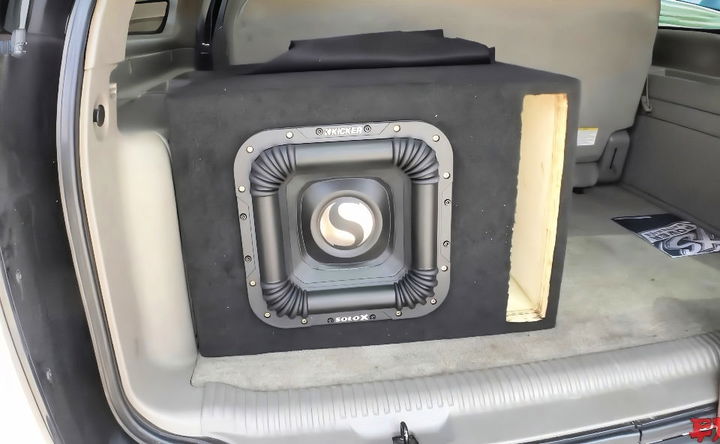
Building a ported subwoofer box for the Kicker SOLO X 12 is a rewarding project that boosts your car audio experience while giving you hands-on skills in woodworking and audio installation.
FAQs About DIY Subwoofer Box
Discover answers in our faqs about DIY subwoofer boxes, covering materials, design tips, and construction techniques for optimal sound.
The size of your subwoofer box should be based on the manufacturer’s specifications for the subwoofer. These specifications will include the optimal volume of the enclosure, which is crucial for the best sound quality. You can use online calculators or software to help with the dimensions.
Yes, you can make a subwoofer box for home use. The principles of building a box are the same, but you may choose different materials or design aesthetics to match your home decor.
Sealed boxes: Provide tight, accurate bass and are generally more compact.
Ported boxes: Have a vent (port) that increases the volume of bass and efficiency at low frequencies but are larger in size.
While the shape of the subwoofer box can influence the distribution of sound, the most critical factor is the internal volume which should match the subwoofer’s requirements. Regular shapes like rectangles are easier to construct and calculate volume for, but you can experiment with different shapes as long as the internal volume remains consistent with the subwoofer’s specifications.
Ensuring your subwoofer box is airtight is crucial for optimal sound quality. Here are some steps to achieve this:
Seal the joints: Use high-quality wood glue for all the joints during assembly. After the glue dries, apply a bead of silicone caulk to all internal seams.
Check for leaks: After the box is assembled, you can perform a simple test by holding a lighted incense stick near the seams while playing a deep bass tone through the subwoofer. Watch for the smoke; if it gets sucked in or blown out, there’s a leak.
Install the subwoofer properly: Use a gasket made of foam or rubber between the subwoofer and the box to create a tight seal. Ensure all mounting screws are tightened evenly.
Conclusion:
Wrapping up, building a DIY subwoofer box can be a rewarding project that enhances your audio experience. With the right tools and materials, you can create a custom box that fits your specific needs. This guide on how to build a subwoofer box provides all the essential steps and tips to help you get started. Whether you want booming bass or a compact design, a well-built subwoofer box can make all the difference.
Related DIY Projects and Ideas:
Discover inspiring DIY projects and ideas for your next home improvement, crafting, or upcycling venture. Get creative with our step-by-step guides!
- DIY Charging Station: Create a custom charging station to power up your devices for less with this DIY idea. Learn more here.
- DIY Magnetic Board: Organize your space with a DIY magnetic board using this creative idea.
- DIY Tablet Stand: Discover three different ways to make a functional DIY tablet stand.
- DIY Epoxy Countertops: Transform your kitchen with stunning DIY epoxy countertops.
- DIY Fog Machine: Elevate your parties with a DIY fog machine using these fun idea.

