Get started on a fun and unique journey into the realm of epoxy resin crafts with this list of 30 creative resin crafts and projects for beginners. Resin crafts offer a wonderful opportunity for creativity and can lead to some truly amazing DIY creations. From resin trays to photo coasters, resin bugs to shimmering jewelry, the opportunities are limitless when it comes to resin craft ideas.
Each DIY resin project is complete with step-by-step instructions, making the assembly process clear and straightforward, even if you're new to working with resin. These epoxy resin crafts range from home decor items like glittering wedding signs, chic cabinet knobs, and bathroom tiles to personal accessories like bookmarks, pendants, and keychains. What's more, if you are interested in resin art ideas, we have included unique projects such as resin ocean serving trays and fluid resin art that will add a vibrant touch to your living space.
One of the standout features of working with resin is the versatility it offers. With these resin crafts for beginners, you can explore unique items to put in resin - such as maple leaves for a stunning paperweight or sequins for a sparkling tray. Besides adding personal style to your home, these epoxy projects also make thoughtful, handmade gifts. So gather your materials and get ready to dive into the world of resin DIY with these enticing resin craft ideas!
1. DIY Wood Resin Tray
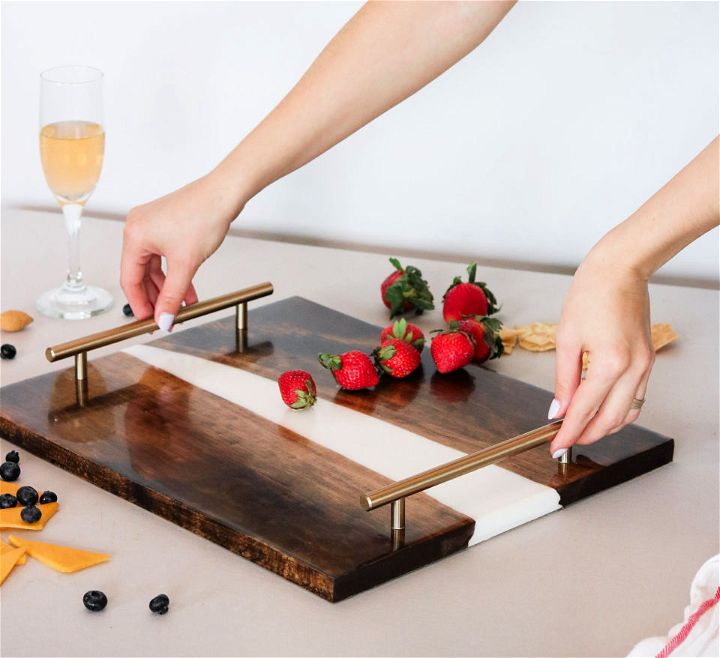
Build a stunning DIY wood resin tray with this step-by-step guide! Join us in crafting a beautiful piece that mimics a flowing river between two pieces of wood.
While the trend usually features a blue center, we opted for a neutral white look. With affordable supplies like resin, wood, stain, and optional handles, you can complete this project for around $40-$70. Take your time as the resin needs to set between layers, and be cautious when working with it.
Once finished, you'll have a unique tray that can also serve as a food-safe charcuterie board. Check out the video tutorial for a visual guide. Get creative and start crafting your own wood resin tray today! lilyardor
2. Make Vacation Photo Coasters With Resin
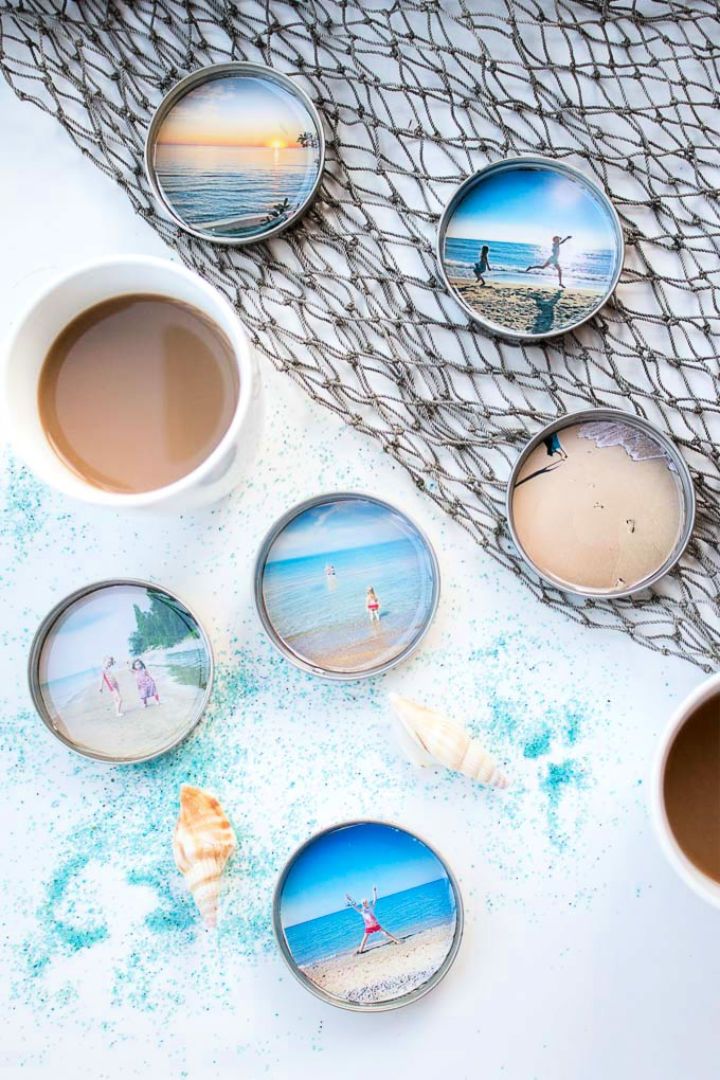
Decorate your home with diy vacation photo coasters using resin! Choose a selection of photos and print them out on glossy photo paper. Then, cut them down to the size of your gold art minds lids. Glue each one to the base with ultra seal multi-purpose sealer or any clear drying craft glue. Next, pour the resin onto the image in a thin layer and use a paintbrush to spread it evenly across the surface.
Allow it to cure overnight before adding a second coat of resin. Use stirring sticks, straw, or torch to help remove bubbles and further refine your DIY piece. The supplies you will need are straightforward and easy to use and you will end up with beautiful homemade coasters that are unique and inexpensive! resincrafts
3. Homemade Resin and Wooden Serving Tray
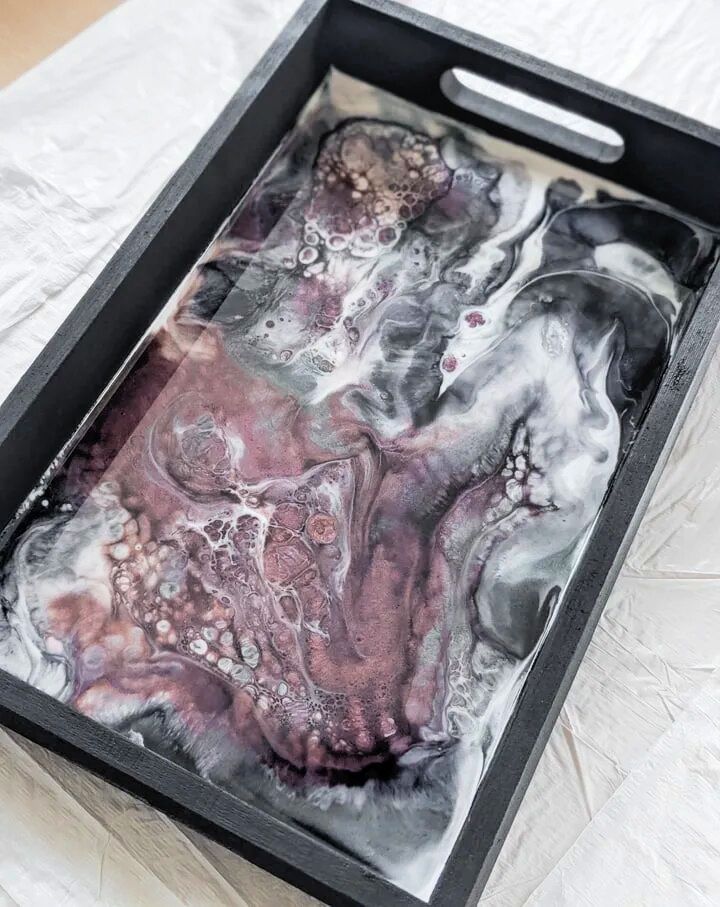
diy resin and wood serving tray is a creative and beautiful project that combines woodworking with a touch of sparkle. The tray is perfect for containing your two-part resin mix, which you can add pigment to to achieve the desired color. Finish it with craft paint and optional fine glitter, and heat with a heat gun to harden and cure the resin.
You need a wooden tray, two-part resin, pigments in many colors, craft paint, a heat gun, resin mixing supplies, workspace protection, and if desired fine glitter. Have fun creating an eye-catching diy serving tray! bybrittanyg
4. Unique DIY Resin Gemstone Phrase Shirt
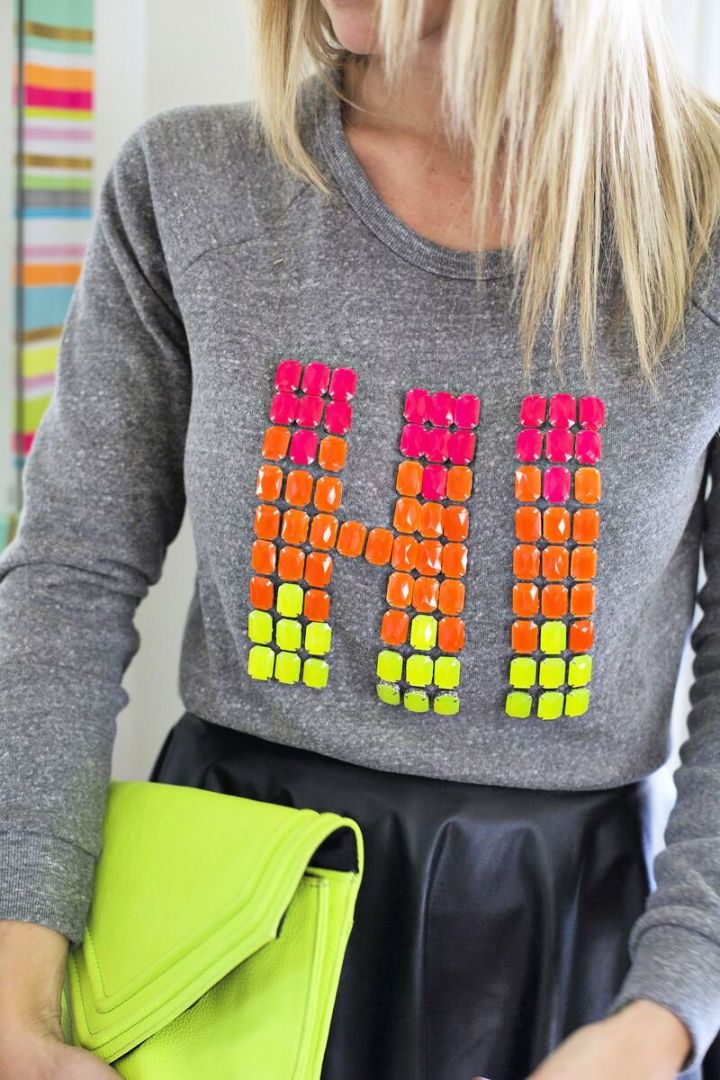
Add a bit of spark to any outfit with diy resin gemstone phrase shirts! Perfect for adults looking for something fun and colorful, this diy project is sure to make a statement. Gather supplies like plain sweatshirts, large sewable resin gemstones, jewel glue or fabric glue, x-acto knife or scissors, straight pins, needle and thread (optional).
Once you're ready and have an idea of what phrase you want to make out of these unique gems, it's time to start making your DIY resin gemstone phrase shirt. With a little bit of work, your new DIY creation will be sure to add some pizzazz to any outfit. abeautifulmess
5. Making Epoxy Resin Planters With Silicone Mold
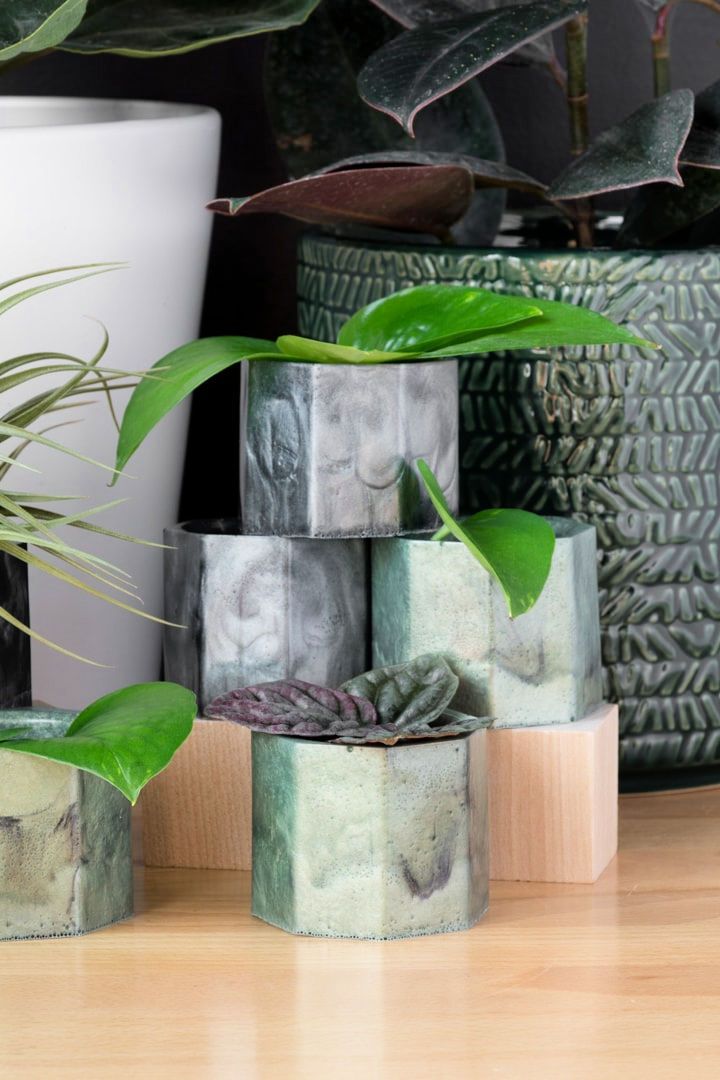
DIY Resin crafts offer endless creative ideas, transforming ordinary objects into stunning, high-gloss pieces of art for home decor.
Making diy epoxy resin planters with a silicone mold is a fun and easy project for adults. To get started you'll need epoxy resin, mica dye powders, black alcohol ink, a silicone measuring cup, disposable mixing cups and stirrers, disposable gloves, workspace protection & paper towels. First prepare the workspace and mix two-part epoxy resin.
Then add the dye powder and pour into the silicone molds and pop any air bubbles. Let it cure, remove from mold and voila - beautiful hexagon-shaped planters! bybrittanygoldwyn
6. How to Make a Resin Pour Memento Box
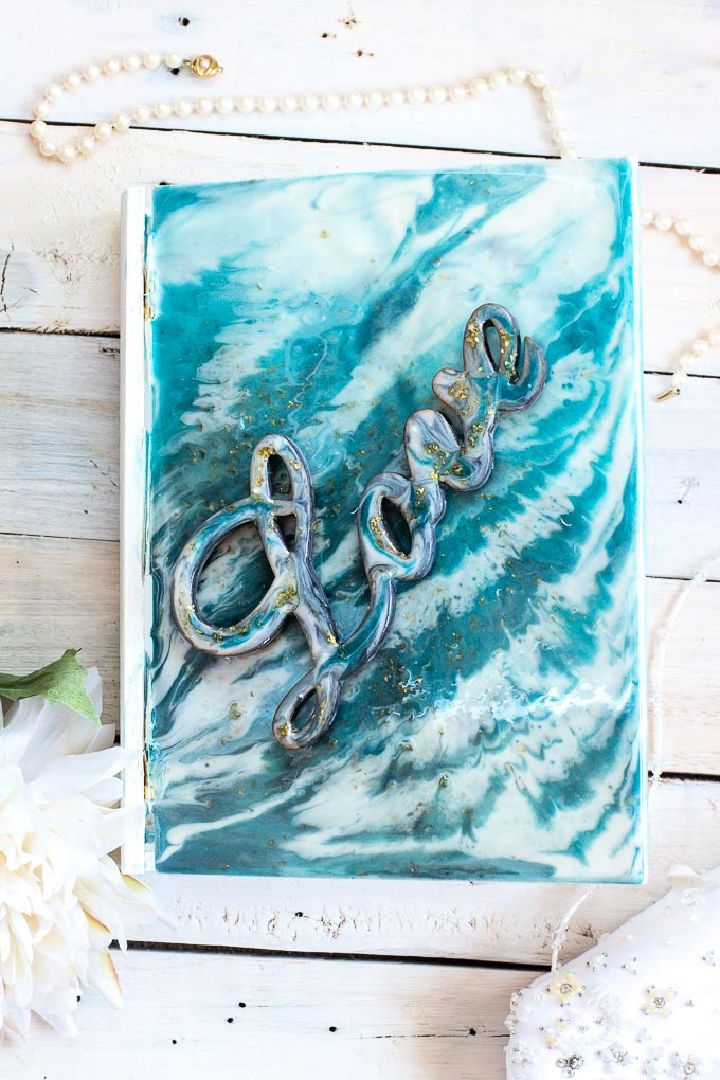
A diy resin pour memento box can make a thoughtful and unique gift for weddings. With the right materials, you can craft an elegant and beautiful box which will be sure to amaze! You'll need a wooden book box, wood pallet word shape, screws and screwdriver, fine-grit sandpaper, various paints, Ultra Seal glue or any clear drying craft glue, Envirotex Lite Pour-on resin, clear glitter flakes, paintbrush, cups and stir sticks, disposable work surface and brush, gloves and a hot glue gun.
Once everything is ready simply prepare the book cover for the resin pour, mix and colour the solution then carefully pour it in. With some patience and creativity you'll end up with a one-of-a-kind keepsake that your loved one will cherish forever. sustainmycraft
7. Handmade Resin Faux Bugs
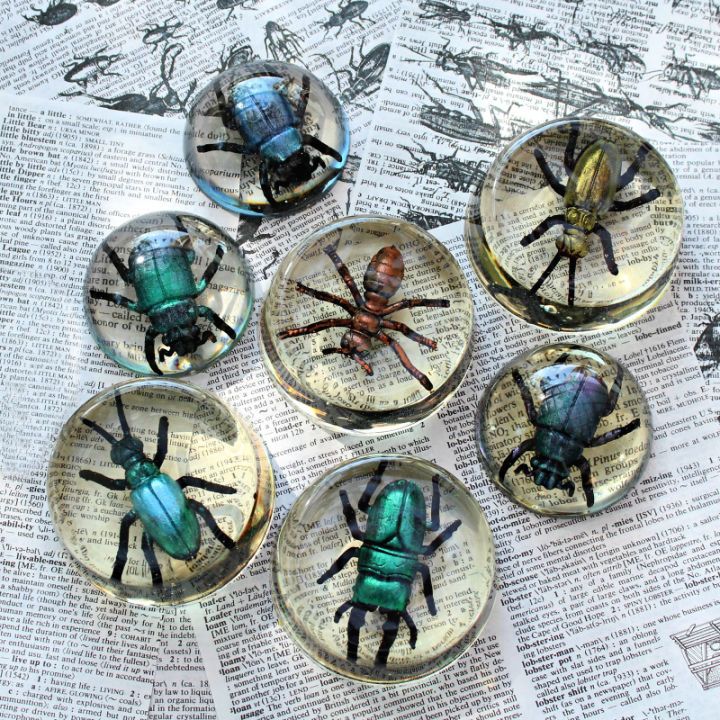
Get crafty and make DIY faux bugs in resin! You'll need some glaze coat resin, decoart metallic lustres, black Americana acrylic paint, plastic bugs, silicone molds, and paint brushes to get started. Paint the bugs in the black americana which will give it a dried matte look. Then embellish them with decoart's metallic lustres to create a beautiful shine.
Once everything is prepped, mix a batch of glaze coat following instructions closely. When it's all ready to be poured, place the bugs into the mold face down and pop air bubbles using a small torch or lighter. Let cure overnight for best results - now you have DIY faux bugs in resin! markmontano
8. Adorable Seashore Resin Jewelry
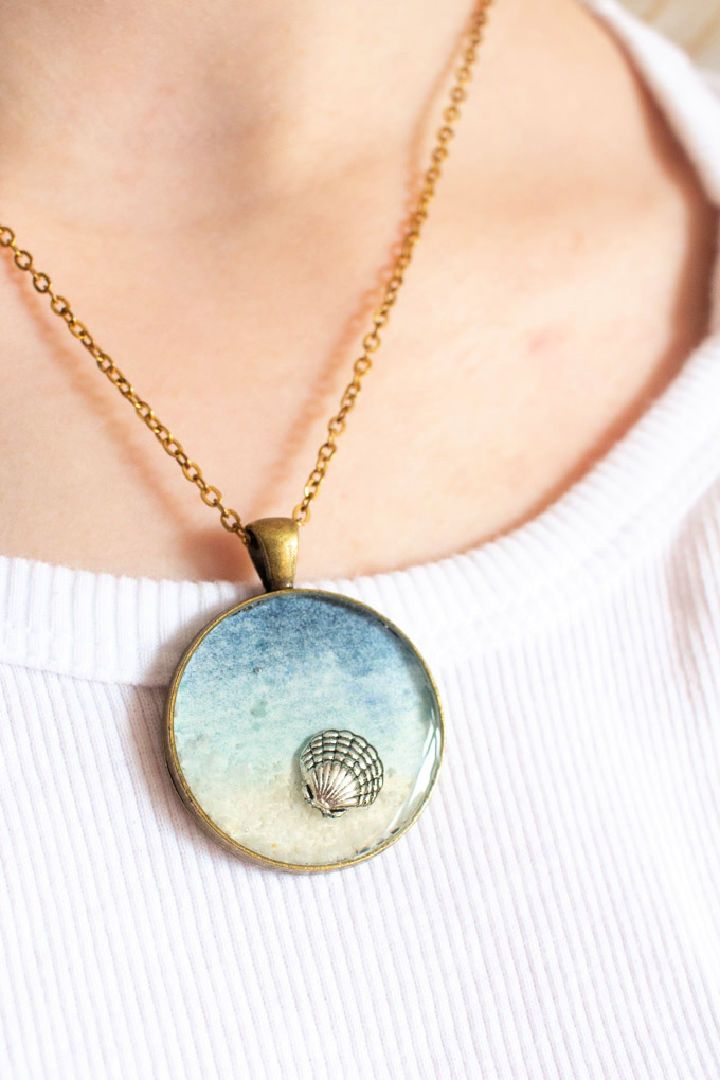
Making DIY resin jewelry with a seashore theme is both creative and fun! This project requires watercolor paper, watercolor paint, metal sea creature charms, white decorative sand and envirotexlite jewelry resin. Put the pieces together by placing the charm inside an oval or round bezel and fill it up with white sand. Then paint with watercolors and seal it up with ultra seal or a water-based sealer.
Finally, pour the Envirotex Lite jewelry resin over the bezel to get a glossy finish. Add some sparkle for an extra touch of style. Now you can use these DIY adorable seashore resin jewelry pieces to spruce up any summer outfit! resincrafts
9. Late-Summer Maple Leaf and Resin Paperweight
Resin crafts provide a durable and long-lasting finish, perfect for preserving cherished mementos, such as dried flowers and photographs.
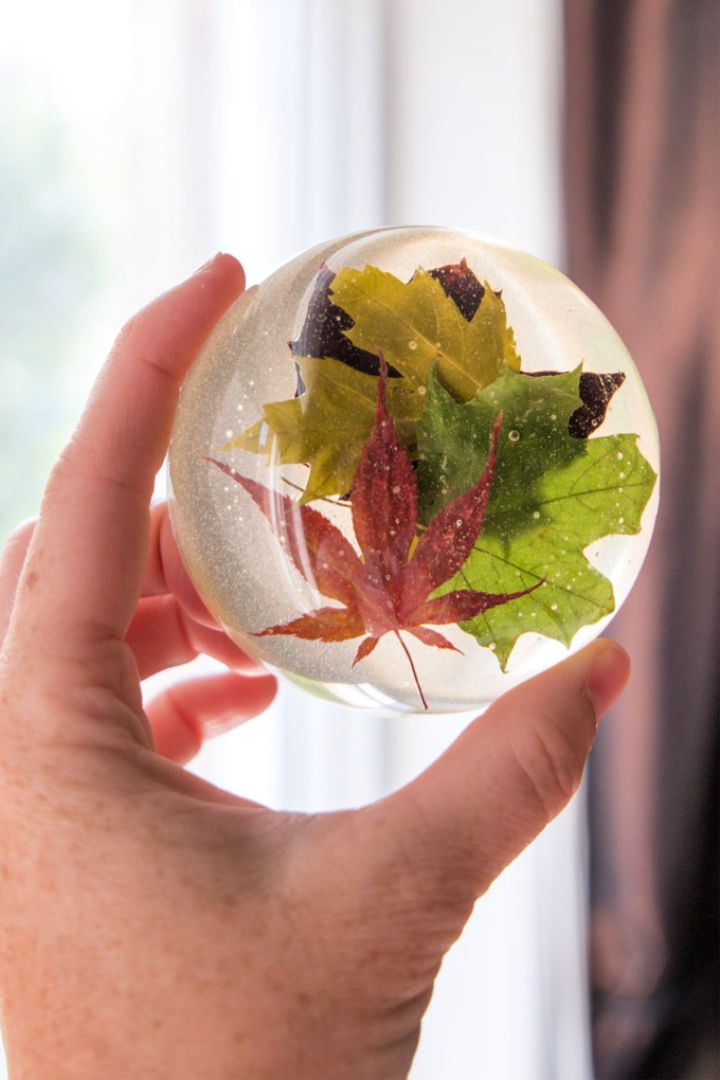
Create a unique and beautiful diy leaf resin paperweight with a few simple steps. Before beginning the project, collect and press your desired leaves for at least one week. After they are pressed, generously coat both sides using an all-purpose sealer and let it dry fully. The supplies needed for this diy project include: small maple leaves, an ultra-seal quick decoupage, large domed poly molds, mold release conditioner, easycast clear casting epoxy, measuring cups, stir sticks, straws and opaque pigments (opalescent).
Once these items have been gathered together you can begin crafting your diy leaf resin paperweight – perfect for decorating your office or to give as a gift to someone special this autumn season. resincrafts
10. Cool DIY Glitter Resin Wedding Sign

Making diy glitter resin wedding signs is a great way to create beautiful reminders of your special day. To get started, gather 20x36 inch birch plywood from your local hardware store, 6” vinyl letters for your saying, mod podge and bottles of vintage leaf or chunky glitter from craft stores like Michael's.
You'll also need Envirotex Lite Resin 32 ounce kit, 4 plastic buckets, painter's tape, aluminum foil, heavy plastic sheeting and a straw. With these supplies you can make gorgeous wedding signs in any style you like! apracticalwe
11. Gold Leaf and Emerald Resin Cabinet Knobs
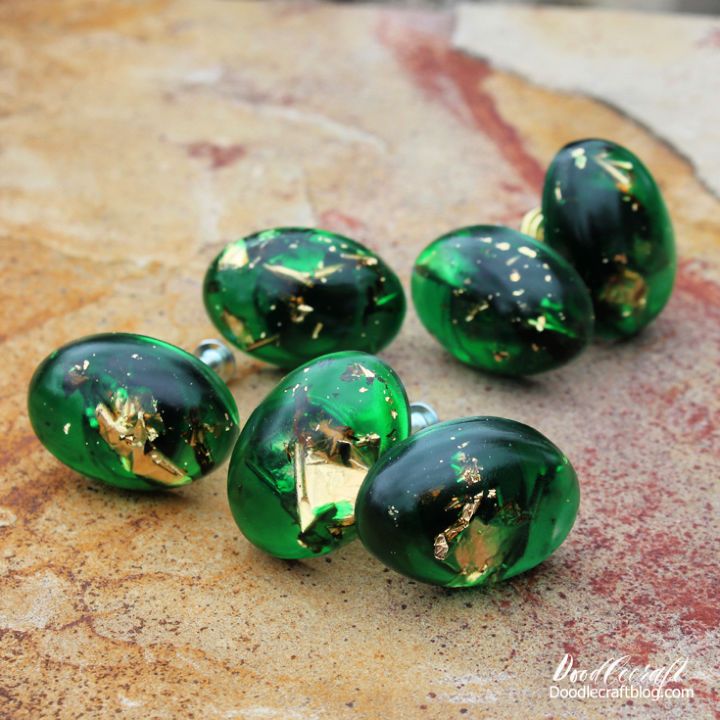
DIYing your own cabinet knobs can be an exciting and creative project. With the right supplies such as clear polyester casting resin, transparent green resin dye, gold leaf, knob hardware and e6000 glue, you can make glorious DIY gold leaf and emerald resin cabinet knobs that not only look beautiful but are highly unique.
The oval molds provide the base shapes for your DIY project while the transparent green resin dye provides a mesmerizing hue to offset alluring swirls of gold leaf that dazzle in the light. Making your own DIY cabinet knobs is easier than you think and they're sure to make a pretty addition to any furniture or decor style! doodlecraft
12. Making a Resin Art for Beginners
With resin crafts, DIY enthusiasts can create personalized gifts, like custom wall art and intricate ornaments, that impress and delight.
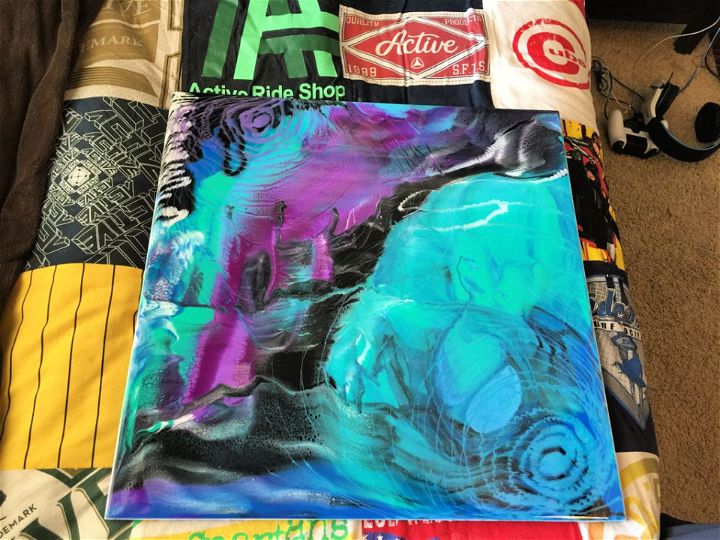
Crafting DIY resin art is a great way to start out in the world of art. With the right materials and a bit of help, anyone can create a beautiful and unique piece. To begin, basic materials like canvases, paint/spray paint, large popsicle sticks, latex gloves and resin are required.
Create your masterpiece by following each step with care: cut wood, prime it, plan colors, prepare canvas and cups; mixing resin, pouring resin into cups and onto the wood; heating it up with a heat gun then covering for the reveal. With DIY resin art for beginners accessible to try out any day of the week, let your creativity spark and discover something new! instructables
13. How to Make Statement Bookmarks With Resin
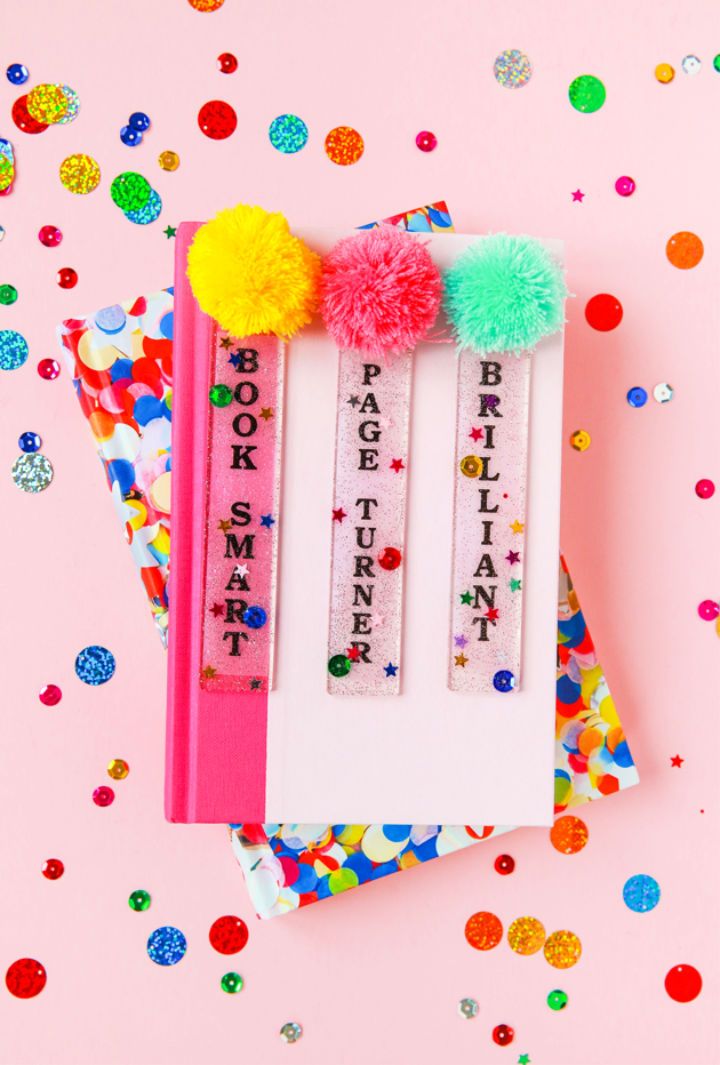
Make reading a priority in the New Year by creating DIY statement bookmarks with resin. This fun and simple craft is a great way to jazz up books and can be easily customized to your needs. To begin, you'll need a Brother P-Touch Embellish Elite printer, white ribbon, silicone bookmark mold, resin, gloves, glitter and other optional materials.
Follow the appropriate step-by-step instructions for each product, then add your favorite statement to give each bookmark its own unique flair. Once you're finished, you'll have special DIY statement bookmarks that will help make reading more enjoyable! thecraftedlife
14. Awesome DIY Resin Agate Serving Board
Elevate your DIY projects using epoxy resin crafts, providing unmatched durability, customization, and a professional finish for various things.
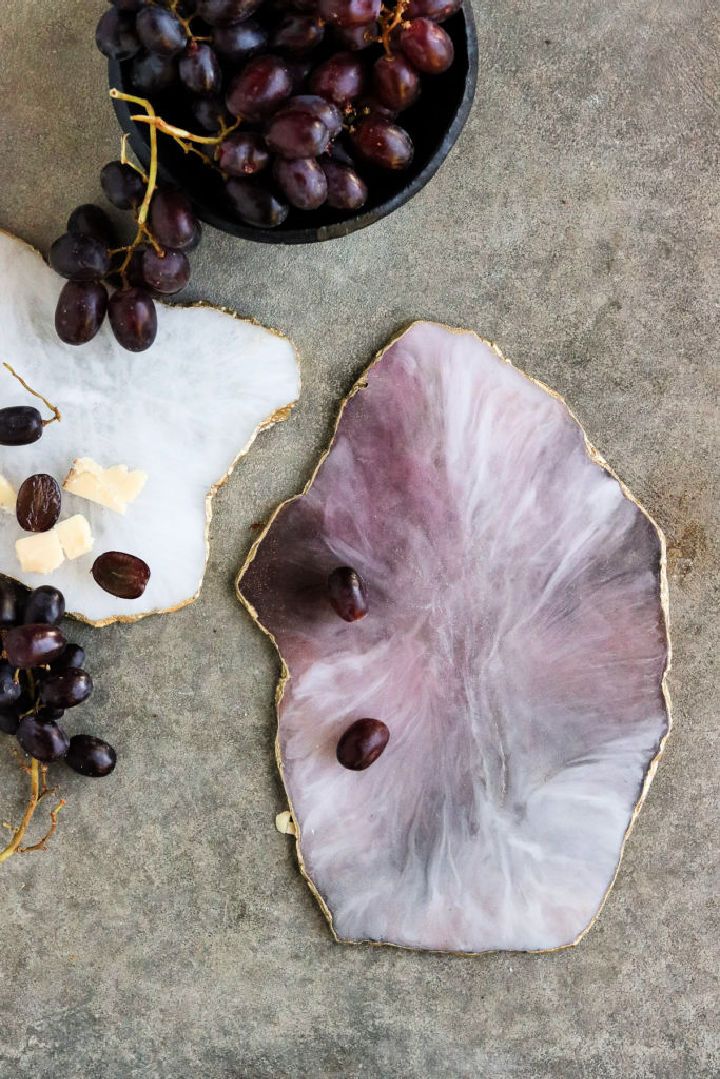
Craft your own DIY resin agate serving boards, perfect for entertaining in style! Start off by gathering a few supplies - a heat gun, silicone, paper and pencil, paints, clear plastic cups, popsicle sticks and bigger mixing sticks, level, gloves , artists knife and a respirator. Begin the project by making molds for an agate board and prepping the area. Move on to creating the white resin agate board with layers that alternate between the colors.
For a unique twist on this design add optional gold effect. Finish up with by assembling the layers for the DIY resin agate serving board and enjoy your beautiful creation! lilyardor
15. Build Resin Tiles for the Master Bathroom
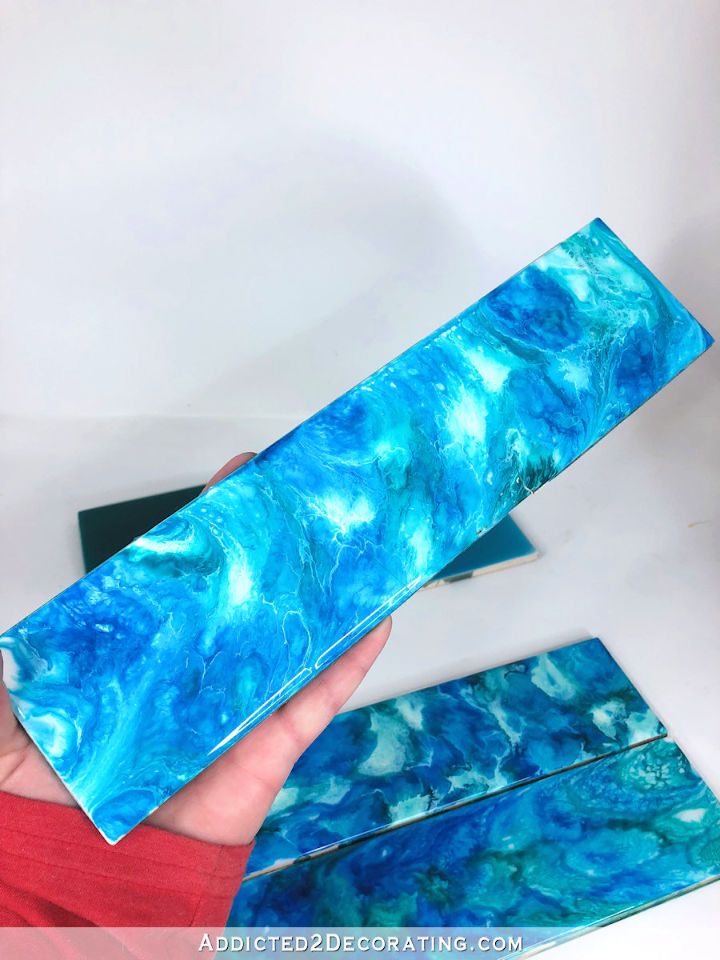
DIY resin tile ideas are a great way to give your master bathroom a stylish facelift. We recently tested out five different ideas and the results were unexpectedly beautiful. The first three used clear resin and that was combined with blue alcohol inks, white or both. The next two used resin tinted with green, blue and either turquoise or pearl tints.
With these DIY tiles, you can create gorgeous effects step-by-step to remodel your master bathroom and make it look like it has come straight out of a home remodeling magazine. addicted2decor
16. Cool Paper and Resin Succulent Frame
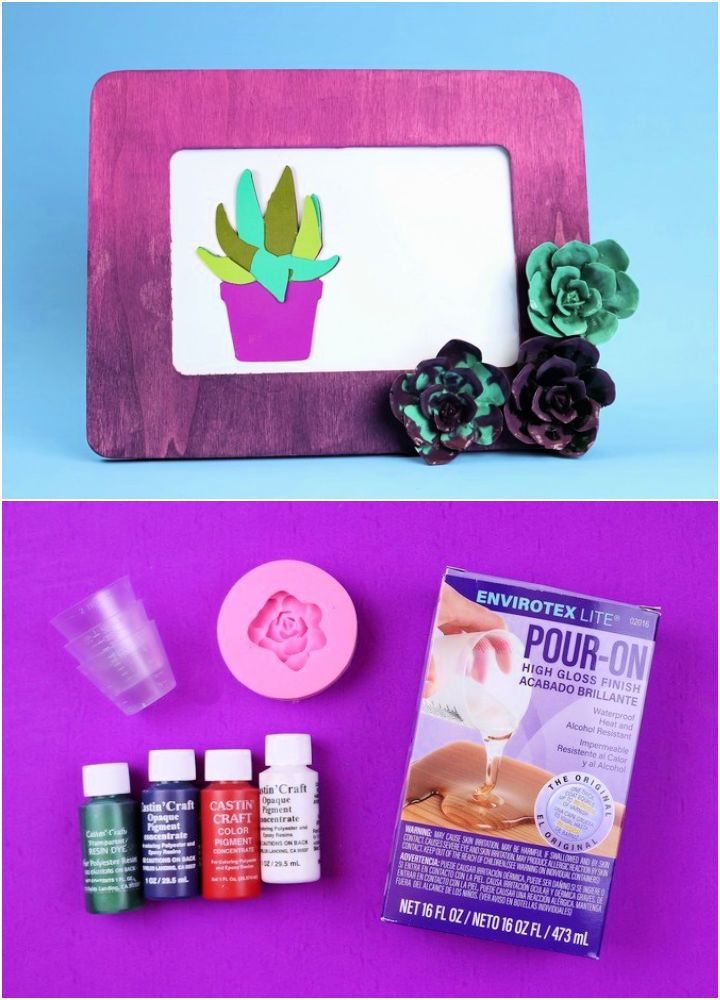
Make a DIY paper and resin succulent frame for your home decor project! Gathering all supplies for the job, such as EnviroTex Lite, mixing cups and stir sticks, resin pigments, succulent silicone molds, long arm lighters, craft frames, craft paint, hot glue guns and glues might seem daunting - but with this step-by-step tutorial on how to make a paper and resin succulent frame it will be surprisingly simple.
Utilize your Cricut machine to cut cardstock in shades of purple and green along with craft glue to carefully assemble the elements of your homemade frame. With just a few tools and some patience you'll have a new flowery addition to your home in no time! madincrafts
17. How to Make a Resin Photo Holder at Home
By mastering the art of resin crafts, artists can replicate natural materials like wood and stone, adding texture and depth to their work.
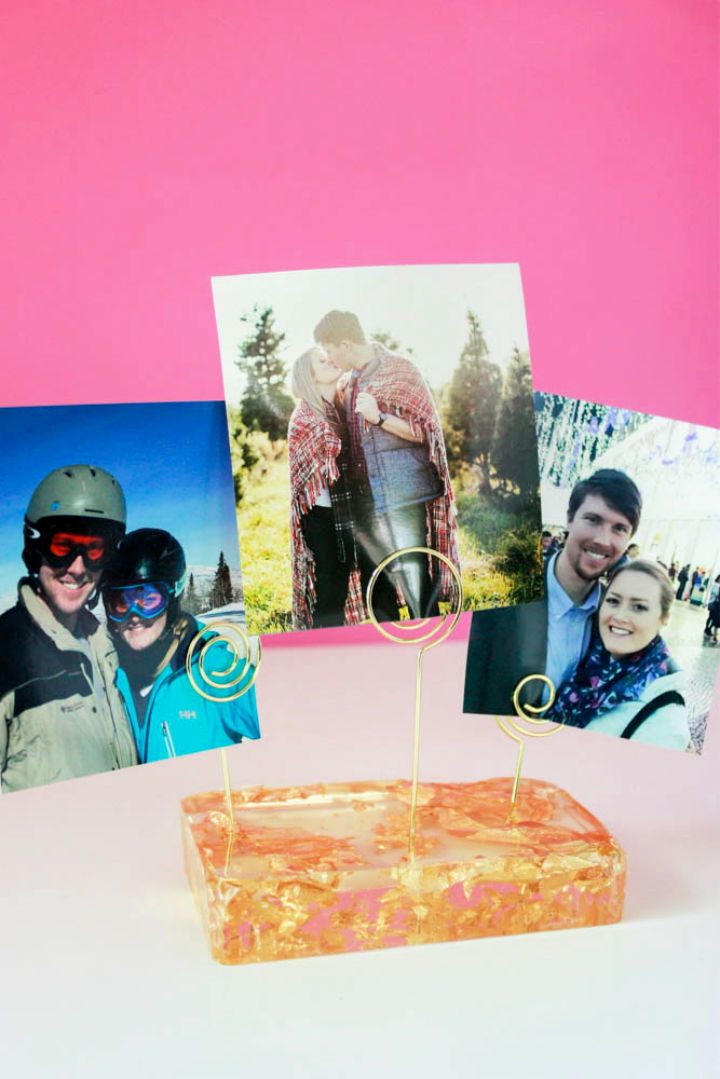
Create a DIY resin photo holder with easycast clear casting epoxy, wire photo clips, gold leaf, rubber gloves, mixing cups, stir sticks and a plastic mold. Start by breaking apart the gold leaf and adding it to the plastic mold. Mix equal parts of the hardener and resin in separate cups for 2 minutes each before pouring into the mold.
Add in more gold leaf as desired and then insert your metal photo rings into cardboard for them to stand upright. Once dry, you'll have a pretty DIY resin photo holder that you can use to showcase your favorite photos! amber oliver
18. Simple DIY Resin and Wood Coasters
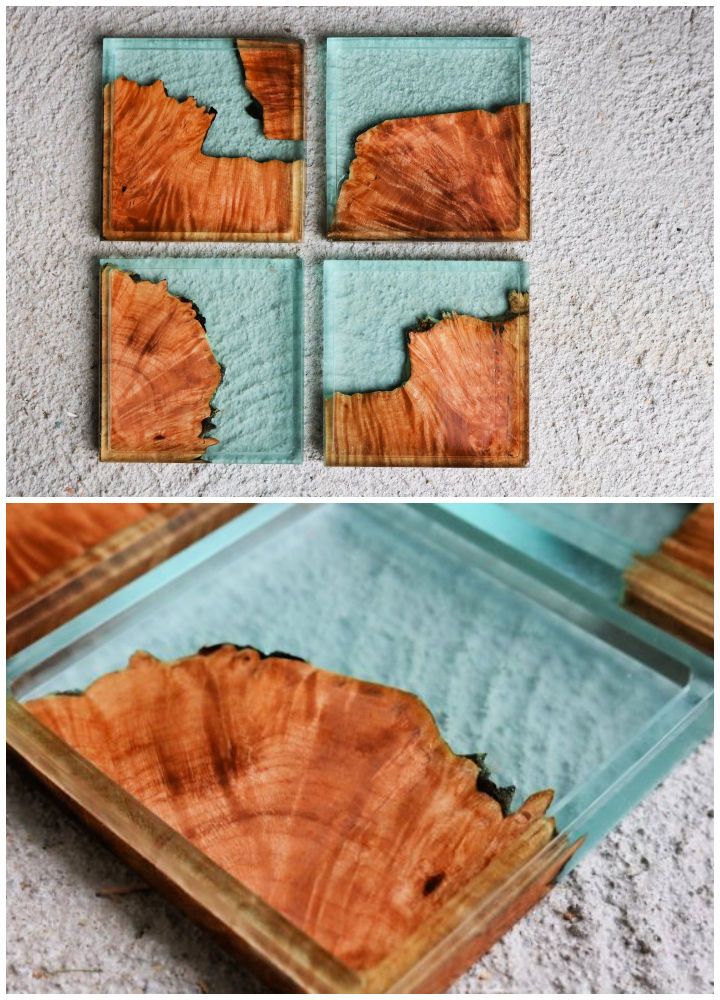
Get creative with your DIY projects and make your own stylish resin and wood coasters. You'll need some epoxy resin, wood pieces that fit in a silicone mold, and a few sanding materials for the process. Once you have those items, start by clamping the wood pieces into the molds. Mix the epoxy according to directions, pour it into the molds until full, and use a torch or heat gun to remove any air bubbles.
Cure and de-mold once cooled, then sand with 80 grit sanding discs until smooth before continuing up to 320 grit. Create your own customized DIY coasters and show them off with pride! diyhuntress
19. Create Fall Leaf Resin Purse Charms
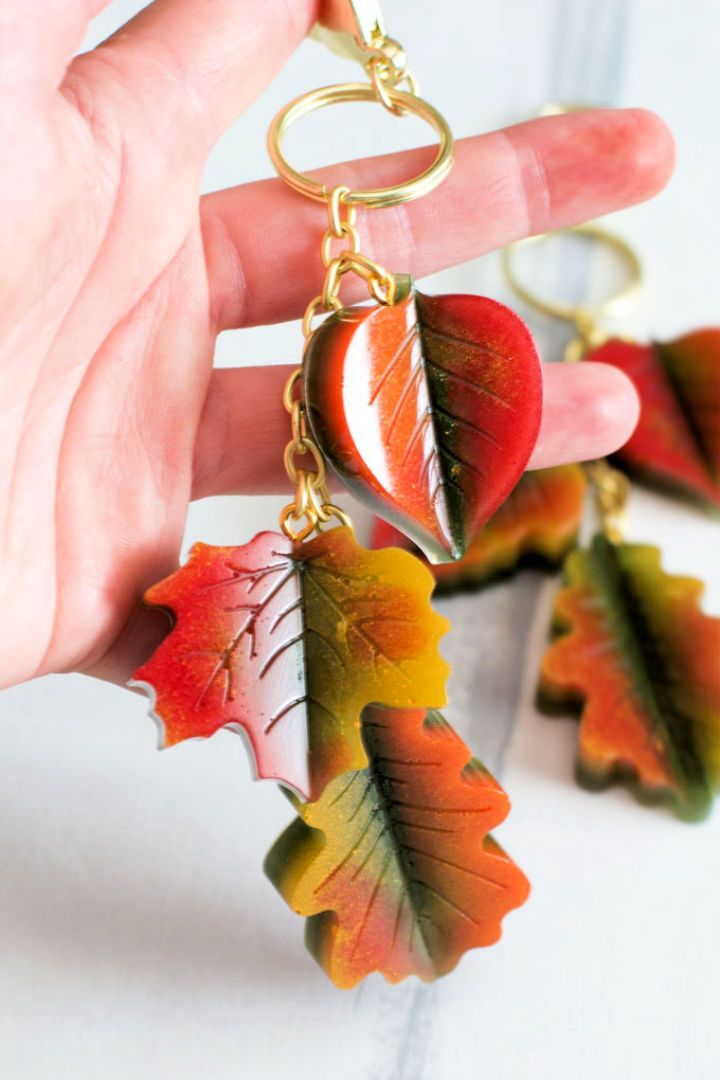
Create DIY fall leaf resin charms to add a touch of seasonal beauty to your fall wardrobe! To make them, you'll need leaves silicone mold, Easycast Clear Casting Epoxy, acrylic craft paint in red, yellow and green, cups, stir sticks, straw or kitchen torch, disposable work surface, gloves, small gold eyelet screws and drill with small drill bit. Start by mixing equal parts of resin and hardener in a clean measuring cup.
Stir for two minutes before transferring it into another clean cup. Divide the resin evenly into thirds into separate cups and pour a small amount of the yellow-tinted resin into each section of the leaf mold. Follow along to create DIY fall leaf resin charm that your friends will envy! resincrafts
20. Quick and Easy DIY Wood and Resin Trinket Tray
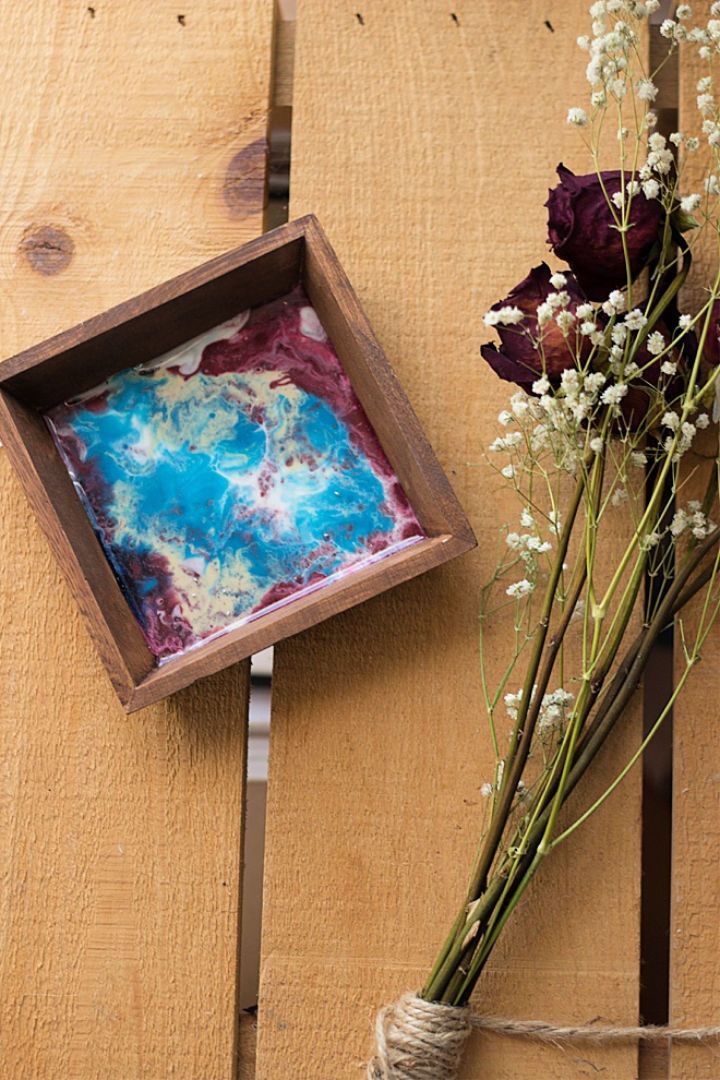
Crafting DIY resin wood trinket tray is a great way to create beautiful gifts for your bridesmaids. With the right supplies, you can make a gorgeous wooden tray with a glossy marbled finish that will add charm to any room. Supplies include sticks, resin, acrylic paint, straw and wood stain for staining the box.
Start by staining the wood and then proceed to mixing the resin and paint. After that, fill up the cups with the mix and blow it with the help of a straw. The result is an eye-catching curved design that can hold jewelry or other trinkets in a stylish way! somethingt
21. Wood and Epoxy Resin Inlay Serving Tray
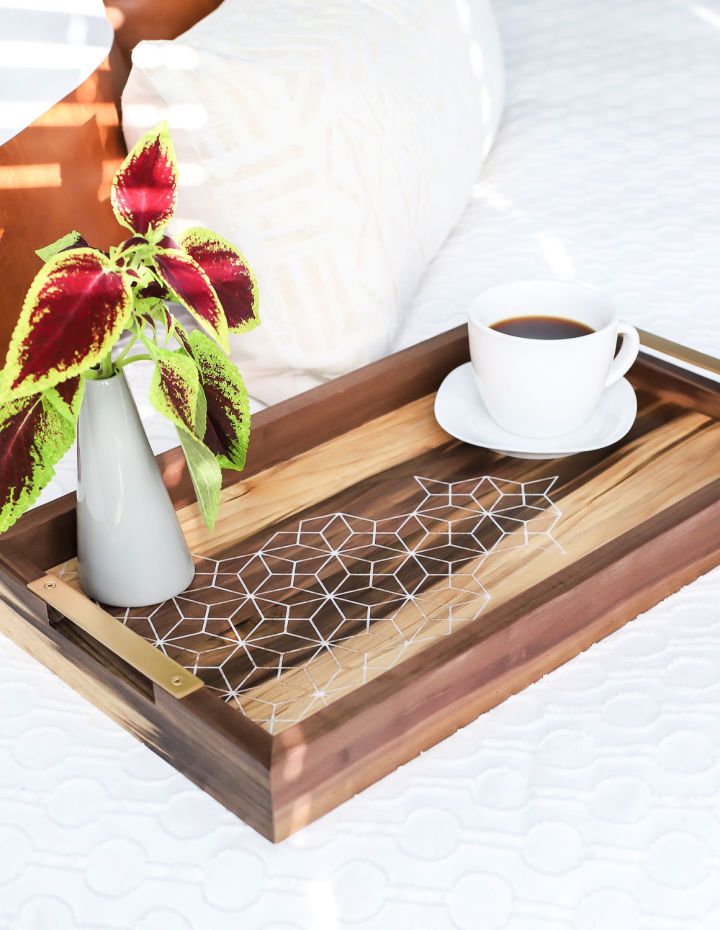
Discover the endless ideas of epoxy resin crafts, a versatile medium perfect for creating stunning, long-lasting art pieces and home decor.
Create a DIY wood and epoxy resin inlay coffee serving tray that's both beautiful and useful. Start with a pile of scrap wood to fashion the basis of the tray, and use epoxy resin to provide a smooth, glossy finish that really makes the piece shine. Don't forget to add some extra materials like steel scraps for decoration which adds an extra bit of personality to your stunning DIY creation.
Armed with these supplies and a bit of creativity, you'll have a unique wooden coffee serving tray perfect for any occasion. jenwoodhouse
22. Make a Resin Ocean Serving Tray to Sell
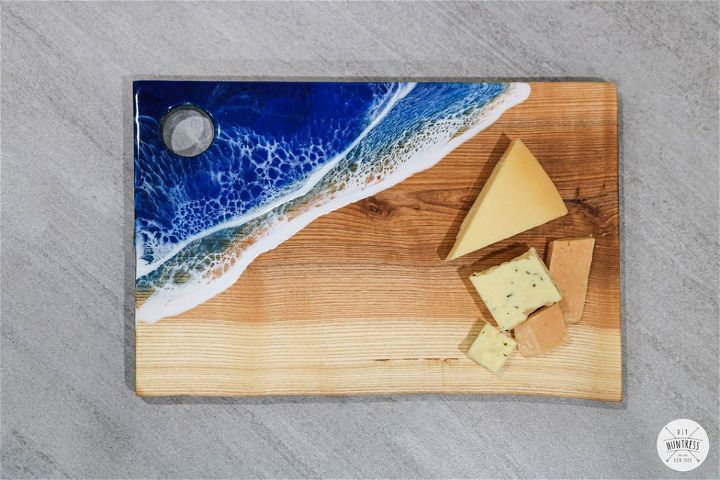
For diy enthusiasts, creating a resin ocean-inspired serving tray to sell can be a fun and rewarding project. With the right supplies – including MAS table top epoxy and live edge wood for the tray – this project can come together in 12 easy steps. Begin by choosing and prepping the board, then move on to drilling handles, sanding, prepping for pour as well as prepping resin.
After these steps, start with the pour, add clear resin and sea foam and create waves along with additional details using an acrylic brush before repeating layers if desired. To complete, simply remove tape and sand accordingly! If you're looking for an interesting sale item or a great gift idead this DIY resin ocean serving tray is definitely worth considering. instructables
23. Amazing DIY Fluid Resin Art
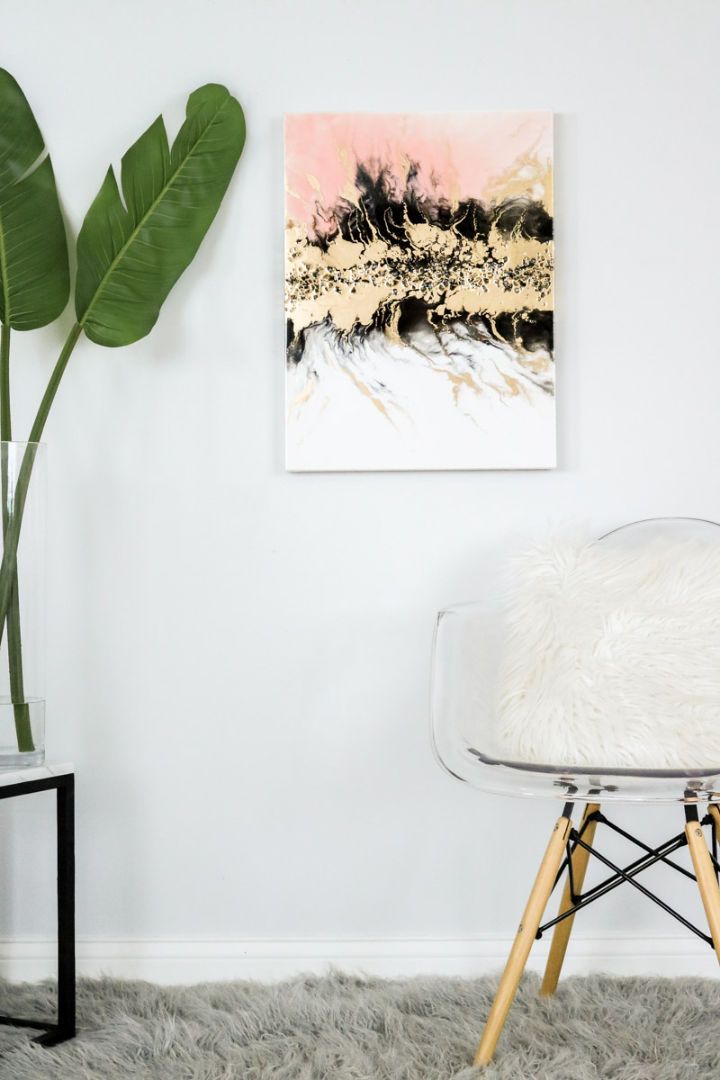
The versatility of resin crafts makes it a popular choice for both experienced and novice crafters, offering endless artistic expression ideas.
DIY fluid resin art is an exciting and creative way to add a unique touch to your home decor or a perfect gift for someone special. To get started, you'll need basic supplies such as toothpicks, resin, ice cream sticks, a heat gun, acrylic paint, gold pigment or spray paint, gloves, measuring cups, canvas or wood, plastic cups, broken crystals or glass pebbles, paper towels and a plastic table cloth.
To begin making DIY fluid resin art you must first prep your work area then gather all the supplies needed. Next is mixing up the resin and finally pouring your epoxy resin into your desired shape or onto a canvas for a stunning pour-on epoxy piece. With DIY fluid resin art there's so much fun to be had and plenty of memories along the way! lilyardor
24. Faux-Watercolor Resin Feather Pendants
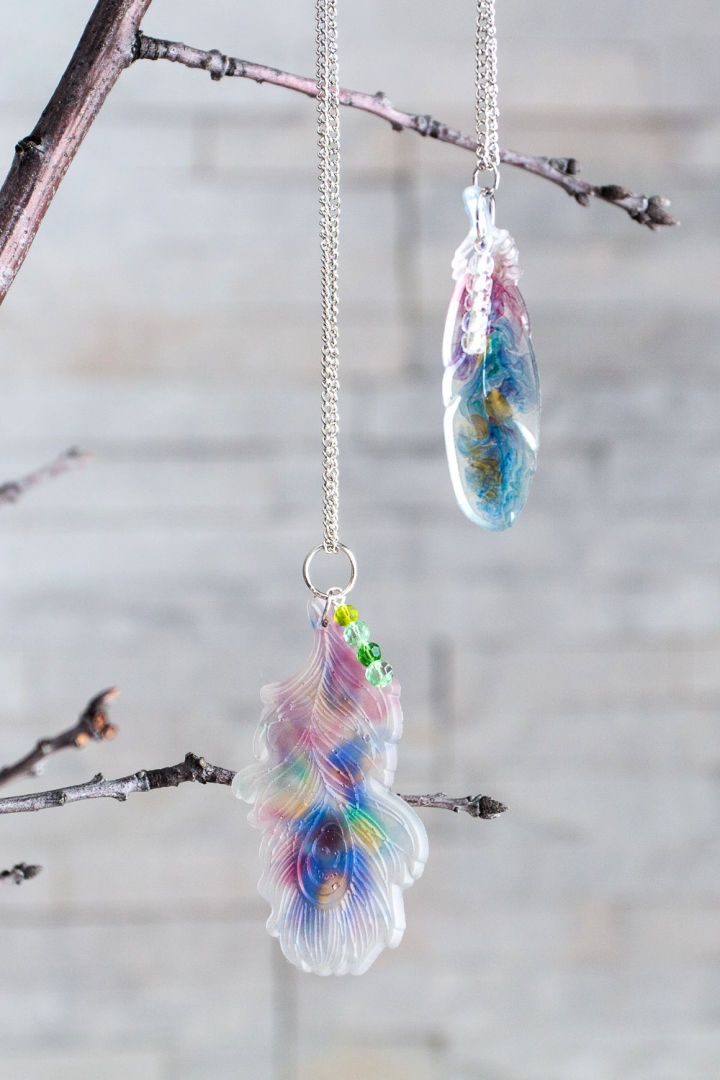
Creating diy faux-watercolor resin feather pendants is both easy and affordable. It's a great way to bring art into your pendants and show off creativity with statement pieces. All you need to get started are some silicone molds, mold release/conditioner, clear casting epoxy, colors (dyes) of your choice, toothpicks and the necessary hardware.
Don't forget the disposable work surface and wear gloves while handling resin. To make the faux watercolor effect, simply mix colors and use a toothpick to create swirls if desired! When you're done, attach hardware for earrings or necklace pendants. Enjoy! resincrafts
25. Homemade Sequined Resin Tray
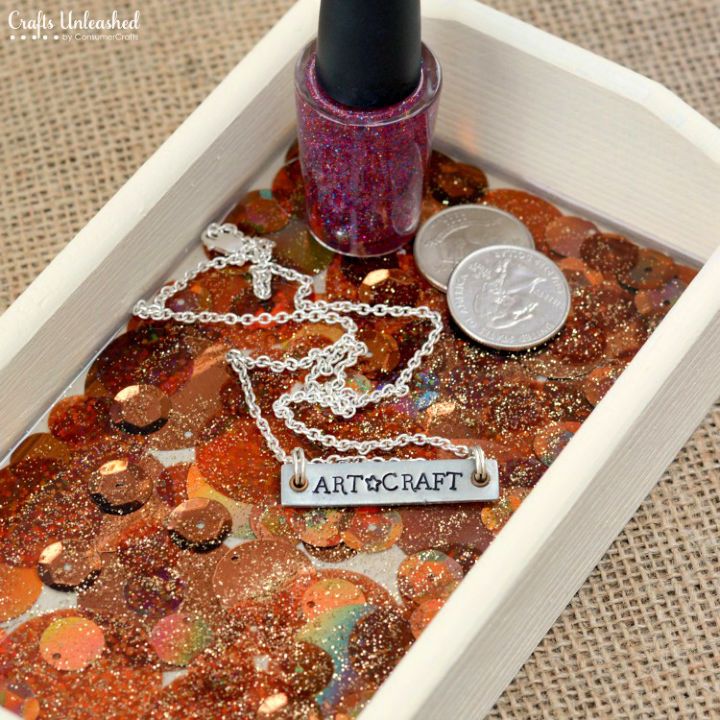
A homemade sequined resin tray is the perfect way to spruce up your home or office. The best part about these trays is that they are so easy to make. All you need to do is find a tray, paint it with nail polish, and then seal it with resin! Making crafts is not only a great way to pass the time, but it can also be a great way to make some extra cash. If you are looking for an easy and cost-effective craft that will leave people in awe, then this project is just for you! This is a great way to make your own decorative tray. It takes some time to make, but it will be worth it. If you are crafty, this is the perfect project for you!
26. Make Clear Casting Resin Paperweights
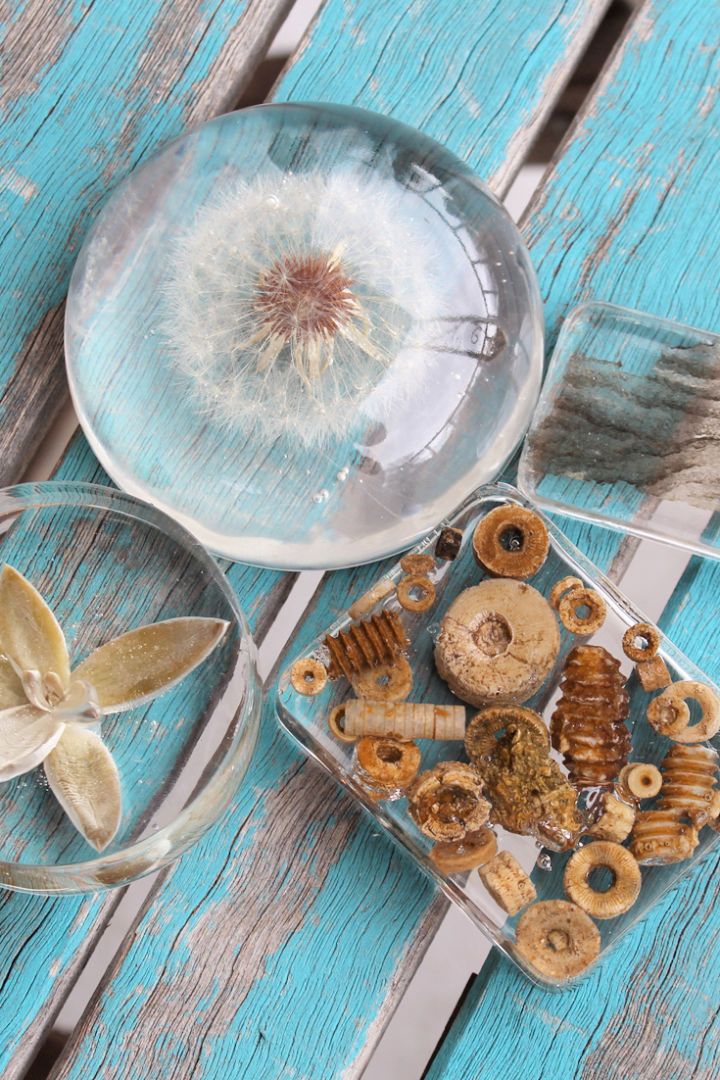
Making DIY clear casting resin paperweights is a fun and rewarding craft project. All you need are the basic components of polyester casting resin, mixing cups, molds, mold release and some items to embed (such as dandelions, succulents or fossils). Not only is it easy and affordable but it's also a great way to express your creativity. The end result will be a beautiful paperweight featuring natural elements that make for a truly eye-catching decor piece. resincrafts
27. Make Your Own Resin Autumn Leaf Pendant
Epoxy resin crafts have gained immense popularity, allowing artists to create unique 3D effects in jewelry, sculptures, and captivating wall art.
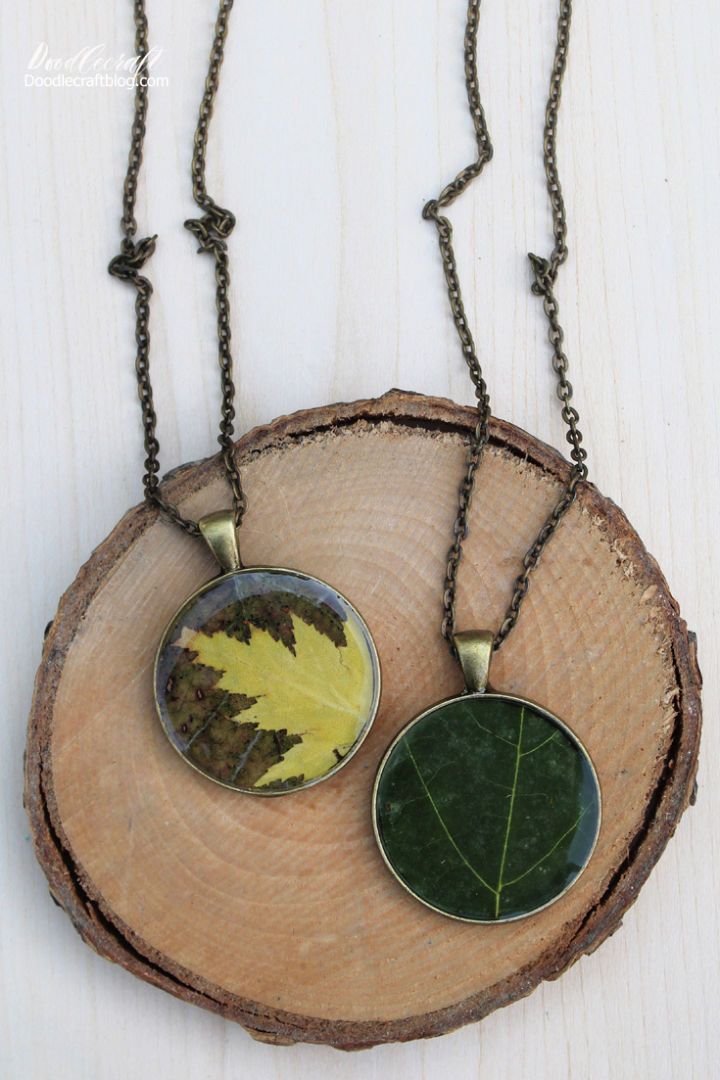
Creating a DIY resin autumn leaf pendant is an affordable and fun craft activity for couples to do together! You will need envirotex jewelry resin, some leaves, and a jewelry bezel. Start by collecting the leaves and press them flat between layers of paper, cardboard, and books. Once the leaves are pressed flat, use a sealer like mod podge to paint the bezel before you place on the leave.
Then coat the top with another layer of sealer. Next, mix up your resin and carefully pour it into the bezel. Finally, use a mini torch or a heat gun to pop any bubbles that have surfaced. With just these simple steps you can create your own DIY resin autumn leaf pendant! doodlecraft
28. Gorgeous DIY Alcohol Ink Resin Keychain
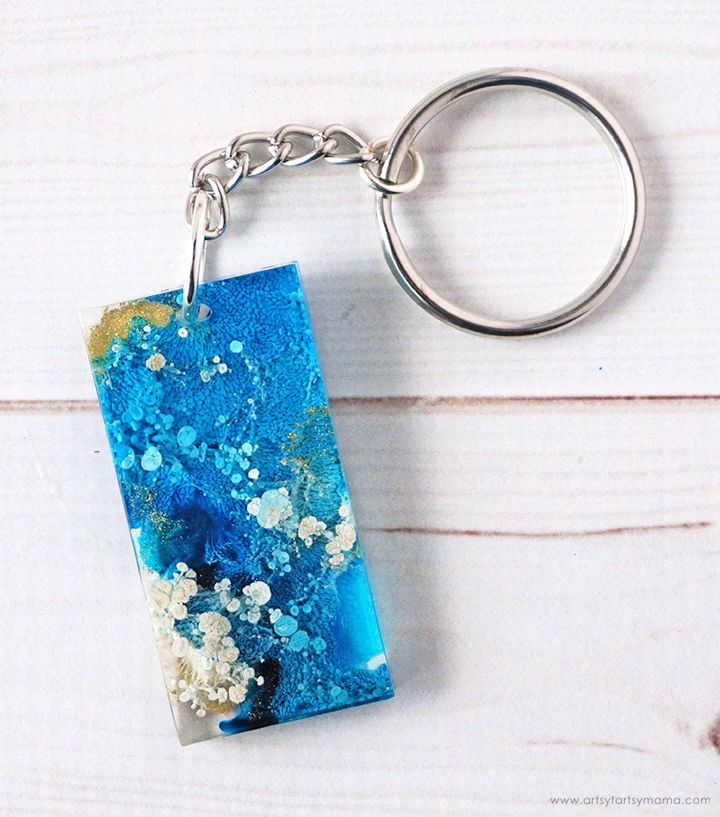
Making DIY alcohol ink resin keychains is a fun and affordable craft that you can do from the comfort of your own home. You will need easycast clear casting epoxy, mold conditioner and release spray, measuring cups, stirring sticks, disposable gloves, alcohol inks, jewelry mold, jump rings, jewelry pliers, and key rings. To get started pour the resin into each of your molds with a stirring stick and avoid overfilling.
Add one drop of alcohol ink on top of the uncured resin; followed by adding one drop of white ink to the center. Lastly add an additional drop of colored ink over the white ink drops and leave it to cure in an undisturbed area for 12-24 hours. Once complete you'll have a unique DIY alcohol ink resin keychain! artsyfartsymama
29. Making Resin Hair Clips for Beginners

Looking for a simple way to spice up your accessories? Making diy resin hair clips is the perfect project for beginners. You'll need resin, a clip mold and clips, glitter, e-6000 glue and some disposable materials like gloves, paper cups, and wooden stir sticks. Start off by carefully mixing your resin according to the instructions given. Once mixed, add glitter to the mixture cup. Next, pour the resin/glitter into the mold without overflowing.
When the resin has cured and hardened in the mold overnight, remove it from the mold. Then attach your metal clips to an old piece of cardboard before applying a thin coat of e-6000 glue on top. After it dries completely you're ready to wear your stylish DIY resin hair clips! thecraftedlife
30. Custom Wooden Resin Pendant
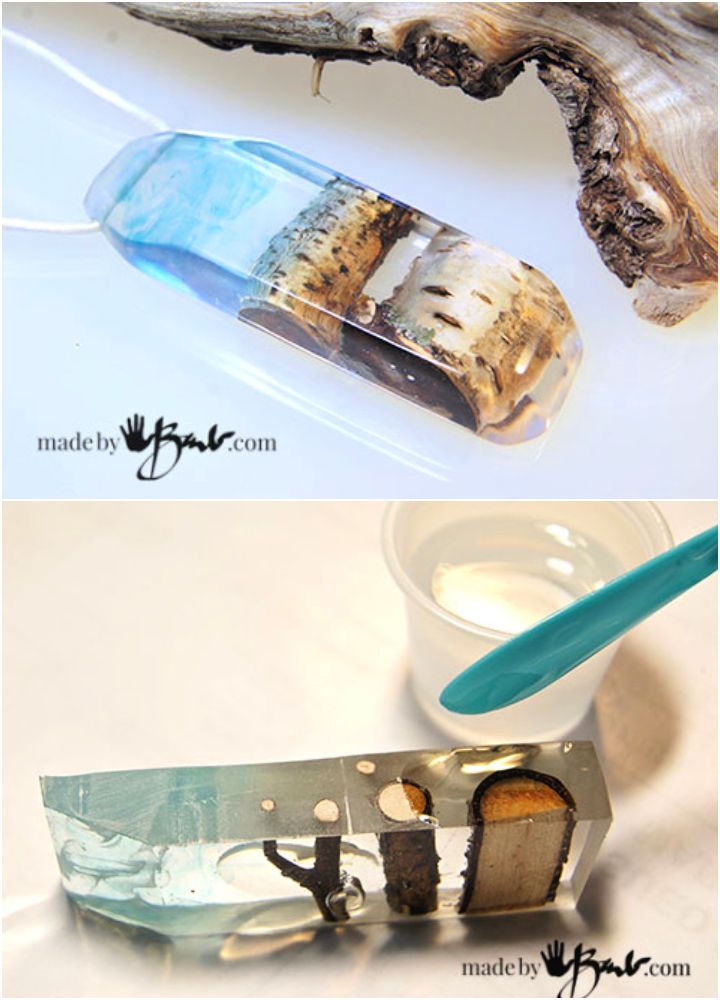
Crafting diy wood resin pendants is a great way of making stand-out jewelry with a super unique edge. All it takes is some natural wooden branches, a small shallow square silicone cake mold and resin to create cute and simple pieces.
With the right materials, minds open to the extraordinary array of textures and designs that nature offers for these showstopping pendants – perfect for completing any stylish look. madebybarb
Conclusion:
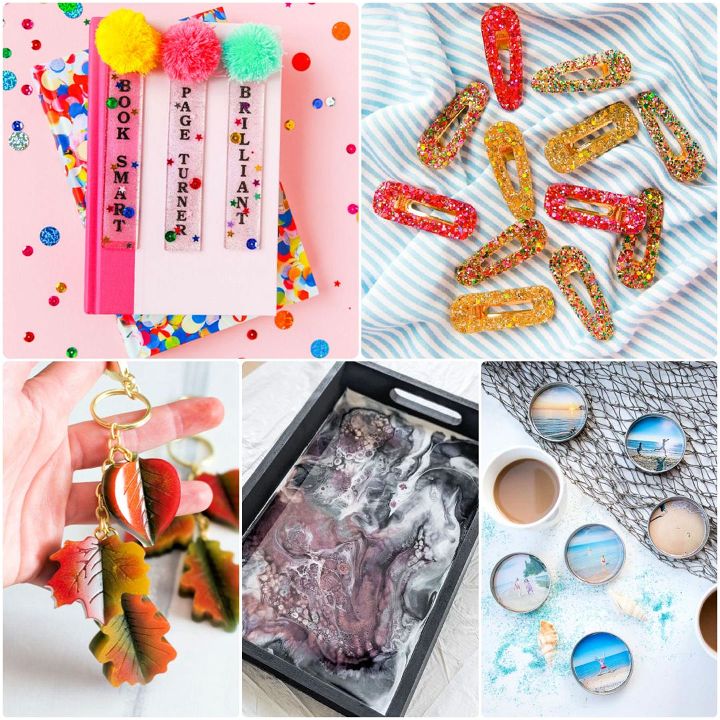
In conclusion, these creative resin crafts offer a multitude of unique ideas, ranging from DIY projects to stunning epoxy accessories. With options like resin trays, photo coasters, and captivating jewelry, there's no limit to what you can achieve with this versatile medium. So, whether you're new to epoxy resin or already have experience, dive into the world of resin projects and find inspiration for your next artistic pursuit. Remember, the only limit is your imagination, so embrace the epoxy revolution and unleash your inner craftsperson.

