Making a DIY 4th of July wreath is a fantastic way to add a personal touch to your holiday decorations. This patriotic craft project is not only enjoyable but also allows you to showcase your creativity. By making your own 4th of July wreath, you can achieve a unique look that perfectly complements your festive theme. This easy-to-follow guide will help you craft a stunning wreath using readily available materials.

Start by gathering materials like a wreath frame, ribbons, decorative stars, and other red, white, and blue embellishments. With these supplies, you'll be able to create a beautiful and festive 4th of July wreath that will impress your friends and family. Follow the step-by-step instructions for a straightforward and rewarding crafting experience.
Ready for more details? Let's move on to the next section, where we dive into the step-by-step process of making your 4th of July wreath.
Materials You'll Need:
- 14-inch Wire Wreath Form: Available at Dollar Tree. You can choose from silver, gold, or black.
- Pipe Cleaners: Cut them in half to use in bundles.
- Deco Mesh from Dollar Tree: Two rolls each of red, white, and blue colors.
- Bowdabra: This helps in making the deco mesh bundles.
- Hot Glue Gun: Necessary to attach the decorations.
- Sign and Decorative Items: Choose a patriotic sign and other decorations like stars or flags.
Each of these materials plays a critical role. The wire form provides a sturdy base, while the deco mesh adds color and volume. Pipe cleaners help attach the bundles securely, and hot glue ensures the decorations stay put. The Bowdabra is optional but makes the process easier by organizing your bundles before securing them.
Step by Step Instructions
Make a gorgeous DIY 4th of July wreath with our step-by-step instructions. Perfect for holiday decor! Prepare deco mesh, make bundles, add a sign & bow.
Step 1: Prepare Your Deco Mesh
First, you need to cut your deco mesh into 12-inch strips. Deco mesh from Dollar Tree is quite apt for this project due to its affordability and availability.
- Roll Each Strip: Start at one end and roll it about three times to hide the cut edges. This reduces fraying and gives a neat finish.
- Ruffle the Center: Once both ends are rolled, scrunch the center to form a "cruffle" – a combination of curl and ruffle.
Make sure to prepare equal amounts of red, white, and blue cruffles.
Step 2: Make Mesh Bundles
Using the Bowdabra, place three cruffles in each bundle, alternating colors to ensure an even distribution of red, white, and blue.
- Assemble the Bundles: Place one cruffle in the center and two on either side. Adjust them to make sure they all have their space to shine.
- Secure with Pipe Cleaners: Lift the bundle out from the Bowdabra, and twist a pipe cleaner around the base tightly. Your bundles should now be big and fluffy.
Step 3: Attach Bundles to the Wreath Form
Attach each completed bundle to the wire wreath form.
- Placement: Attach five bundles per section (between each crossbar of the wreath form).
- Securing the Bundles: Twist the pipe cleaners around the two bars in the center of the wreath form. Secure them tightly and tuck the pipe cleaners back into the mesh to keep the back neat.
Step 4: Adding the Sign
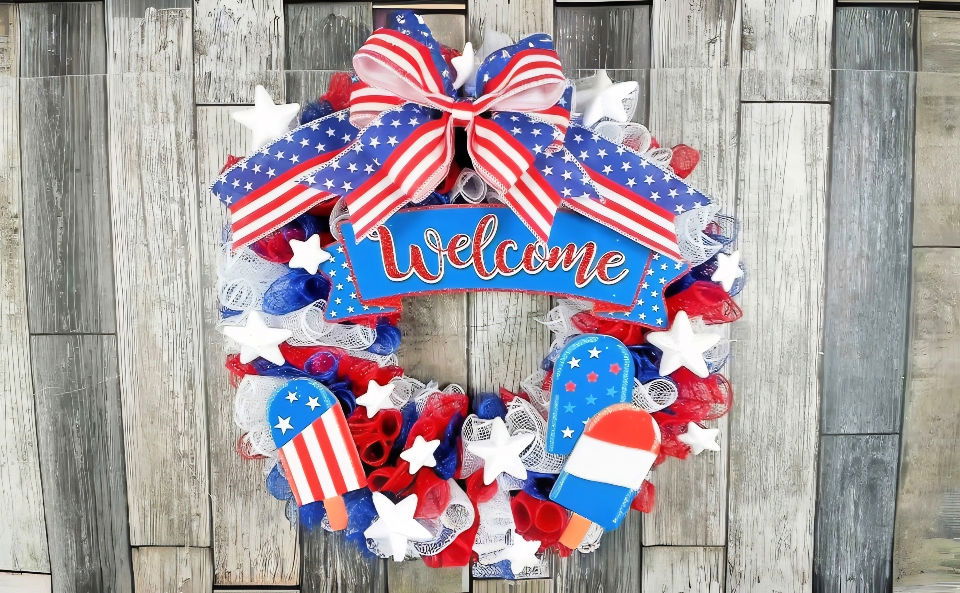
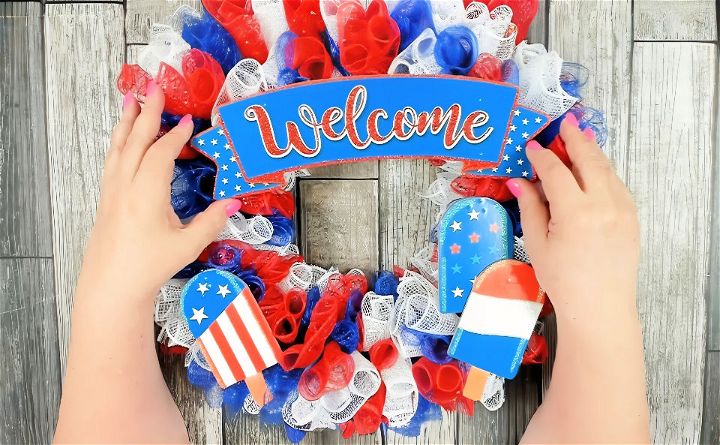
For this wreath, I chose a beautiful "Welcome" sign with an ice cream theme, which fits perfectly with the Fourth of July spirit.
- Disassemble the Sign: If needed, remove any ribbons or attachments.
- Attach Pipe Cleaners: Hot glue two pipe cleaners on the back of the sign. Secure them by gluing a small piece of ribbon over the pipe cleaners for extra stability.
Once the glue is set, attach the sign to the wreath form by feeding the pipe cleaners through the deco mesh and securing them on the back.
Step 5: Make and Attach the Bow
For the bow, I chose an American flag ribbon.
- Cut Ribbon: Cut one piece at 22 inches (for the tails), four pieces at 16 inches, and one piece at 2.5 to 3 inches.
- Assemble the Bow Using Bowdabra:
- Place the longest piece in the Bowdabra for the tails.
- Layer each of the 16-inch pieces one by one, folding them to keep the pattern consistent.
- Secure everything with a pipe cleaner, leaving enough length to attach the bow to the wreath form.
- Wrap the small piece around the center of the bow to hide the pipe cleaner, glue it down securely.
Attach the bow to the top of the wreath.
Step 6: Final Touches
To give the wreath a finishing touch, I added white stars from a table scatter set bought at Dollar Tree.
- Placement: Place the stars around the wreath.
- Attach with Hot Glue: Secure each star by holding it in place until the glue sets.
And there you have it! A beautiful, thick, and vibrant patriotic wreath ready to hang for the Fourth of July, Memorial Day, or even as a year-long Americana decoration. This project is not only fun but adds a personal touch to your holiday decor.
FAQs About DIY 4th of July Wreath
Discover answers to common questions about DIY 4th of july wreaths, including tips and tricks to create festive, patriotic decorations.
Yes, there are many simple designs that are perfect for beginners. One of the easiest is the ribbon wreath, where you cut strips of ribbon and tie them around a wreath form. Another beginner-friendly option is the clothespin wreath, where you paint clothespins in patriotic colors and clip them around a wire form.
Absolutely! There are plenty of DIY wreath ideas that require minimal crafting skills. For example, you can create a beautiful wreath by wrapping a foam form with strips of fabric or tulle in red, white, and blue. You can also buy pre-made bows and simply attach them to a wreath form for an instant decoration.
To ensure your wreath lasts for years to come, store it in a cool, dry place away from direct sunlight when not in use. Wrap it in tissue paper or place it in a wreath storage bag to protect it from dust and damage. Avoid using perishable materials like fresh flowers if you plan to reuse the wreath.
Adding lights to your wreath can create a stunning effect, especially in the evening. Consider intertwining a string of battery-operated LED lights in red, white, or blue around your wreath. Make sure the battery pack is concealed but accessible for when you need to turn the lights on or off.
For an eco-friendly wreath, use natural materials like twigs, dried flowers, and leaves painted in patriotic colors. You can also repurpose old fabrics or use biodegradable elements like paper or felt. This not only reduces waste but also gives your wreath a unique, rustic charm.
Conclusion:
Wrapping up, making a DIY 4th of July wreath is a fun and rewarding way to celebrate Independence Day. By following these steps, you can craft a beautiful and festive decoration that showcases your patriotic spirit. Whether you hang it on your door or display it indoors, your handmade wreath will bring joy to your celebrations.
Related DIY Projects and Ideas:
Explore related DIY projects and ideas for home improvement, crafts, and creative decorations. Get inspired to start your next DIY project today!
- Burlap Wreath: Craft a rustic burlap wreath at home with these simple steps. Perfect for seasonal decor.
- Fall Wreath: Create a cozy fall wreath to brighten your door this season with these DIY ideas.
- Wood Burning: Explore easy wood burning project perfect for beginners. Get inspired with patterns and tips.
- Faux Fireplace: Build a stylish faux fireplace on a budget with this DIY idea. Enhance your living space easily.
- Welcome Sign: Make a personalized DIY welcome sign to greet your guests in style.


