Making a DIY cat bed can be a fun and fulfilling project that provides a cozy spot for your furry friend. This task involves simple materials and basic sewing skills, making it manageable for anyone interested. Making a cat bed yourself allows customization in design, size, and fabric to suit your cat's preferences and home decor. Plus, it's a great way to use up some leftover fabric scraps creatively.
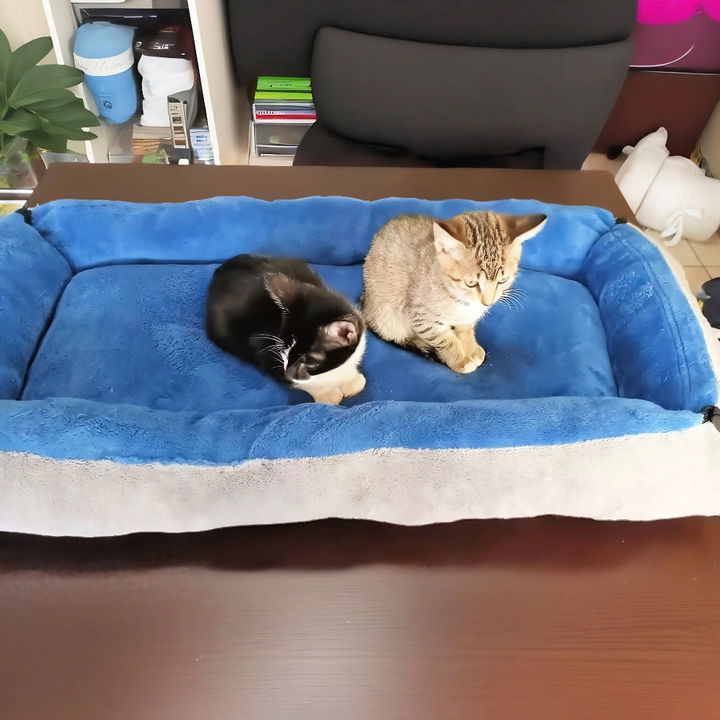
When crafting a DIY cat bed, it's crucial to focus on comfort and durability. Choose soft, washable fabrics and sturdy filling materials to ensure the bed lasts. Adding personalized touches, like a monogram or your cat's favorite toys, can make it even more special. Follow clear step-by-step instructions to keep the process straightforward. Next, explore the materials needed and detailed crafting tips to get started on your unique project.
Materials You'll Need
Before diving into the process, let's discuss the materials. Each item serves a unique purpose, ensuring the cat bed is cozy and durable.
- Two Different Color Blankets: Using different colors adds a visual appeal. These blankets provide the main fabric for the bed.
- Batting: This stuffing makes the bed puffy and comfortable for your cats.
- Eight Pieces of Ribbon: These help to finalize the bed's structure.
Step by Step Instructions
Learn how to make a cozy DIY cat bed with our step-by-step instructions, which include cutting, sewing, and final touches for a perfect finish.
Step 1: Cutting the Material
Measure and Cut
Start by cutting the fabric. My cat beds were 100 cm by 65 cm and 80 cm by 65 cm. Feel free to adjust the sizes to suit your needs.
- Lay the Blanket Flat: Place your two different color blankets flat on a table.
- Measure and Mark: Use a ruler to measure and mark the fabric according to your desired dimensions.
- Cut: Cut both pieces to the marked dimensions.
Step 2: Pinning the Fabric
Prepare for Sewing
Now, pin the blankets together. Make sure you pin them with the face sides facing each other.
- Align the Fabric: Place the two colored blankets on top of each other, faces touching.
- Pin Along the Edges: Use fabric pins to secure the blankets together along the edges.
Step 3: Shaping the Corners
Measure and Cut Corners
Next, it's time to shape the edges by cutting the corners.
- Measure 15 cm: From each corner of the blanket, measure 15 cm along both adjacent edges.
- Mark and Cut: Mark these points and cut the corners off.
Step 4: Adding the Ribbon
Secure the Ribbons
Ribbons are an essential part of the process. They’ll help hold the bed's structure.
- Place Ribbon at Corners: Take a strip of ribbon and place it on the inside of the corner.
- Repeat for All Corners: Repeat this step for all eight corners.
Step 5: Sewing the Edges
Sew Around the Blanket
Now, it’s time to sew the blankets together, leaving a small gap for stuffing.
- Start Sewing: Sew all around the edges of the blanket.
- Leave a Gap: Remember to leave a small gap which you’ll use to insert the stuffing later.
Step 6: Turning the Fabric
Prepare for Stuffing
After you've sewn the blankets together, turn the material right side out through the gap you left.
- Turn Inside Out: Carefully turn the fabric inside out through the gap.
- Flatten It Out: Make sure to flatten and smooth out the fabric.
Step 7: Making the Rectangle
Mark and Sew
Next, you need to make a rectangular shape in the center of the blanket for the stuffing.
- Mark the Rectangle: Use a fabric marker to draw a rectangle from corner to corner.
- Sew Along the Lines: Sew along the marked lines, leaving another gap for stuffing.
Step 8: Stuffing the Bed
Add the Batting and Stuffing
Stuffing the bed is a fun part and adds the cushiness to it.
- Start with the Center: Begin by stuffing the rectangular center. Use a mix of stuffing and batting.
- Move to the Edges: After finishing the center, move to the edges, stuffing them completely.
Step 9: Sealing the Gaps
Sew Up the Openings
Once the bed is stuffed to your satisfaction, it’s time to seal the gaps.
- Sew the Center Gap: Start by sewing up the gap in the center.
- Sew the Outer Gaps: Then sew up the gaps along the outer edges.
Step 10: Final Touches
Secure the Ribbons
All that’s left now is to tie the ribbons, securing the bed’s structure.
- Tie the Ribbons: Tie each ribbon at the corners.
- Secure the Corners: Ensure the ribbons are tightly knotted to secure the corners.
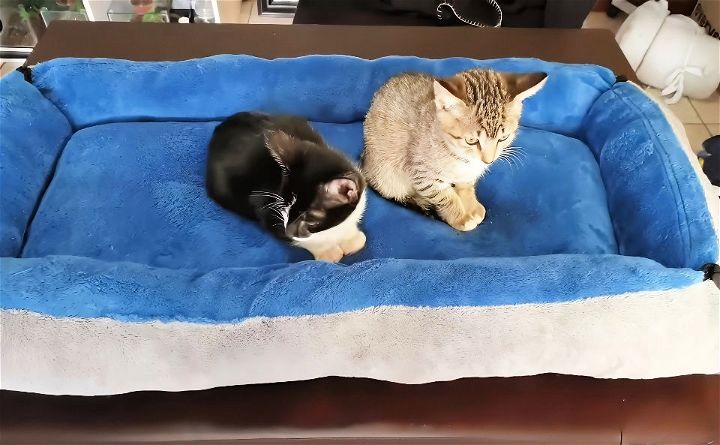
And there you have it! Your custom-made cat bed is ready for your feline friends to enjoy. Making these beds not only kept my cats comfortable but also gave me immense satisfaction and joy.
FAQs About DIY Cat Bed
Discover answers to faqs about DIY cat beds, including materials, patterns, and tips for crafting the perfect cozy spot for your feline friend.
Make sure the bed is spacious enough for your cat to stretch out. Use soft materials for padding and consider your cat’s preference for enclosed spaces or open beds. A touch of catnip can also make the bed more appealing.
Yes, there are several no-sew options available. For example, you can make a bed from an old sweater by simply stuffing it and tying the ends, or use a cardboard box and line it with a soft blanket.
Absolutely! You can crochet a hammock, build a cat condo from a wood pallet, or even fashion a cat tent from an old T-shirt. There are many tutorials online that offer step-by-step instructions for these projects.
Most fabric beds can be machine washed on a gentle cycle. Ensure all components are washable and avoid materials that may shrink or lose shape. For cardboard-based beds, spot cleaning is recommended, and they should be replaced periodically.
To make a cat bed that complements your home decor, choose fabrics and materials that match your color scheme and style. Consider upcycling furniture like an old end table by adding a cushion inside for a chic look. For a rustic touch, a wood pallet can be transformed into a cozy cat condo. There are many online resources with instructions to guide you through the process.
Conclusion:
Wrapping up, making a DIY cat bed is a fun and rewarding project. Not only does it save money, but it also allows you to customize the bed to your cat's preferences. Using simple materials and easy-to-follow steps, you can make a comfortable and stylish haven for your feline friend. DIY cat bed projects can make your cat happier and your home cozier. Get started today and enjoy the satisfaction of a job well done for your beloved pet!
Related DIY Projects and Ideas:
Explore innovative DIY projects and creative ideas to transform your home. Get inspired with easy-to-follow guides and tips for all skill levels.
- DIY Chicken Feeder: Build a functional chicken feeder for your flock with our simple DIY guide. Ensure your chickens are well-fed and happy.
- DIY Gun Rack: Follow our step-by-step guide to craft a secure and stylish gun rack. Ideal for organizing and displaying your firearms.
- DIY Disc Golf Basket: Construct your own disc golf basket with our easy-to-follow DIY guide. Perfect for practicing your throws at home.
- DIY Hat Rack: Create a personalized hat rack with our detailed DIY instructions. Perfect for organizing your hats stylishly and efficiently.
- DIY Ballet Barre: Create a custom ballet barre at home with our easy DIY guide for aspiring dancers. Perfect for practicing your routines.

