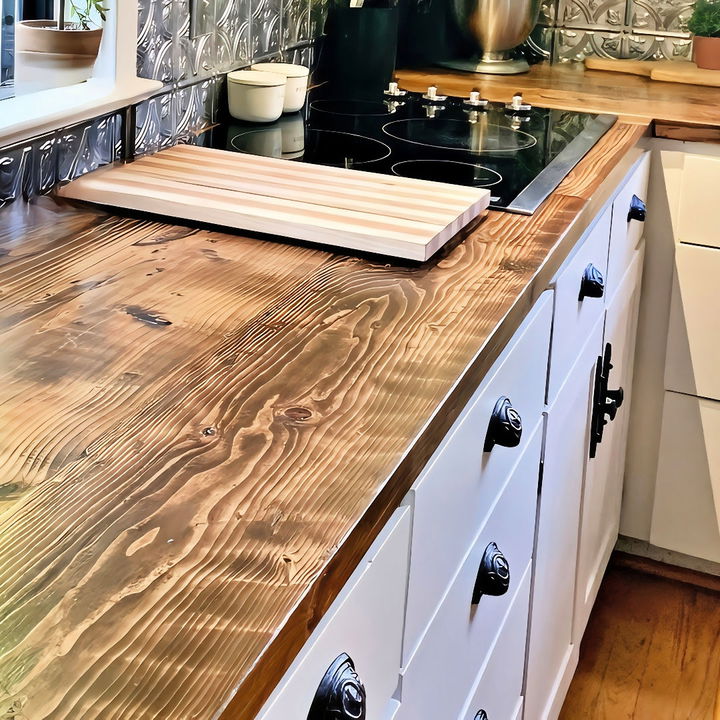
Transform your kitchen with a glossy masterpiece by learning how to DIY epoxy countertops. Making epoxy countertops on your own can be a great way to add a sleek, modern touch to your kitchen or bathroom. The process involves preparing the surface, mixing the epoxy resin, and applying it for a durable and beautiful finish. This guide will walk you through each step, ensuring you achieve professional-quality results.
Follow the instructions carefully, starting with gathering your materials and tools. Pay attention to details like correct mixing ratios and curing times for the epoxy. Ready to transform your DIY epoxy countertops? Dive into our step-by-step guide in the next section and start your DIY project with confidence.
Materials You'll Need
Before you start, gather the following materials:
- Epoxy Resin (Stone Coat Countertop Epoxy): This is the base material for your countertop.
- Epoxy Undercoat in White: This will serve as the base layer.
- Metallic Powders and Epoxy Dyes: These will provide the tropical colors.
- Dispersion Fluid: Useful for making a selling effect in the epoxy.
- Mixing Buckets: For mixing the epoxy and colors.
- Paddle Mixer and Drill: For mixing the epoxy.
- Masking Tape: To make a tape dam.
- Gloves: To protect your hands.
- Propane Torch or Heat Gun: For eliminating air bubbles.
- Wood for the Base: The surface to pour the epoxy on.
Step by Step Instructions
Learn how to DIY epoxy countertops with our step-by-step guide: preparation, mixing, adding color, and more for a stunning finish!
Step 1: Preparing the Base
The first step in making your tropical countertop is preparing the base. I used a sheet of wood for this purpose:
- Sand and Round the Corners: Make sure the edges are smooth to avoid sharp corners.
- Apply Epoxy Undercoat: I applied two coats of white epoxy undercoat and let it dry completely. This provides a solid base color for your epoxy to adhere to.
Step 2: Making the Tape Dam
For the tropical pour technique, which gives the countertop a vivid, high-definition look, you’ll need to make a tape dam:
- Use Masking Tape: Wrap masking tape around the edges of your project. This tape will hold the epoxy in place while it thickens.
- Apply Multiple Layers: Ensure the dam is high enough to hold the extra epoxy you'll be pouring.
Step 3: Mixing the Epoxy
Next, it’s time to mix the epoxy resin:
- Measure Epoxy by Volume: Stone Coat Countertop Epoxy requires a 1:1 ratio of Part A to Part B by volume.
- Use a Paddle Mixer: Attach a paddle mixer to a drill, mix the epoxy for two minutes. Halfway through, slow down and scrape the sides and bottom of the bucket to ensure a thorough mix.
- Divide the Epoxy: Once mixed, divide the epoxy into separate mixing cups.
Step 4: Adding Color
To make the tropical look, you’ll need to add colors:
- Tint with Epoxy Dyes: I started by tinting a large amount of epoxy white to serve as the base color.
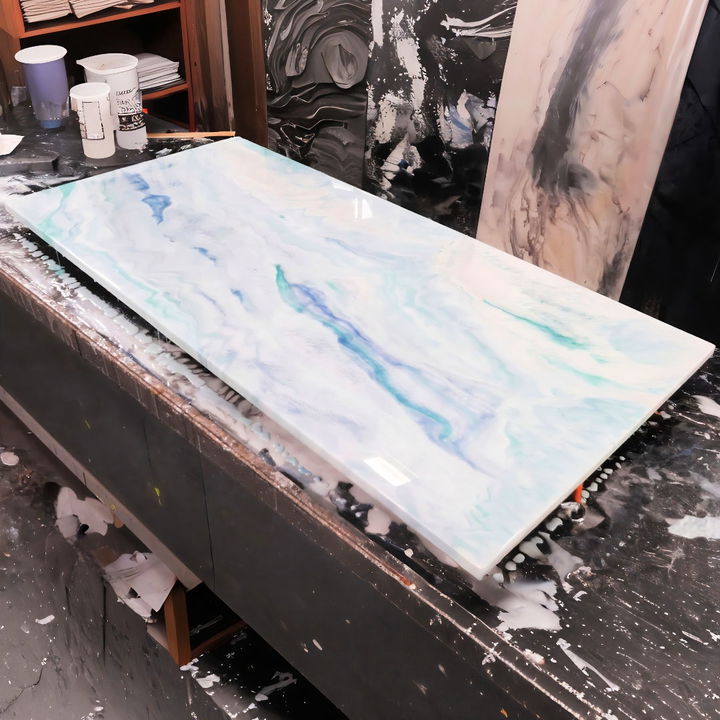
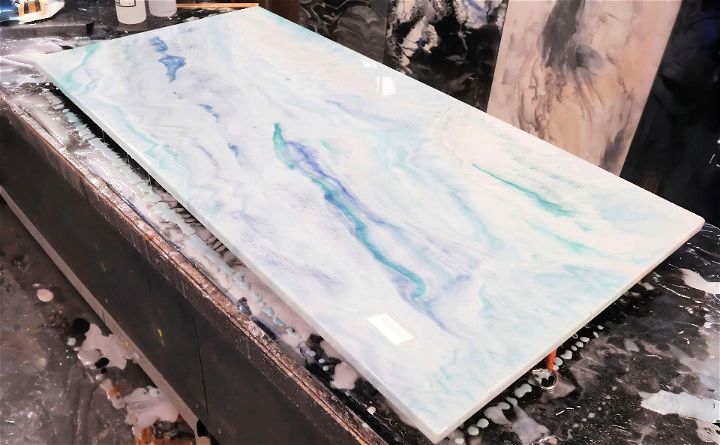
- Add Metallic Powders: For the tropical look, I used Blue Earth, Blue Pearl, and Teal Blue Green metallic powders. A little goes a long way, so use sparingly.
- Mix Thoroughly: Mix these components until they’re fully incorporated.
Step 5: Making the tropical Pour
Now comes the fun part:
- Combine Colors in Large Bucket: Pour the colored epoxy back into a large mixing bucket without mixing them together. This will make a marbling effect.
- Pour on the Countertop: Pour the epoxy in any pattern you wish. I opted for an angled striated look, but you can experiment with different methods.
Step 6: Self-Leveling and Eliminating Bubbles
Once the epoxy is poured:
- Let It Self-Level: This process can take a few hours. Do not tilt or move the surface during this time.
- Heat Gun or Propane Torch: Use these tools to remove air bubbles. Sweep the surface with the heat source, keeping it an inch away.
Step 7: Removing the Tape Dam
After about three hours:
- Peel the Tape: Carefully remove the tape from the top down to let the epoxy start flowing over the edges.
- Use Gloved Fingers: Smooth out the edges with gloved fingers to ensure uniform coverage.
Step 8: Final Touches
You’re almost done:
- Check for Drips: After the epoxy has started to set, check for any drips. You can scrape these off with a paint stick to avoid sanding later.
- Curing Time: Let the project cure fully. This can take up to 24 hours depending on room temperature.
Additional Tips
- Test Your Colors: Before pouring on your main project, do a small test piece. This way you’ll know exactly how the colors will turn out.
- Workspace Setup: Ensure your workspace is clean and dust-free to avoid contaminants in the epoxy.
- Patience is Key: Allow ample time for each step, especially the curing process, to get the best results.
Making a tropical epoxy resin countertop may seem hard, but follow these steps for a unique piece that brightens your space. Try it and add a tropical touch to your kitchen! If this guide helped, subscribe for more DIY tips.
FAQs About DIY Epoxy Countertop
Discover the top faqs about DIY epoxy countertops, including tips, materials, and steps to make stunning epoxy countertops for your home.
An epoxy countertop is a surface made by applying a layer of synthetic resin over an existing countertop. This resin cures to form a hard, durable finish that can mimic various materials like marble or granite.
To prepare your old countertop, clean it thoroughly and sand it down to ensure the epoxy adheres properly. Remove any stains, repair cracks, and wipe down the surface with isopropyl alcohol to remove any residues.
Yes, epoxy countertops are highly customizable. You can add colors, patterns, and even objects like coins or photos into the resin before it cures to make a unique design.
Maintain your epoxy countertop by cleaning it with non-abrasive cleaners and avoiding direct heat. Use cutting boards and trivets to protect the surface from scratches and heat damage.
The curing time for an epoxy countertop can vary depending on the product used and the environmental conditions. Generally, it takes about 24 hours for the epoxy to dry to the touch and about 72 hours for it to fully cure and become completely solid. However, it’s recommended to wait at least 7 days before putting heavy objects on the surface or using the countertop normally to ensure the epoxy has achieved maximum hardness.
Conclusion:
Wrapping up, learning how to DIY epoxy countertops can be an exciting and rewarding project. By following the detailed steps and tips provided in this guide, you can make stunning and durable countertops that elevate your space.
Related DIY Projects and Ideas:
Discover the best related DIY projects and ideas for your next creative endeavor, packed with tips, guides, and inspiration.
- DIY Charging Station: Power up your devices for less with this DIY charging station. Organize and charge efficiently.
- DIY Fog Machine: Level up your parties with this creative DIY fog machine idea. Get step-by-step instructions for an amazing atmosphere.
- DIY Magnetic Board: Create your own magnetic board with this easy DIY idea. Perfect for home organization and decor.
- DIY Subwoofer Box: Build a subwoofer box for perfect sound with these detailed plans. Enhance your audio experience.
- DIY Tablet Stand: Discover 3 different ways to make your own tablet stand. Perfect for any device and situation.


