Making a DIY Fairy Garden is a fun and imaginative way to add enchantment to your space. These mini-gardens can be customized using a variety of plants, miniature decorations, and creative structures. Start by choosing a container that suits your style, whether a pot, terrarium or even a corner of your garden. Gather tiny furniture, fairy figurines, and cute adornments to bring your fairy garden to life.
Building your own DIY Fairy Gardens allows you to express creativity and make a magical spot for relaxation. Select suitable plants that stay small and thrive in your chosen environment. Arrange the items carefully, ensuring each piece contributes to the overall theme. To keep your garden fresh, water it regularly and remove any dead leaves.
Materials You’ll Need
Before diving into the steps, let's gather all the necessary materials. Each item plays a crucial role in bringing your fairy garden to life.
- Large Planter: Provides the base of your fairy garden.
- Potting Soil: Needed for filling the planter and offering a medium for plants to grow.
- Small Plants or Succulents: Adds greenery and life to your garden.
- Various Size Rocks and Pebbles: Used for pathways and decoration.
- Moss and Twigs: Perfect for adding natural textures and details.
- Tiny Objects for Decor: Make fairies feel at home with miniature houses, furniture, and other charming items.
Step-by-Step Guide to Making Your Fairy Garden
Make a magical oasis with our step-by-step guide to making your fairy garden. Learn how to design and decorate your own enchanting mini landscape!
Step 1: Preparing Your Planter
First, fill your large planter with potting soil, leaving a few inches from the top. This will be the base where your fairy garden will grow and thrive.
Step 2: Adding the Largest Object
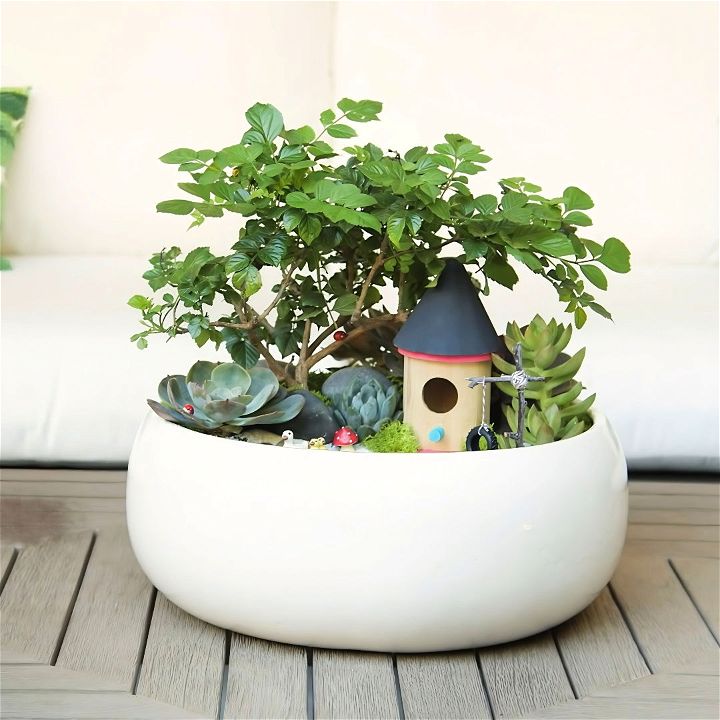
Now, start by placing your largest object, such as a small tree or a large plant, into the planter. Avery was excited to help me with this step, and we chose a miniature tree that would give our fairies some lovely shade.
Tip: Position this object toward the back of the planter to make depth and layered scenery.
Step 3: Setting Up the Fairy House
Next, select a spot for your fairy house. Avery chose a nice cozy corner for ours. The house is a focal point and helps set the scene for the fairies.
Step 4: Planting Small Plants and Succulents
Now, it’s time to add the smaller plants and succulents. When arranging them, there's no strict order to follow, but placing the larger ones towards the back can make a visually appealing layout. Avery and I placed some cute little succulents that looked perfect.
Why Succulents?: They are low maintenance and can thrive in the confined planter environment, making them ideal for fairy gardens.
Step 5: Landscaping with Rocks, Moss, and Twigs
To make the garden look magical, use various sized rocks and pebbles to make pathways. Moss works wonderfully to cover up any exposed potting soil, giving it a lush, green look. Avery and I found that adding twigs can mimic natural bushes or even become tiny pieces of fairy furniture.
Step 6: Crafting a Pathway
I particularly loved making a pathway to the fairy house with Avery. We used small shiny pebbles that we thought the fairies would like.
Tip: You can use anything that sparkles or shines—fairies are quite fond of glittery things!
Step 7: Making a Pond
A blue sand pond is an adorable addition. Avery had some blue sand that perfectly mimicked the look of water, and we even added a little miniature duck to swim in it.
Step 8: Adding Final Touches
Lastly, we included an adorable tire swing made from twigs, string, and a small tire from a toy car. These little personal touches make the garden even more enchanting.
Personal Touch: Finding small objects around the house or outside to repurpose as fairy furniture is a fantastic way to personalize your fairy garden. Let your imagination run wild!
Why This Activity is Perfect for Kids
Making a fairy garden is not just about the end product; it's about the journey. This activity is perfect for kids, as it allows them to:
- Express Creativity: They can come up with imaginative designs and ideas.
- Learn about Plants: Caring for the plants in the garden can be an educational experience.
- Bonding Time: It’s a lovely way to spend quality time together.
Where to Display Your Fairy Garden
A fairy garden can be a stunning centerpiece for an outdoor table, adding charm and whimsy to your space. It also looks fantastic tucked away in the trees or nestled in an existing garden.
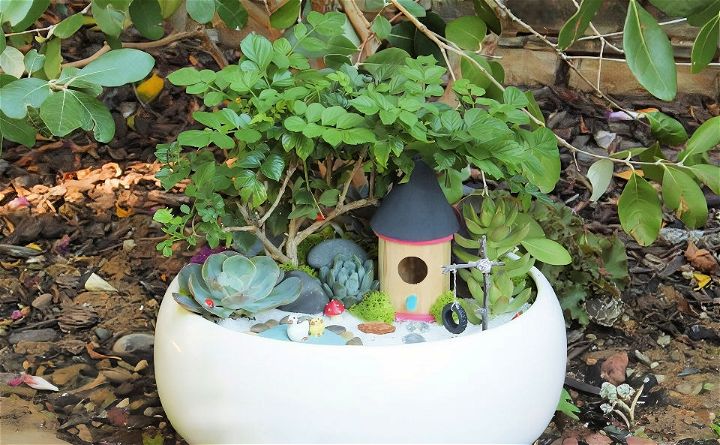
Avery and I had an absolute blast making our fairy garden, and the end result was nothing short of magical. We can’t wait for the fairies to discover their new home! This DIY project is a fantastic way to unleash your creativity and add a touch of whimsy to your garden. Give it a try, and you might find yourself wanting to join the fairies in their enchanting little world.
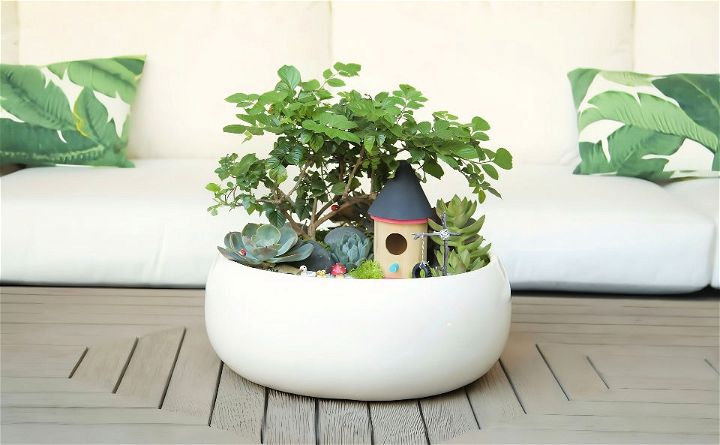
FAQs About DIY Fairy Garden
Discover the top faqs about DIY fairy garden, including tips, materials, and design inspiration to make your magical miniature landscape.
A fairy garden is a miniature garden that includes small plants, decorations, and often, tiny fairy figures. It’s a creative way to bring a bit of magic and storytelling into your home or garden. People make fairy gardens for fun, as a hobby, or to add a unique touch to their living space.
When selecting plants for your fairy garden, consider small, low-maintenance varieties like succulents, cacti, or moss. These plants are easy to care for and fit well in the tiny landscapes of fairy gardens.
You can find fairy garden accessories at craft stores, online retailers, or you can make your own. Items like tiny furniture, bridges, and figurines can be purchased or handcrafted from natural materials like sticks and stones.
Yes, fairy gardens can be maked and kept indoors. Choose a container with good drainage and place it in a location where it will receive adequate light. Indoor fairy gardens allow for more delicate accessories and plants that may not withstand outdoor conditions.
Maintaining a fairy garden involves regular care to keep it looking magical. Pinch or prune the plants to manage their size, clear debris to maintain a tidy appearance, and protect the garden from harsh weather by moving it indoors if necessary. Additionally, clean and reapply a sealant to the decorative elements periodically to keep them weatherproof.
Conclusion:
Wrapping up, learning how to make a fairy garden is a fun and rewarding project that anyone can enjoy. By following easy steps and using your creativity, you can make a magical space. Start with a plan, gather your materials, and let your imagination guide you. Fairy gardens bring a touch of whimsy to any outdoor area. Happy gardening!

