When it comes to DIY home painting, it's not just about picking a color that suits your room - it's a lot more than that. In simple terms, you need the right approach, from preparing your walls to applying the final coat. This DIY home painting tips guide aims to arm you with practical tips to make your painting project run smoothly. Whether it's choosing the right type of paint or using the right tools, we've got you covered.
Moreover, good painting techniques can turn a hectic task into a satisfying project. We’ll guide you through avoiding common mistakes and ensuring a neat finish. Every step is crucial, from prepping your space to making sure those edges are crisp and clean.
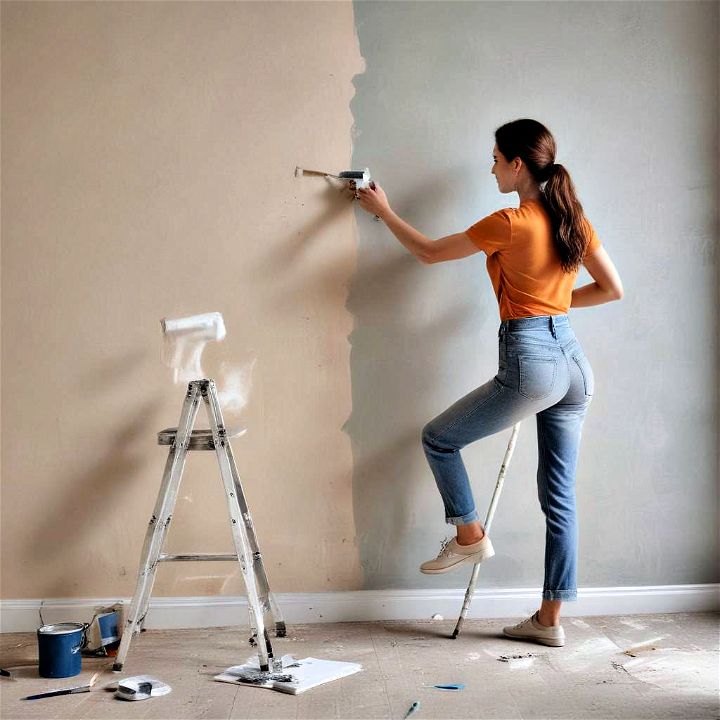
Stay tuned for insightful advice that’s easy to follow, improving not just the appearance of your walls but also your skills as a home painter. Get ready to transform your space with confidence.
1. Use Primer
Starting your paint project with a primer sets a solid foundation. It ensures better adhesion of paint to the surface, increases paint durability, and provides additional protection for the material being painted. Think of it as the base coat that guarantees your color shines through vividly and evenly.
2. Deal with Problem Tape
Using low-quality tape can lead to leaks and seepage. Opt for a high-grade painter's tape to create sharp edges and protect your trim or ceiling lines. This way, you avoid the frustration of bleed-through and get a professional look with clean, crisp lines.
3. Lay a Drop Cloth
Before you dip that brush in paint, lay a drop cloth to protect your floors and furniture from spills and drips. It's an easy step that saves you from time-consuming cleanups and potential damage. A plastic or canvas drop cloth can be your best friend, keeping your spaces neat.
4. Avoid Lap Marks
To dodge those unsightly stripes caused by overlapping wet and dry paint, maintain a "wet edge" by painting the full height of the wall and moving over slightly with each stroke. This technique merges the paint together while it’s still fresh, giving an even, seamless look.
5. Buy Quality Paint
Investing in high-quality paint can make all the difference in the longevity and look of your project. Premium paints often have better pigments and binders, which translate to richer colors and more durability. This means you'll paint less often and enjoy a more stunning finish for longer.
6. Consider Color Carefully
Choosing the right color is crucial; it sets the mood for your room. Test samples on your walls and observe them throughout the day as natural light changes. This ensures the color you pick blends well with your room's lighting and decor, creating the perfect ambiance.
7. Clean the Walls
Preparation is key to a flawless finish. Cleaning your walls removes dirt, dust, and grease, ensuring the paint adheres properly and looks smooth. A simple wipe down with a damp cloth or a mild cleaning solution can make a significant difference in the outcome of your paint job.
8. Use a Corner Roller for Tight Spots
A corner roller is a nifty tool that allows you to paint those hard-to-reach spots with ease. Its special design gets right into the crevices, ensuring even coverage all around. It's perfect for achieving a professional finish in corners and around trim without the hassle.
9. Paint the Trim First
Tackling the trim before the walls simplifies your painting process. Once the trim paint has dried, you can cover it with tape when painting the walls, reducing worries about overpainting. This approach also helps create a neat, clean look with minimum touch-ups required.
10. Wash Roller Covers
Washing roller covers before their first use removes any loose fibers, preventing them from sticking to your freshly painted walls. Plus, cleaning and storing them properly after use extends their life, saving you money and ensuring a smooth application the next time you paint.
11. Box Paint for Consistency
To maintain color consistency throughout your project, mix all the paint you'll use into a large container, or "box" it. This simple step blends slight color variations from different cans, ensuring a uniform shade is applied across your walls.
12. Buy a Better Brush
Choosing a high-quality brush can significantly enhance your painting experience and outcome. A good brush provides smoother application, better coverage, and less bristle loss. While it may cost a bit more upfront, the efficiency and finish it provides are well worth the investment for any DIY painter.
13. Clean Dirty Surfaces Before Painting
Before diving into your painting project, ensure your surfaces are clean. Dirt, dust, and oil spots can hinder paint adhesion, leading to a less than desirable finish. A quick wash can make a world of difference, providing a clean slate for your fresh coat of paint.
14. Know When Your Paint Is Thoroughly Dry
Patience is key in painting. Giving your paint ample time to dry between coats prevents smudging and ensures a smooth, durable finish. Drying times can vary based on the paint type and environmental conditions, so checking the manufacturer's recommendations is a smart move.
15. Paint the Walls
Transforming a room starts with painting the walls. It’s a simple yet effective way to refresh your space. Approach it with a plan—starting from the top down—and you’ll see how quickly and effectively your room’s mood can change with just a few strokes of paint.
16. Choose the Right Paint Type
The paint you pick makes all the difference. From matte to high-gloss, each finish has its benefits and ideal uses. Consider the room’s function and lighting when selecting your paint type. This forethought ensures the finish not only looks great but also stands up to daily wear and tear.
17. Apply a Second Coat If Necessary
Applying a second coat of paint can enhance color depth and ensure an even, uniform finish. While it might seem like extra work, this step can significantly improve the overall appearance and longevity of your paint job. Just make sure the first coat is completely dry before proceeding.
18. Use Carpet Protection Film
Renovations can get messy. Protecting your carpets with a carpet protection film shields them from spills, drops, and dirt. This self-adhesive, tear-resistant film ensures your floors stay pristine beneath the chaos of painting, saving you from a strenuous cleanup post-project.
19. Account for the Weather
Did you know the weather can influence your painting project? High humidity can prolong drying times, while too much heat might speed them up too much. Aim for mild, dry days for exterior projects to ensure a smooth, hassle-free application and drying process.
20. Use Caulk for Seamless Finishes
Caulk is your secret weapon for achieving professional-looking results. Apply it to seal and smooth out any gaps or cracks before you paint. This not only enhances the appearance but also protects the integrity of your work, resulting in a cleaner, more seamless finish.
21. Finish One Wall Before Starting Another
Focus and finish painting one wall before moving on to the next. This approach ensures consistency and allows you to maintain a wet edge, reducing the chances of streaks. Plus, it’s incredibly satisfying to see one complete section before moving to the next!
22. Invest in Premium Paint for Better Results
Splurging a bit on premium paint can pay off in the long run. Higher-quality paints usually have better pigments and a smoother application, leading to a more vibrant and durable finish. Consider it an investment in your home’s beauty and longevity.
23. Keep a Wet Edge to Avoid Marks
To avoid lap marks, always keep a wet edge when painting. This technique involves overlapping your last stroke with the next before it dries. It can make a huge difference in achieving a professional, uniform finish without visible strokes or seams.
24. Properly Load Your Brush to Save Time and Avoid Drips
Getting just the right amount of paint on your brush is an art—it saves time and prevents annoying drips. Dip the brush about a third of the way into the paint, tapping off the excess, not wiping, to ensure a smooth, controlled application. This little trick makes for a neater, more efficient painting process.
Bottom Line
In wrapping up, these 24 most useful DIY home painting tips are designed to help you tackle your next painting project with ease and confidence. From selecting the right paint to mastering the brush strokes, every detail contributes to the ultimate goal: transforming your living spaces beautifully and efficiently.
We aimed to provide actionable advice that caters to your needs and simplifies the painting process. So, grab your supplies, and let's bring some fresh color into your home! Remember, a successful DIY home painting project is all about preparation, patience, and the joy of seeing your efforts come to life.

