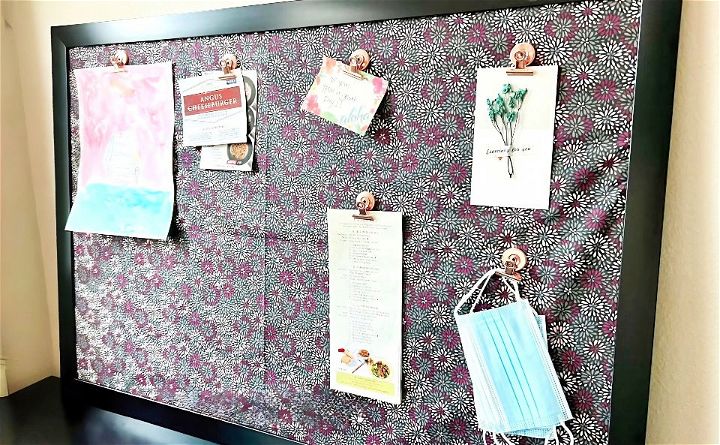
Making your own DIY magnetic board is a fun and practical project that helps keep your space organized. With some basic materials like a metal sheet, fabric, and magnets, you can craft a stylish and functional board. This guide walks you through the step-by-step process, making it simple for anyone to follow. Plus, it adds a personalized touch to your home or office decor.
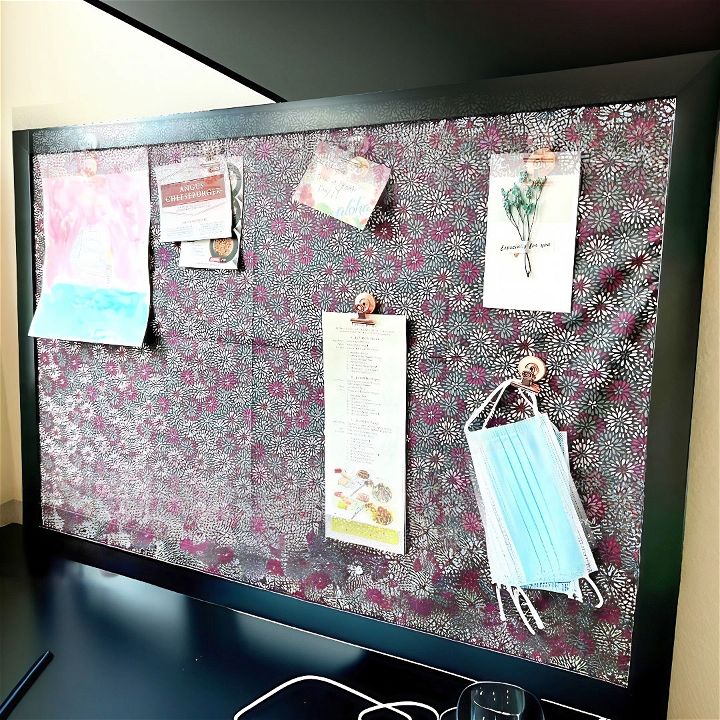
Building a magnetic board is more than just a craft; it’s a useful tool for everyday life. Use it to display photos, reminders, or important notes. This project is perfect if you enjoy hands-on activities that yield satisfying results. By following along, you'll quickly see how rewarding and straightforward it is to make your own DIY magnetic board.
Materials Needed
Before we dive into the steps, let’s talk about the materials you’ll need and why they’re important.
- Metal Sheet: The most essential part of your magnetic board. Make sure to use a metal sheet and not aluminum, as magnets won’t stick to aluminum. You can easily find this at your local hardware store.
- Thin Fabric: This will cover your metal sheet, giving it a personalized touch. I used a thin cotton fabric because thicker fabrics can interfere with the magnet’s ability to stick to the metal.
- Scissors: Used to cut the fabric to the appropriate size.
- Packing Tape: This secures the fabric to the back of the metal sheet.
- Poster Frame: Optional but highly recommended. It gives your magnetic board a polished look and helps protect the edges of the metal sheet.
Step by Step Instructions
Learn how to make a DIY magnetic board with our step-by-step instructions. Perfect for organizing and displaying your items easily!
Step 1: Gather Your Materials
The first step is to gather all your materials. Double-check to ensure you have everything on the list. This will save you time and hassle later on. For my board size (24" x 36"), I needed 1 yard of fabric, but you can adjust the size based on your needs.
Step 2: Prepare the Metal Sheet
Lay your metal sheet on a flat, clean surface. Be cautious when handling it, as the edges can be sharp. I found it helpful to wear gloves during this step to avoid any injuries.
Tip
Select a metal sheet relatively thin yet rigid enough to hold the magnets firmly. It’s essential for the final board’s effectiveness.
Step 3: Cut the Fabric
Next, spread out your fabric and place the metal sheet on top. Leave an extra inch of fabric around the edges of the metal sheet. This extra fabric will wrap around to the back, ensuring a neat finish.
Use scissors to carefully cut the fabric around the metal sheet. Be precise, as uneven edges can create difficulties when wrapping the fabric later on.
Tip
Make sure that the fabric is wrinkle-free and smooth before cutting to ensure a clean appearance on your final product.
Step 4: Attach the Fabric to the Metal Sheet
With the fabric cut to size, lay the metal sheet back on top. Starting at one end, begin wrapping the fabric edge over the metal sheet and secure it with packing tape on the back. Work your way around the sheet, pulling the fabric tight to eliminate wrinkles.
Tip
It's helpful to have an extra set of hands for this step to keep the fabric taut and secure.
Step 5: Secure the Fabric with Packing Tape
Once the fabric is neatly wrapped around the metal sheet, secure it firmly with packing tape. I used long strips of tape, running them along the entire back edge for added security. Make sure the fabric is taut and smooth on the front side.
Tip
Double-check that the fabric is secure and there are no loose ends. This will ensure your board looks professional and lasts for a long time.
Step 6: Place the Metal Sheet in the Poster Frame
If you’ve opted for a poster frame, now is the time to use it. Remove the backing and carefully place your newly wrapped metal sheet inside. This gives the board a clean and finished look. Secure the backing of the frame, and your custom magnetic board is ready to use!
Step 7: Display and Organize
Find a perfect spot for your new magnetic board. Hang it on a wall using appropriate hooks or screws, or simply lean it against a surface. Start organizing your notes, photos, or any other items with magnets.
Tip
Consider labeling different areas of the board with washi tape or stickers to create designated spots for various items. This can make your magnetic board even more functional and personalized.
Making a custom magnetic board was an enlightening project for me. Not only did I find a creative outlet, but I also gained a practical tool that helped me stay organized. Whether you use it to keep track of important dates, display favorite photos, or manage daily to-do lists, this DIY magnetic board is versatile and beneficial.
Key Takeaways
- Use the right materials: Opt for a metal sheet (not aluminum) and thin fabric for the best magnetic hold.
- Precision matters: Careful measuring and cutting ensure a professional-looking final product.
- Personalize it: Choose a fabric that reflects your style and preference to make the magnetic board unique.
By sharing my personal experience and these easy steps, I hope you’re inspired to create your own custom magnetic board.
FAQs About DIY Magnetic Board
Discover everything you need to know about DIY magnetic board setups with our comprehensive faqs. Get tips, materials, and step-by-step guides!
You can personalize your magnetic board using spray paint in a color that matches your decor. For a more creative touch, use painter’s tape to create patterns or designs before painting. Always apply paint in a well-ventilated area and allow it to dry completely between coats.
Yes, you can make a magnetic board without power tools. If you’re using a pre-cut piece of metal, simply fit it into a frame of your choice. For a stand-alone board, you can use an easel-style back or mount it directly onto a wall with appropriate hardware.
A DIY magnetic board can serve many purposes. It’s great for organizing invitations, reminders, photos, or artwork. You can also use it in the kitchen for recipes, in the office for important notes, or in a kid’s room for educational magnets.
To maintain your magnetic board, wipe it down regularly with a damp cloth to remove dust and debris. Avoid using abrasive cleaners that could scratch the paint. If you’ve used chalkboard paint, a simple chalkboard eraser or damp cloth will keep it looking fresh.
To attach your magnetic board to the wall, you have several options. If your board is framed, you can use picture hanging hooks that are appropriate for the weight of your board. For an unframed metal sheet, consider using adhesive strips designed for heavy items or mounting brackets. Always ensure the wall surface is clean and dry before attaching anything.
Conclusion:
In conclusion, making a DIY magnetic board is an engaging and practical project. It adds a personal touch to your space while helping keep your notes and reminders in one spot. Making your own magnetic board is straightforward and customizable to any style or need. So grab your materials and enjoy the satisfaction that comes from making something useful and unique for your home or office.
Related DIY Projects and Ideas:
Discover creative DIY projects and ideas to transform your home. Explore tips and tutorials for all skill levels. Get inspired now!
- DIY Fog Machine: Create an eerie atmosphere with a DIY fog machine for your parties. Follow our guide for easy, budget-friendly ideas.
- DIY Charging Station: Organize and power up your devices with a DIY charging station. Discover cost-effective ideas to keep your gadgets ready.
- DIY Tablet Stand: Make your own tablet stand in three different ways. Check out these practical and creative DIY solutions.
- Subwoofer Box Build: Enhance your audio experience by building a subwoofer box. Follow our step-by-step guide for perfect sound.
- DIY Epoxy Countertops: Transform your countertops with a DIY epoxy project. Learn how to achieve a stunning, durable finish easily.

