Making your own DIY umbrella stand can be a fun and rewarding project. It's a practical solution to keep your entryway tidy and your umbrellas organized. This guide will take you through simple steps to make a functional and stylish umbrella stand using materials you probably already have at home. You don’t need advanced skills – just a bit of time and creativity.
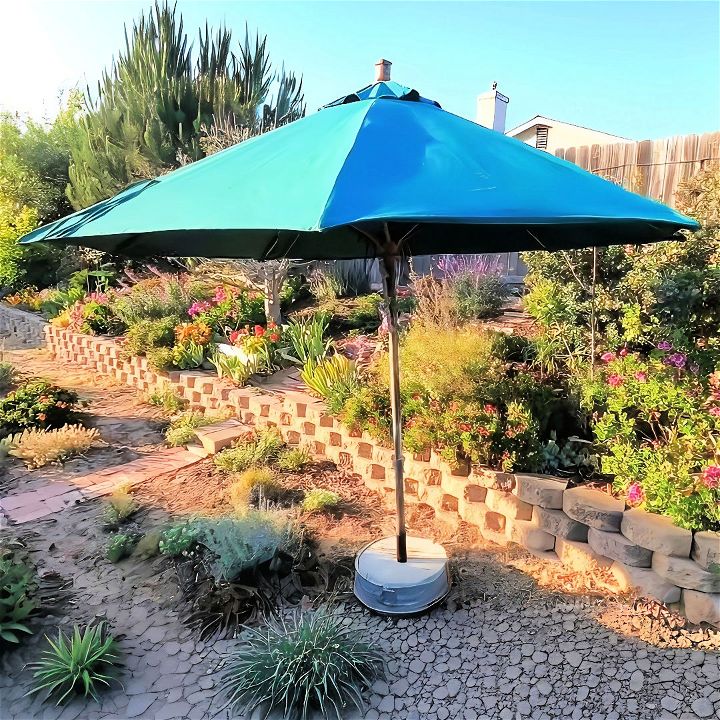
This project can be completed over a weekend, offering a quick and cost-effective method to add a useful item to your home. The guide covers everything from selecting the materials to assembling and decorating the stand.
Materials Needed
Before starting, gather these materials:
- Concrete - 75 to 80 pounds. Concrete provides weight and durability.
- Pipe (1.5 to 1.75 inches in diameter) - This will hold the umbrella. You can use either metal or PVC.
- Mold for the base - An old garbage can or a large bin works well. It should be about 18 inches in diameter.
- Plastic garbage bags - To line the mold and prevent concrete from sticking.
- Cooking oil or motor oil - To make it easier to remove the mold.
- Mixing bin - To mix the concrete.
- Water - To mix with the concrete.
- Trowel or small board - For leveling the concrete.
- Stick or piece of wood - To remove air bubbles.
- Torpedo level - To ensure the pipe is vertically aligned.
Step-by-Step Guide
Build a sturdy DIY umbrella stand with our step-by-step guide: prep the mold, mix & pour concrete, add pipe, remove air bubbles, let set, and finish!
Step 1: Preparing the Mold
First, you need to prepare your mold. If you’re using an old garbage can or large bin, cut the bottom off to make an open-ended mold. Make sure your mold is on a level surface. Line the inside with plastic garbage bags to prevent concrete from leaking and sticking.
Step 2: Mixing the Concrete
You'll need about 80 pounds of concrete for this project. I recommend using a big 80-pound bag or two 50-pound bags. Mix the concrete in your mixing bin. Here’s how:
- Pour the concrete into the mixing bin.
- Make a well in the center of the pile.
- Slowly add water while mixing to avoid dust.
- Keep adding water until the mixture has the consistency of oatmeal. It shouldn't be too soupy because that weakens the concrete.
Step 3: Pouring the Concrete into the Mold
Pour the mixed concrete into the mold. Use a trowel or a small board to level the concrete and ensure a smooth surface.
Step 4: Adding the Pipe
Now, take your pipe and place it in the center of the mold. Push it down until it bottoms out. This pipe will hold your umbrella. Make sure the pipe is vertically aligned using a torpedo level.
Step 5: Ensuring No Air Bubbles
Use a stick or a piece of wood to poke around the concrete. This helps remove any air bubbles, ensuring the concrete sets properly. Also, tap the sides of the mold to release trapped air.
Step 6: Floating the Concrete
Take a flat board or a wood float and press down on the concrete. This brings water to the surface and ensures the concrete is level. It might look dry, but this step helps to even out the moisture.
Step 7: Letting the Concrete Set
Let the concrete set for about 1 to 2 days. During this time, occasionally spritz the top with water to aid the curing process and prevent the surface from cracking.
Step 8: Removing the Mold
Once the concrete is set, carefully remove the mold. If the concrete sticks, you might need to cut the mold off. In this case, cut slits along the edges and peel the mold away.
Step 9: Finishing Touches
After removing the mold, your umbrella stand is ready! You can top it with a wooden cover or paint it to match your outdoor decor.
Tips and Tricks
- Oil the Mold: Before pouring the concrete, spray the inside of the mold with cooking oil or motor oil. This makes it easier to remove the mold once the concrete sets.
- Proper Mixing: Always add water gradually to your concrete mix. It's easier to add more water than to fix an overly soupy mix.
- Working Quickly: Concrete begins to set fast, so work quickly once you start mixing.
- Protecting Tools: Clean your tools immediately after using them, as dried concrete can be tough to remove.
Making your own DIY umbrella stand is a satisfying and budget-friendly project. With just a few simple materials and some effort, you can make a sturdy base that will last for seasons. Plus, it’s a great way to personalize your outdoor space. I hope you found this guide helpful. If you did, please consider subscribing to my channel and clicking the notification bell for more DIY projects.
FAQs About DIY Umbrella Stand
Discover the best faqs about DIY umbrella stand projects, including materials, steps, and tips to make your own functional and stylish stand.
Stability is key for an umbrella stand. Make sure the base is heavy enough by using concrete or sand. The holder should fit the umbrella pole snugly, and you can add rubber feet or weights at the bottom for extra stability.
Yes, you can! By attaching a flat surface on top of the stand or using a planter that doubles as a table, you can make a functional piece that holds your umbrella and provides space for drinks or decor.
Absolutely. Consider adding wheels or designing the stand with a handle. Using lighter materials like a hollow PVC pipe filled with sand or water can also make the stand easier to move.
Personalizing your umbrella stand is all about creativity. Paint it to match your outdoor decor, use stencils for patterns, or wrap it with outdoor fabric or rope for a unique look. You can also embed tiles or mosaics for a more artistic touch.
Maintaining your DIY umbrella stand is straightforward. If it’s made of concrete, occasionally seal it to protect against moisture. For wood stands, apply a weather-resistant finish annually. Clean regularly, and if it has wheels, check them for smooth movement and apply lubricant if necessary.
Conclusion:
Wrapping up, making a DIY umbrella stand can be both a fun and practical project. It allows you to customize your home décor while adding a functional piece. With just a few materials and some creativity, you can build a beautiful and unique umbrella stand that reflects your personal style. Try it out and add a touch of personalization to your home!

