Growing your own herbs at home can be simple and satisfying with a DIY mason jar herb garden. Using mason jars, soil, and your choice of herbs, you can make a practical and attractive garden that fits right on your windowsill. This method requires minimal space and resources, making it accessible to anyone interested in having fresh herbs on hand.
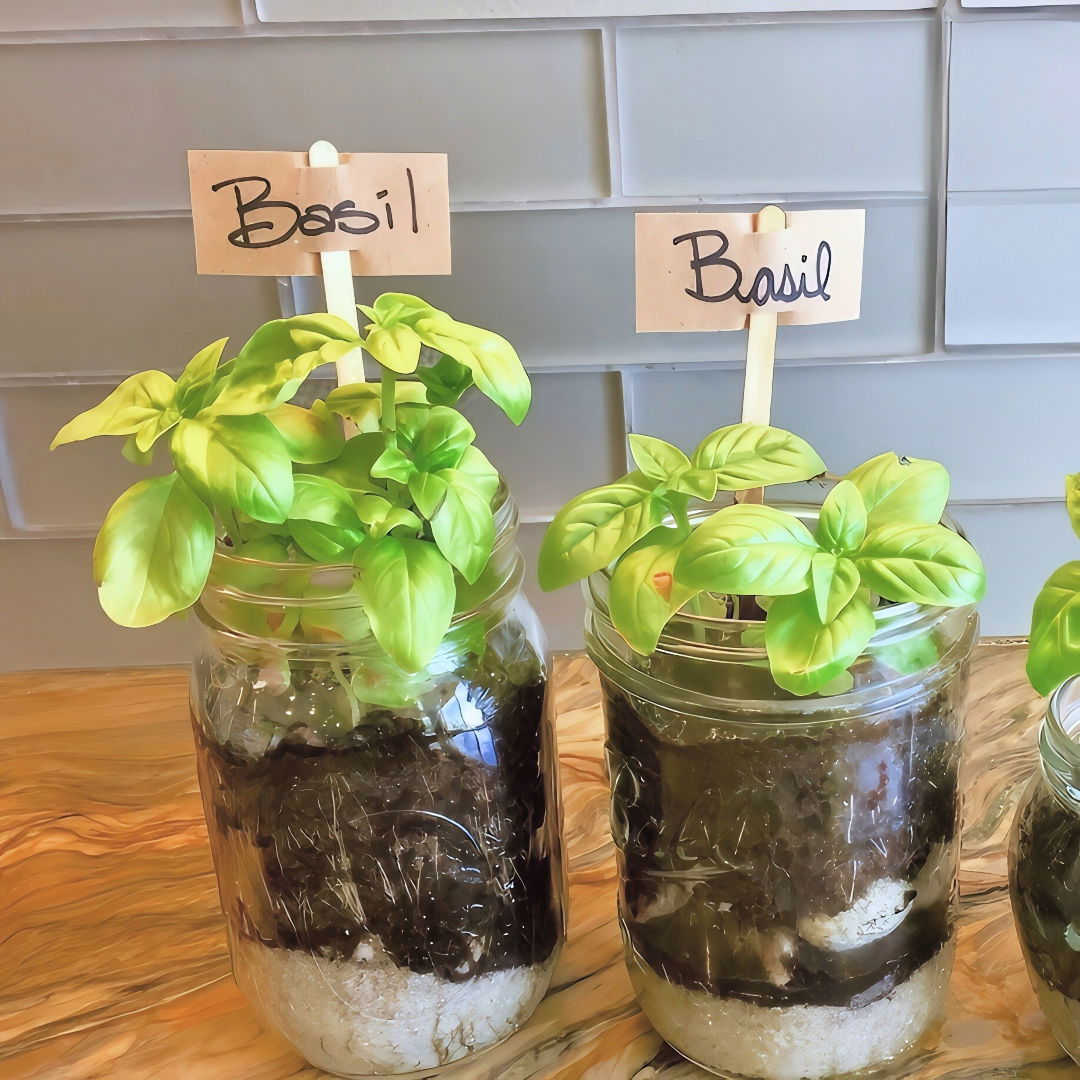
Making a Mason jar herb garden is straightforward and doesn't need a lot of materials. You'll need mason jars, potting soil, small rocks, and herb seeds or seedlings. Layering rocks at the bottom of the jar helps with drainage, ensuring your herbs thrive. It’s a fun way to bring greenery into your space and enjoy the convenience of having herbs readily available in your kitchen.
Ready to get started on your DIY Mason Jar Herb Garden? The next section provides detailed steps and tips for making and maintaining your mini herb garden.
Materials Needed
Here's what you’ll need:
- Mason Jars: These will serve as the planters. Mason jars are great because they are transparent, allowing you to watch your herbs grow and monitor root development.
- Sand: About an inch per jar. Sand helps with drainage, preventing water from stagnating at the bottom.
- Stones: Around 1-2 inches per jar. Stones further assist with drainage and keep the soil from becoming waterlogged.
- Soil: Approximately 2 inches per jar. A good potting mix with nutrients suitable for herb growth.
- Seeds: You can use various herbs, but for this guide, we'll focus on basil.
- Water: Essential for keeping your soil moist and your seeds hydrated.
- Labels: Popsicle sticks work great for this, allowing you to keep track of which herbs are in which jar.
Step by Step Instructions
Make your own mason jar herb garden with our easy step-by-step instructions.
Step 1: Prepare Your Mason Jars
First, ensure your mason jars are clean and free of any residues. This is crucial to prevent any potential contamination that might harm your herb plants.
Step 2: Add Sand
Pour about an inch of sand into each mason jar. Sand is an excellent base layer because it helps with the drainage system.
Step 3: Layer with Stones
Next, add 1-2 inches of stones on top of the sand. This additional layer helps water drain effectively, preventing the roots from sitting in water, which can cause root rot.
Step 4: Add Soil
Now, fill the jars with soil up to about 2 inches from the top. Make sure the soil is moist but not wet. This ensures your seeds have all the nutrients they need to start growing.
Step 5: Plant the Seeds
Sprinkle a few basil seeds on top of the soil. You don’t need many; just a small pinch will do. Lightly cover the seeds with a thin layer of soil.
Step 6: Water the Seeds
Water your newly planted seeds lightly. Since the soil is already moist, you only need a little water. Ensure you don’t overwater; the excess water will drain to the sand layer below.
Step 7: Label Your Jars
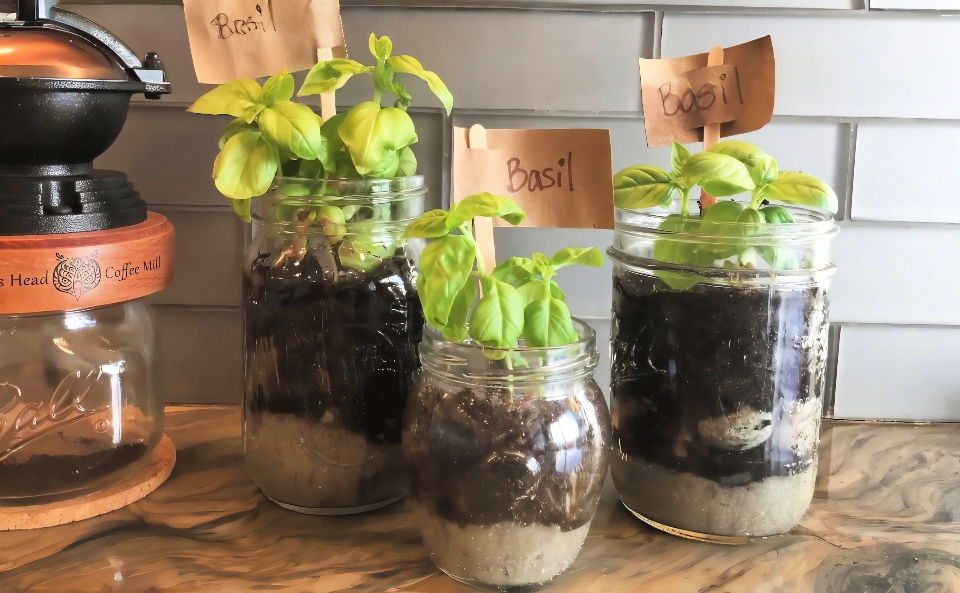
Use popsicle sticks or similar items to make labels for your jars. Write the name of the herb on the stick and insert it into the soil. This will help you keep track of which herb is growing in each jar.
Step 8: Monitor Growth
Place the jars in a sunny spot but avoid direct harsh sunlight, which can overheat the glass jars. Within a week, you should start to see the little sprouts of basil poking through the soil. Watching these sprouts grow is a fantastic way to engage kids in gardening, making it an educational experience as well.
Step 9: Maintaining Your Herbs
Keep the soil moist by watering lightly every few days. You’ll notice that water trickles down through the stones into the sand, ensuring the roots have access to moisture without being waterlogged.
Step 10: Harvesting Your Herbs
After 4-6 weeks, your basil should be fully grown and ready for use. The leaves might be small initially, but feel free to harvest a few at a time. This stimulates further growth. Make sure not to pull out the whole plant; just pick the leaves as you need them.
Tips and Additional Advice
Discover essential tips for better drainage, using transparent jars, rotating plant locations, and expanding your herb garden in this comprehensive guide.
Better Drainage with Proper Layering
The layered system of sand and stones is crucial for drainage. It allows excess water to settle at the bottom and gradually evaporate back up through the soil, maintaining a balanced moisture level. This setup minimizes the risk of root rot, a common issue in indoor plants.
Using Transparent Jars
Mason jars are transparent, which allows you to observe both the shoots and roots as they grow. This visual aspect can be especially exciting for children and provides an educational glimpse into plant biology.
Rotating Plant Locations
If you have a south-facing window, place the jars there to ensure your herbs get plenty of light. Rotate the jars every few days so all sides of the plant receive equal sunlight, promoting even growth.
Expanding Your Herb Garden
Once you’ve mastered growing basil, you can experiment with other herbs such as parsley, cilantro, or mint. Each herb has slightly different care requirements, so make sure to read up on each one before planting.
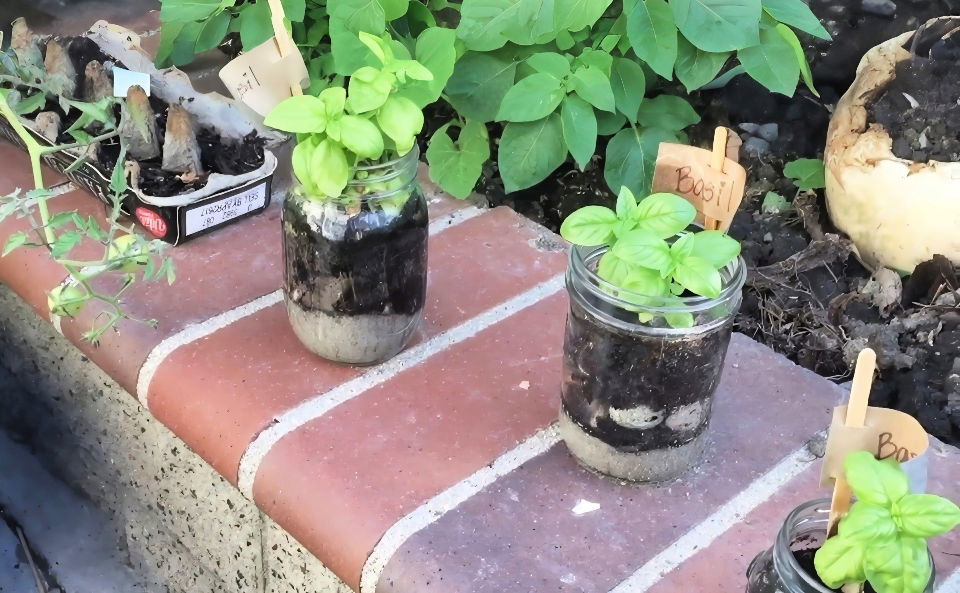
Making a DIY mason jar herb garden is a rewarding and straightforward project. Not only do you end up with fresh herbs at your fingertips, but you also get to enjoy the process of cultivating your mini garden. I hope this guide has inspired you to start your own herb garden and that you find as much joy in it as my family and I do.
FAQs About DIY Mason Jar Herb Garden
Discover the faqs about DIY mason jar herb garden. Get tips, tricks, and solutions for making and maintaining your own indoor herb garden.
When selecting herbs, consider:
Size of the jar: Some herbs have larger root systems and need more space.
Growing conditions: Ensure the herbs you choose can thrive indoors.
Personal preference: Choose herbs you love to use in cooking or for their fragrance.
Caring for your garden involves:
Watering: Keep the soil moist but not waterlogged.
Sunlight: Place the jars in a spot that receives plenty of indirect sunlight.
Pruning: Trim the herbs regularly to encourage bushy growth.
The benefits include:
Fresh herbs: Enjoy a constant supply of fresh herbs right from your windowsill.
Space-saving: It’s a great solution for small spaces or urban living.
Decorative: Mason jar gardens add a charming touch to any area.
It’s best to use a potting mix specifically formulated for herbs or vegetables. This type of soil ensures proper drainage and nutrient content. Avoid using garden soil as it can be too dense and may contain pests or diseases.
Water your herbs when the top inch of soil feels dry to the touch. Overwatering can lead to root rot, so ensure the jars have good drainage. It’s also helpful to use a watering can with a long spout to control the water flow and prevent soil displacement.
Conclusion:
Wrapping up, a DIY mason jar herb garden is an excellent way to bring fresh herbs into your home with minimal effort. It's cost-effective, fun, and adds a touch of nature to your space. Start your garden today and enjoy the benefits of fresh herbs right at your fingertips!
Related DIY Projects and Ideas:
Explore creative and easy DIY projects and ideas to transform your home with budget-friendly designs and personalized touches.
- DIY Planter Box: Build your own planter box and grow anything you love. Easy DIY plans for a beautiful garden.
- DIY Vertical Garden: Discover creative vertical gardening ideas with our step-by-step guide. Maximize space and greenery effortlessly.
- DIY PVC Pipe Garden: Transform PVC pipes into a vertical garden. Perfect for small spaces and creative gardening.
- DIY Rain Barrel: Save money and conserve water with a homemade rain barrel. Simple steps to make your own.
- DIY Ladder Plant Stand: Elevate your greenery with a stylish DIY ladder plant stand. Easy to build and perfect for any space.

