Making your own DIY cupcake stand is a fun and rewarding project. Using basic materials like cardboard, glue, and decorative paper, you can craft a unique stand to showcase your delicious cupcakes. Not only does this allow you to add a personal touch to your baked goods presentation, but it also offers a cost-effective solution. This simple project is perfect for small gatherings or special occasions.
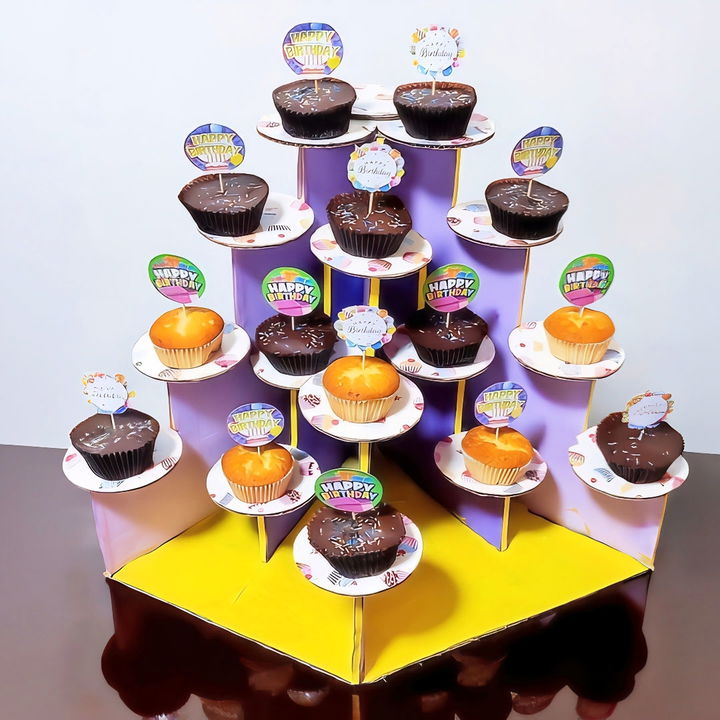
Start by gathering all the supplies you need: cardboard, glue, and decorative elements. Follow a step-by-step guide to ensure your DIY cupcake stand is sturdy and attractive. Decorate it to match your event’s theme or your personal style. This easy-to-make stand will enhance your dessert table, impressing your guests with minimal effort required.
Now, let's explore how to choose the right materials and follow the steps to build your personalized DIY cupcake stand.
Materials Needed
- Cardboard: This is the core material for the stand. It provides the structure and strength needed to hold your cupcakes.
- Scissors: Essential for cutting the cardboard into the desired shapes and sizes.
- Glue Gun and Glue Sticks: For securely attaching the pieces of cardboard together.
- White Glue and Double-Sided Tape: These help in attaching decorative elements.
- Colored Paper or Poster Paint: Used to decorate the cardboard and give your stand an attractive look.
- Gift Wrap: Adds a festive and polished appearance.
- Cupcake Toppers: Optional, but they add a cute finishing touch.
- Cupcakes: The star of the show—Whatta Tops or cheesecake cupcakes.
Step-by-Step Instructions
Learn how to make a DIY cupcake stand with our step-by-step instructions. This is an easy and fun way to display your treats beautifully!
Step 1: Gather Your Materials
Before starting, make sure you have all of the materials listed above. Having everything ready will make the process smoother and more enjoyable.
Step 2: Cut the Cardboard
Begin by cutting the cardboard into circles or other shapes for each layer of the stand. You will need three different sizes: large, medium, and small. These will be the tiers of your cupcake stand.
- Tip: Use a large bowl or a plate as a template for cutting perfect circles.
Step 3: Make the Support Columns
Next, cut out cylindrical support columns from the cardboard. You will need one for each tier connection. These should be sturdy enough to hold the weight of the cupcakes.
- Tip: Roll the cardboard into tight cylinders and use a glue gun to secure them.
Step 4: Decorate the Layers
Take your colored paper or poster paint and decorate each cardboard circle. This step is where you can get creative. Use colors that match your party theme or event decorations.
- Tip: If using paint, allow it to dry completely before moving on to the next step.
Step 5: Assemble the Stand
Using your glue gun, attach the support columns to the largest cardboard circle. Once secure, place the medium-sized circle on top and glue another support column on it. Finally, attach the smallest circle at the top.
- Tip: Ensure each layer is centered and firmly glued to maintain balance.
Step 6: Wrap It Up
Once the structure is assembled and the glue has dried, wrap the support columns with gift wrap. This enhances the visual appeal and hides any imperfections.
- Tip: Double-sided tape works best for securing the gift wrap without visible tape lines.
Step 7: Finishing Touches
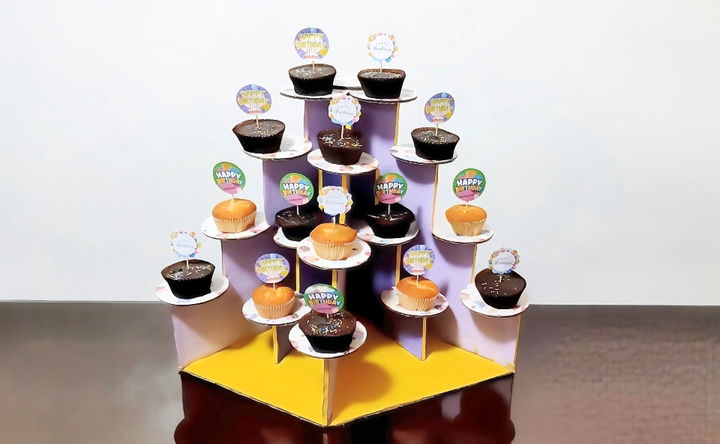
To finish, you can add decorative elements like cupcake toppers. These can be simple designs or elaborate creations, depending on your taste.
- Tip: Place a topper on each cupcake for an extra festive touch.
Step 8: Place the Cupcakes
Arrange the cupcakes on each tier of your stand. Start with the largest tier at the bottom and work your way up to the smallest. This helps maintain balance and ensures that each cupcake gets its own spotlight.
Pro Tips:
- Sturdiness: Ensure long-lasting sturdiness by reinforcing the joints with extra glue.
- Symmetry: Keep the stand symmetrical to prevent it from tipping over.
- Drying Time: Allocate sufficient time for the glue to dry thoroughly at each step.
Step 9: Enjoy!
Your DIY layered cupcake stand is now ready! This homemade stand will surely impress your guests and make your cupcakes look even more delicious.
Additional Tips for Success
- Planning: Sketch out your design before cutting any materials. This helps in visualizing the final product.
- Patience: Take your time with each step. Rushing can lead to mistakes, especially when using hot glue.
- Safety: Be careful when using the glue gun and scissors to avoid any injuries.
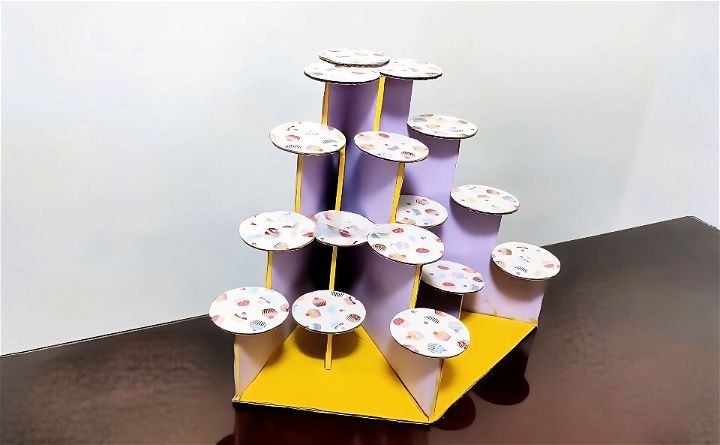
Making a layered cupcake stand using cardboard is not only economical but also allows for a great deal of personalization. With a bit of creativity and effort, you can make a stand that truly complements your event.
FAQs About DIY Cupcake Stand
Discover faqs about DIY cupcake stand: from materials and tools needed to step-by-step instructions. Perfect for your next party project!
Absolutely! Many DIY cupcake stand designs utilize affordable items that can be found at dollar stores, such as plates, candle holders, and glass domes. With some creativity and glue, you can create an attractive stand on a budget.
Yes, there are numerous tutorials available online that provide step-by-step instructions for making cupcake stands. These guides often include detailed materials lists and helpful illustrations to make the process clear and easy to follow.
Creativity knows no bounds when it comes to DIY cupcake stands. You can make tiered mirror stands for an elegant look, use an old lamp or picture frame for an upcycled stand, or even design a rustic ladder stand for a unique touch. Explore various online resources for inspiration and instructions.
Personalizing your cupcake stand is a fun way to tie it into your party’s theme. You can paint it in colors that match your decorations, add ribbons or stickers, or use themed accessories to decorate the stand. For example, if you’re hosting a beach-themed party, you might adorn your stand with seashells and sand dollars.
The best way to clean your cupcake stand depends on the materials used to make it. For stands made of glass or ceramic, a gentle wash with soap and water should suffice. If your stand is made of wood, wipe it down with a damp cloth and avoid prolonged exposure to water to prevent warping. Always dry your stand thoroughly after cleaning to maintain its condition.
Conclusion:
In conclusion, making a DIY cupcake stand is a fun and rewarding project. It allows you to add a personal touch to your celebrations. With simple materials and steps, you can showcase your cupcakes in style. This hands-on project brings creativity and satisfaction as you see your ideas come to life. Now, gather your supplies and start building your unique cupcake stand today!

