Building your own DIY welding table is an incredibly rewarding project. This sturdy workspace not only keeps your welding tools organized but also enhances your efficiency during any welding task. Making a DIY welding table allows you to customize it to fit your specific needs and space, making your welding projects more enjoyable and productive. With simple steps, you can construct a solid, practical welding table that suits your preferences.
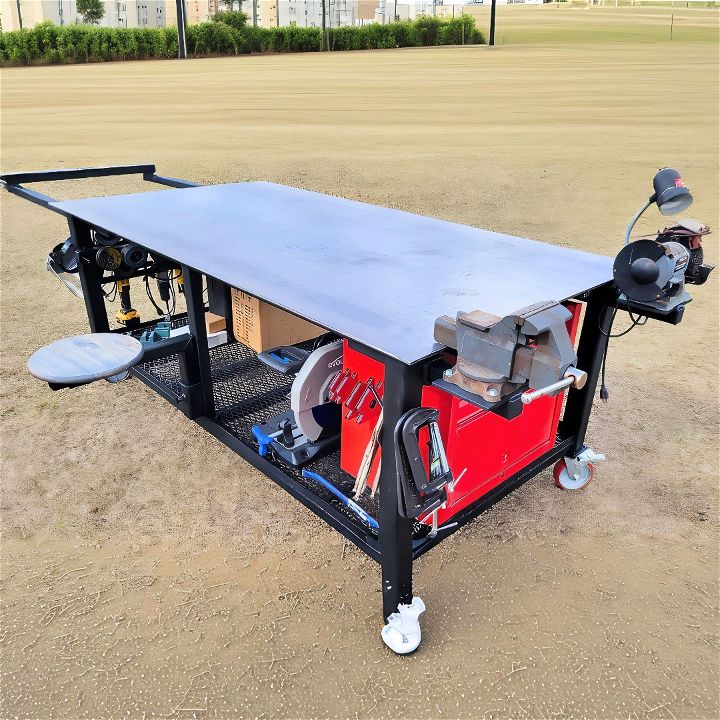
Our guide will help you through the process of assembling your DIY welding table with easy-to-follow instructions and tips. From gathering materials to the final touches, our content covers everything you need to complete this project successfully. By following these steps, you can ensure your table meets your requirements and lasts for years.
Why a Welding Table?
A welding table is an essential piece of equipment for anyone serious about metalworking. It provides a flat, stable surface to work on, making tasks like cutting, grinding, and welding safer and more efficient. With features tailored to your needs, a custom-built table can greatly enhance your productivity and workflow.
Materials Needed
Before we dive into the construction process, let’s look at the materials you'll need and why each is important:
- Steel Sheets (4x8 ft): Provides a large work area and a flat, stable surface.
- Square Tubing (2x2 in, thick wall): Forms the frame of the table, offering strength and durability.
- Receiver Tubes (2 in): For interchangeable attachments and extensions.
- Angle Iron and Flat Bar: For additional support and tool mounts.
- Casters (4,000 lb locking): Makes the table mobile and ensures stability during heavy work.
- Welder, Grinder, and Saw: Basic tools for cutting and assembling the steel.
Step-by-Step Guide
Make your own welding table with our step-by-step DIY guide. Learn design, materials, cutting, assembling, and more.
1. Designing the Table
First, consider what you need from your welding table. I wanted a 4x8 ft table to give me ample workspace. Make sketches and measurements to visualize your table. Consider adding features like interchangeable receiver tubes and mobile casters.
2. Gathering Materials
Visit your local metal supplier to get the steel sheets and tubing. Make sure to choose thick-walled tubing for extra strength.
3. Cutting the Steel
Use a metal cutting circular saw for precision cuts. Cut the square tubing according to your design dimensions for the frame and legs of the table.
4. Assembling the Frame
- Step 1: Lay out the square tubing on a flat surface to form the frame.
- Step 2: Weld the pieces together at the joints. Ensure the frame is square by checking diagonally across the corners.
- Step 3: Add cross braces for additional stability.
5. Mounting the Receiver Tubes
- Step 1: Weld 2in receiver tubes to key areas around the table’s frame. These will allow for interchangeable add-ons and extensions.
- Step 2: Ensure the tubes are aligned and secure.
6. Adding the Tabletop
- Step 1: Place the 4x8 ft steel sheet on top of the frame.
- Step 2: Weld the steel sheet to the frame. Ensure it is flat and secure to prevent any wobbling.
7. Installing the Casters
- Step 1: Weld 3-inch square tubes to the corners of the frame for mounting the casters.
- Step 2: Attach the 4,000 lb locking casters to each corner. The locking feature is crucial for stability during intensive tasks.
8. Custom Features
Extendable Table
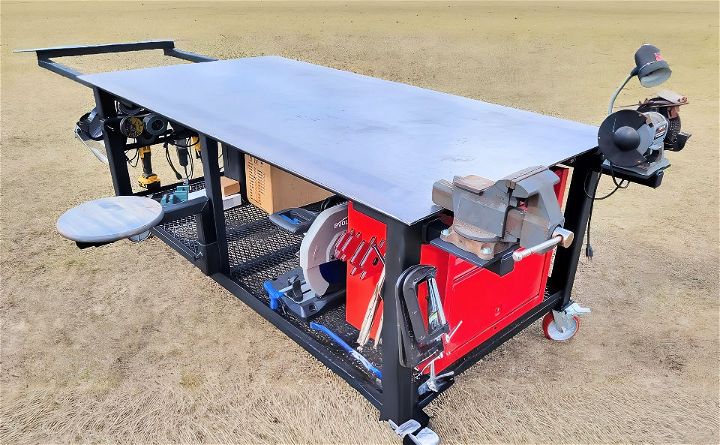
- Step 1: Create an extendable end using additional square tubing and receiver tubes.
- Step 2: Weld the extendable mechanism to the table, allowing it to increase in length when needed.
Tool and Clamp Holders
- Step 1: Weld angle iron and flat bars to the sides of the table for holding grinders, clamps, and other tools.
- Step 2: Ensure these holders are easily accessible, enhancing your workflow.
Under-table Storage
- Step 1: Install shelves under the table using leftover steel for storing tools like welders, saws, and toolboxes.
- Step 2: Use angle iron and flat bar to create a sturdy shelving system.
9. Securing and Testing
- Step 1: Ensure all welds are secure and the table is stable.
- Step 2: Test the extendable feature and the casters' locking mechanism.
10. Finishing Touches
- Step 1: Clean the table to remove any welding residue or debris.
- Step 2: Paint or coat the table to prevent rust and prolong its life.
Building my ideal welding table was fulfilling and taught me a lot. With features like the extendable end and receiver tubes, my work became more efficient and enjoyable. Follow these steps, and you can build a custom welding table to enhance your metalworking projects.
Whether you are an experienced welder or a DIY enthusiast, this guide provides a clear pathway to building a functional and durable welding table. Remember, the key lies in planning, gathering the right materials, and ensuring precision in every step. Happy welding!
FAQs About DIY Welding Table
Discover essential faqs about DIY welding tables, including materials, safety, and tips to build your own sturdy and efficient workspace.
Stability is key for a welding table. Use thick rectangular steel tubing for the legs and frame. Ensure all joints are properly welded and check for wobbles before using the table. Adding a lower shelf made of sheet metal can also increase stability and provide additional storage.
Safety is paramount. Wear thick leather gloves, a welding cap, long-sleeve cotton or leather clothing, and safety glasses. Always weld in a well-ventilated area and ensure you have a proper ground connection. Never weld on painted or coated metals without proper preparation.
Absolutely! Consider adding:
Clamp slots or holes in the tabletop for securing workpieces.
A grounding tab for attaching a grounding clamp.
Tool hooks or holders for easy access to your welding tools.
A four-outlet receptacle for power tools, attached with a long cord.
For larger projects like a welding table, it’s best to buy from a metal supplier. They often charge less than home centers and can cut the metal to your exact dimensions. This can save you up to 50% on costs and ensure you get the quality and size you need for your project.
The size of your welding table should match the space you have available and the projects you plan to undertake. A good starting point is a table that is 3 feet wide by 5 feet long. This size is large enough for most projects but still manageable in a smaller workshop. If you’re limited on space, consider building a table that can fold down or is on casters for easy storage. Remember, the height should be comfortable for you to work at while standing or sitting on a stool.
Conclusion:
In conclusion, building your own DIY welding table is a fulfilling project that can significantly enhance your workspace. This guide equips you with the steps and tips to create a sturdy, functional table. By following these instructions, you’ll have a customized welding table tailored to your specific needs.
Related DIY Projects and Ideas:
Explore step-by-step guides and innovative ideas in related DIY projects and ideas for your next creative endeavor.
- DIY Ladder Plant Stand: Elevate your greenery with this creative DIY ladder plant stand. Perfect for any space!
- DIY Magnetic Board: Organize your life with a stylish DIY magnetic board. Discover easy and fun ideas!
- Make DIY Stencils: Create custom stencils for any project. Easy steps for all skill levels!
- DIY Gun Rack: Build a secure gun rack with this step-by-step DIY guide. Perfect for any gun owner!
- Hang a Door DIY: Learn how to hang a door with this comprehensive DIY guide. Simple steps for everyone!

