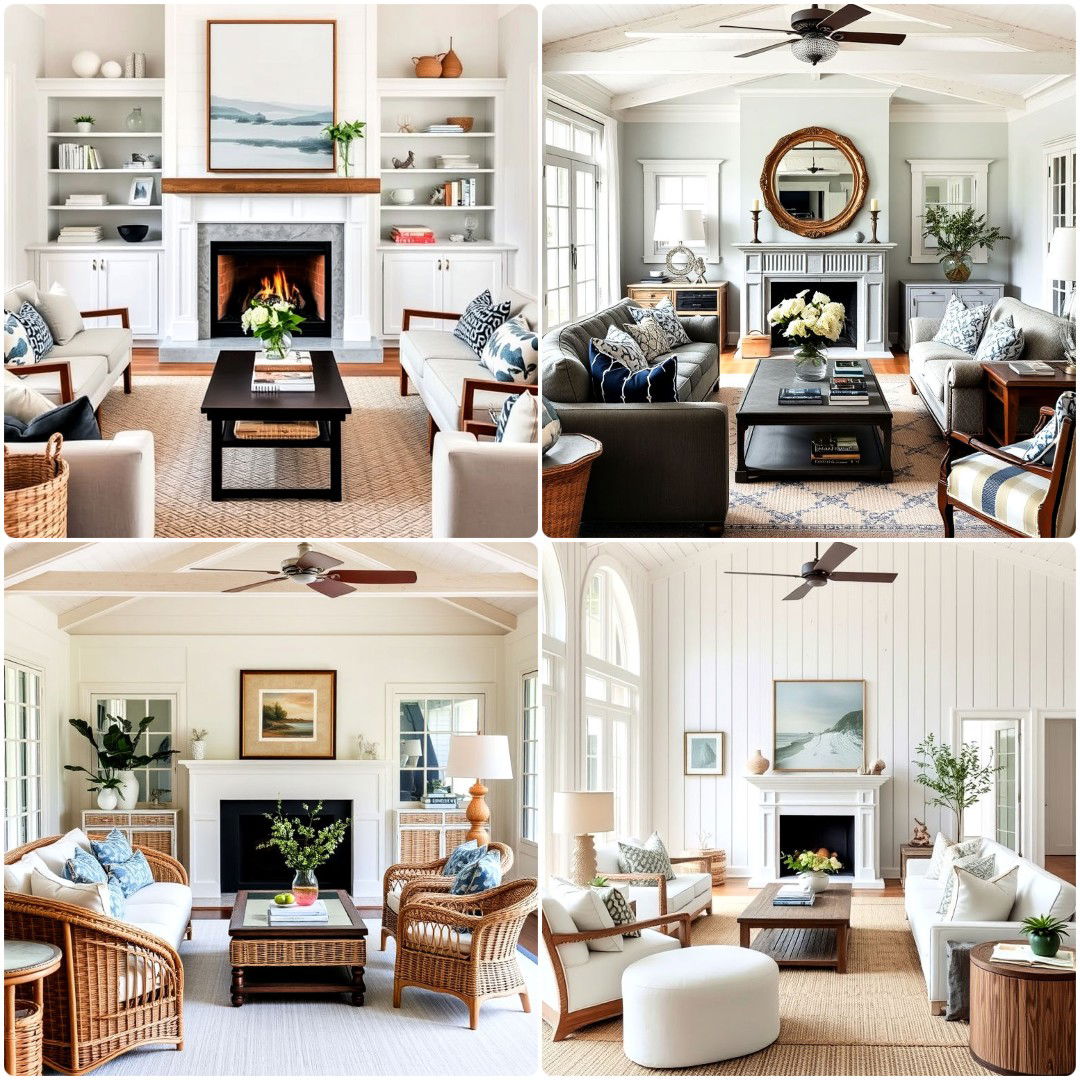
Setting up a dedicated pottery room is a transformative journey that turns a simple hobby into a fulfilling daily practice of creation and mindfulness. Whether you are reclaiming a corner of your basement or designing a professional-grade garden studio, the layout of your ceramic workspace directly influences your artistic flow and productivity. A well-organized room should balance technical requirements, such as heavy-duty shelving and proper ventilation, with an atmosphere that sparks inspiration. From the tactile joy of wedging raw clay to the final satisfaction of unloading a warm kiln, every stage of the process deserves a thoughtful space. This guide explores thirty comprehensive ways to structure your studio for maximum efficiency and aesthetic appeal.

1. Small basement pottery studio
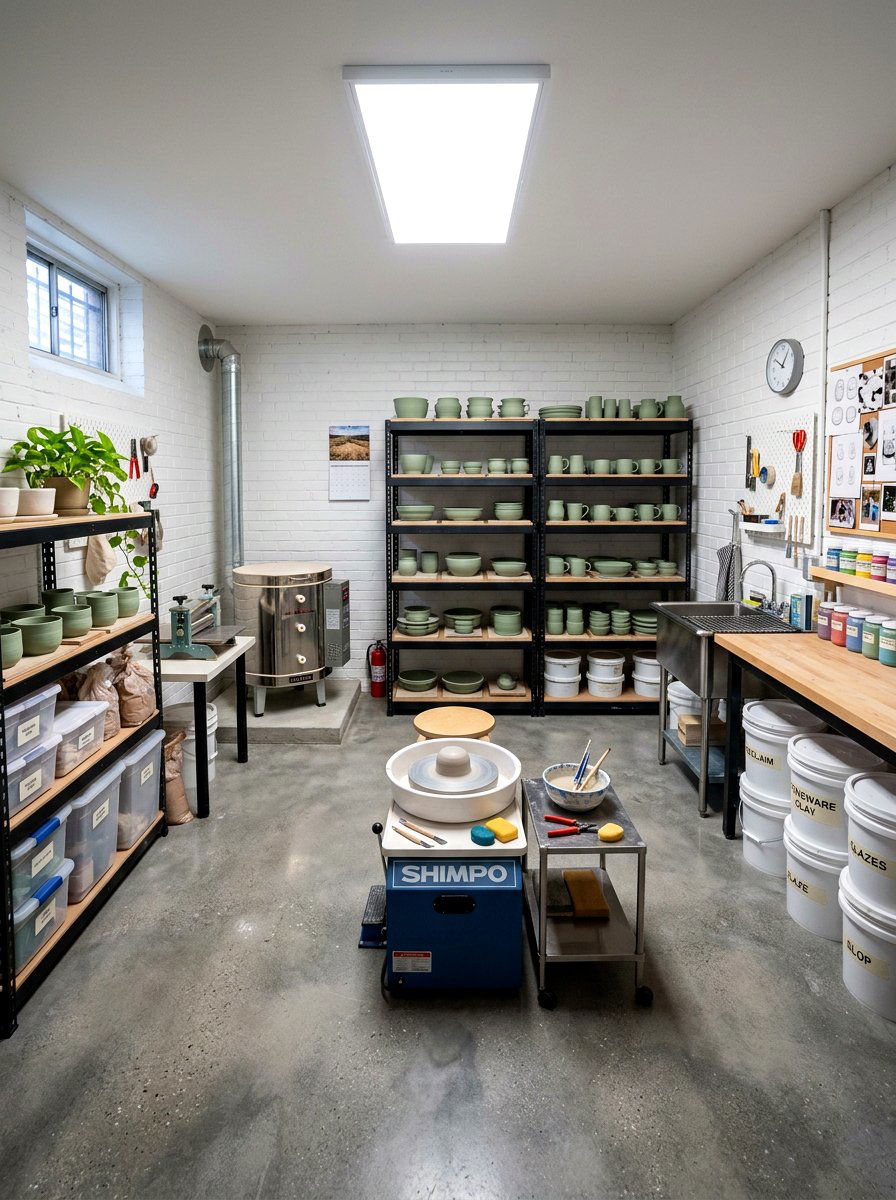
Have you ever looked at a damp, unused basement corner and seen a future ceramic sanctuary? Turning a subterranean space into a pottery workshop requires smart planning regarding moisture and illumination. Start by painting the walls a crisp, reflective white to combat the typical gloom of a basement. Sealed concrete or epoxy floors are the best choice here because they allow for easy mopping after a messy throwing session. Install high-lumen LED shop lights to mimic natural daylight, ensuring you can see every fine detail on your pots. Vertical shelving units help maximize the small footprint, while a sturdy workbench provides a dedicated area for wedging and finishing touches.
2. Sunroom pottery studio
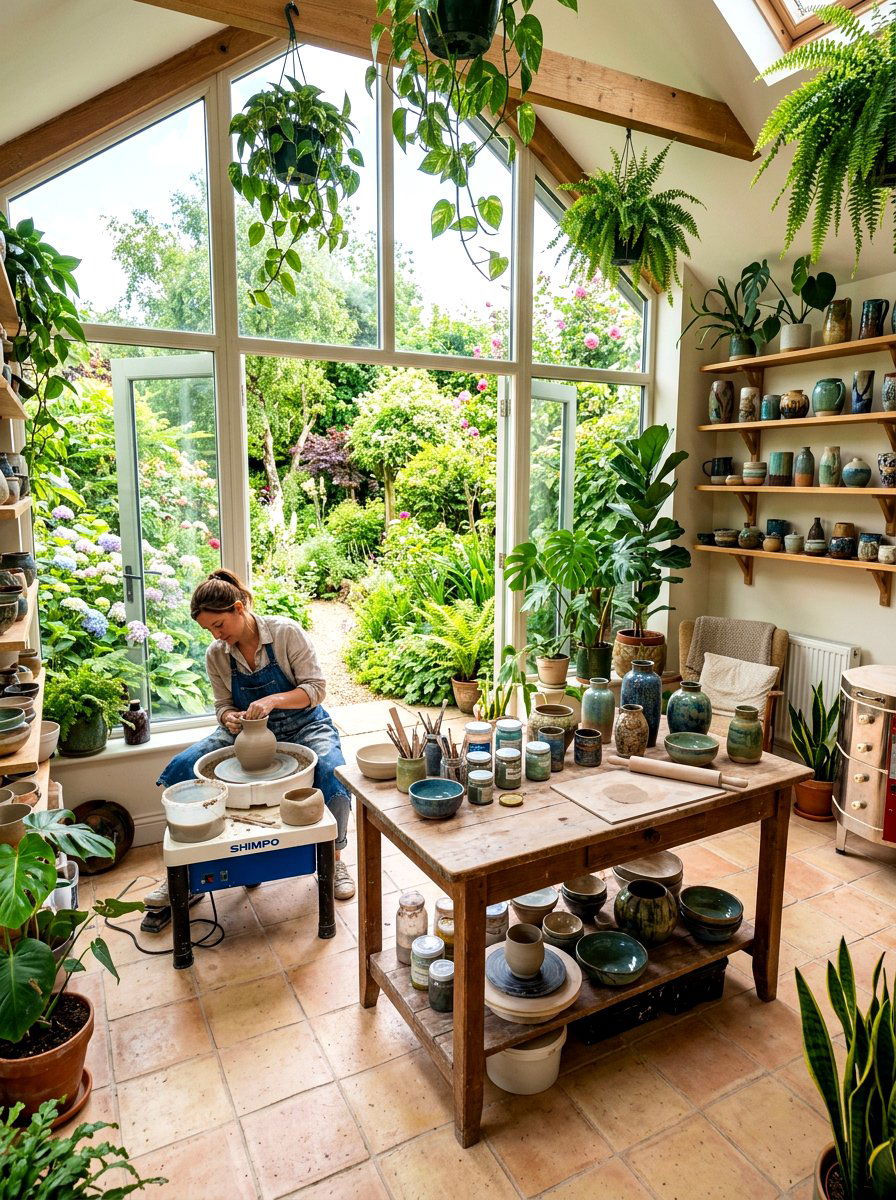
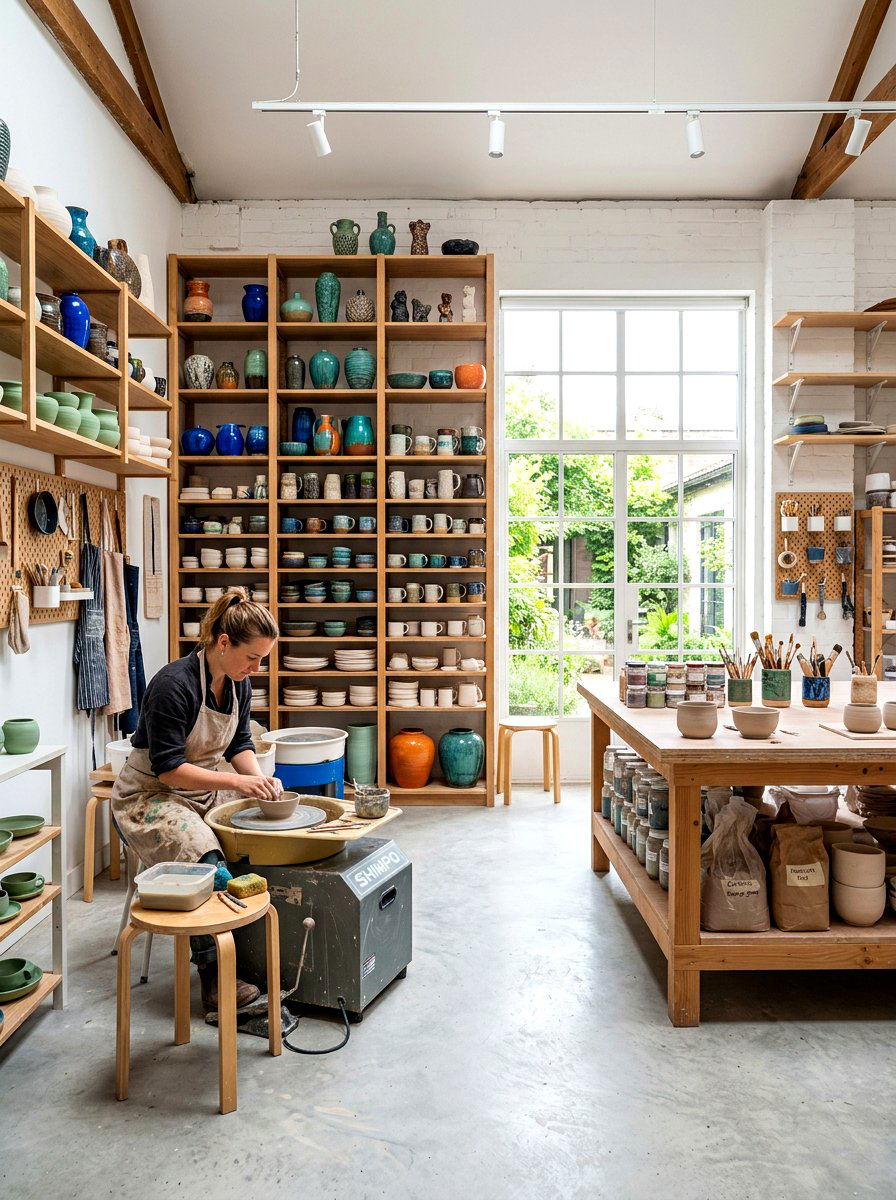
Does anything feel more inspiring than shaping clay while surrounded by the beauty of the outdoors? A sunroom provides the ultimate environment for a pottery studio due to the abundance of natural light and excellent visibility. To protect the space, choose durable tile or stone flooring that handles water spills without staining. Use sheer blinds to control the intensity of the afternoon sun, preventing your greenware from drying too quickly and cracking. Position your wheel near a window to enjoy the view, and keep a few hardy indoor plants nearby to enhance the biophilic connection. This bright, airy atmosphere makes long hours of trimming and glazing feel incredibly restorative.
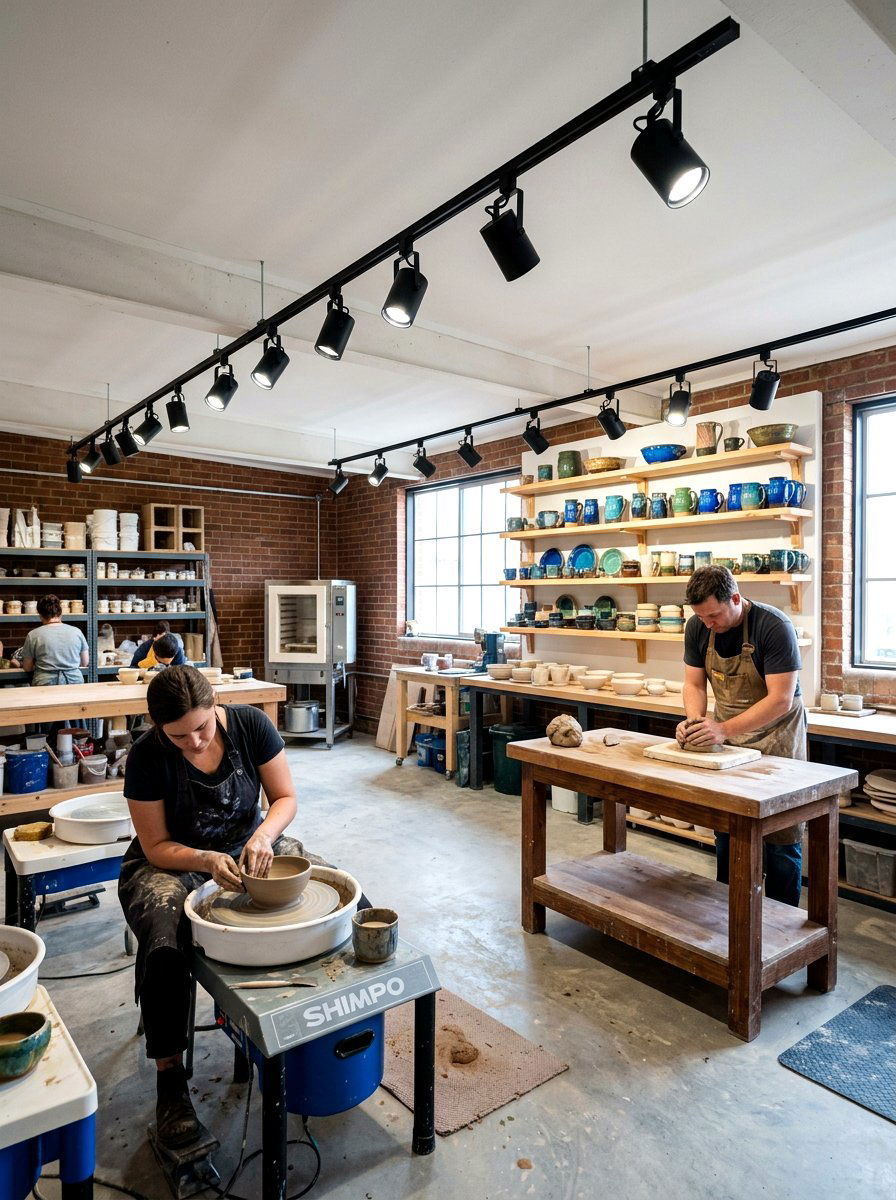
3. Garage pottery studio
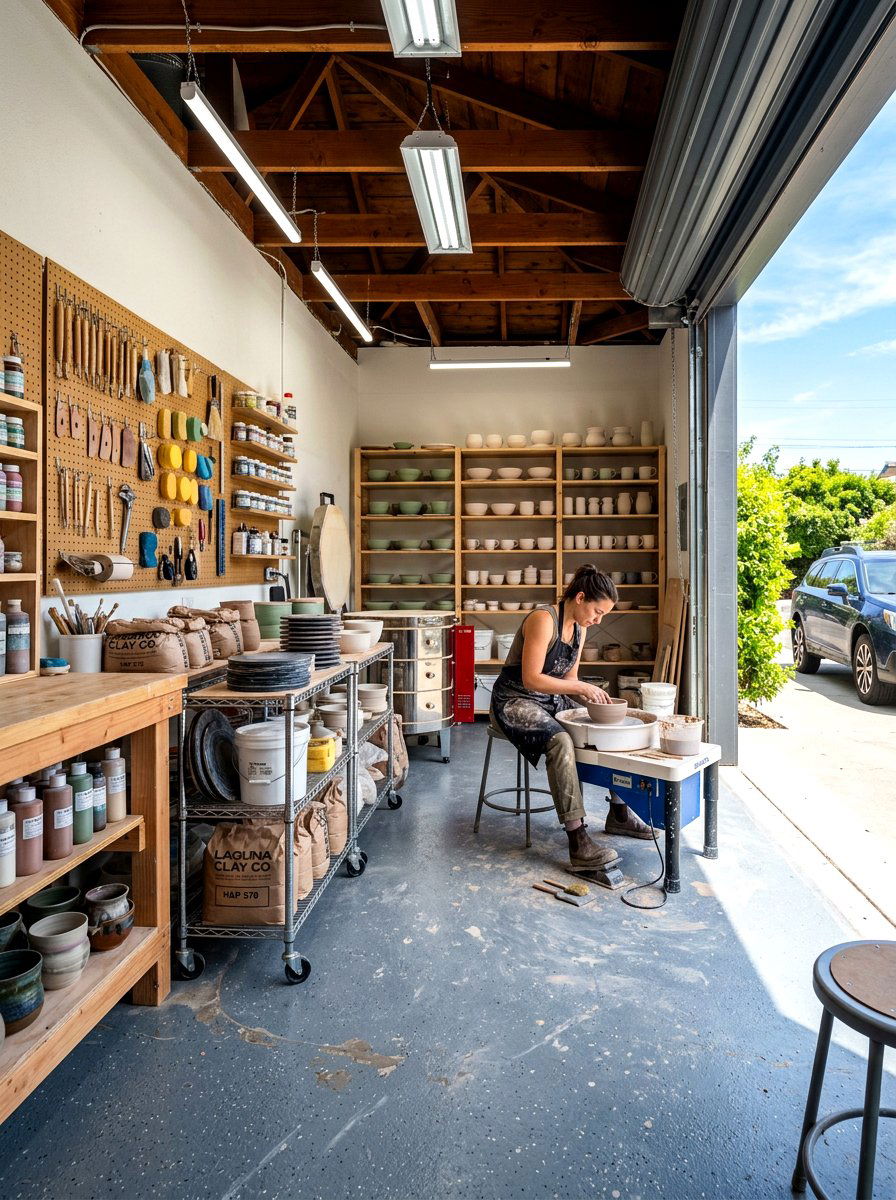
Can a standard vehicle bay actually become a high-functioning professional ceramic workspace? The garage is a classic choice for potters because it often features the industrial-grade electrical outlets needed for kilns and wheels. Focus on a layout that keeps the "dirty" clay areas near the garage door for easy sweeping and hose-down cleaning. Use heavy-duty metal rolling carts to move heavy bags of clay and finished boards of ware between different stations. If the space is unheated, consider adding a portable space heater to keep your hands and clay supple during winter months. Adding a pegboard wall keeps tools organized and off the limited floor area.
4. Outdoor pottery studio
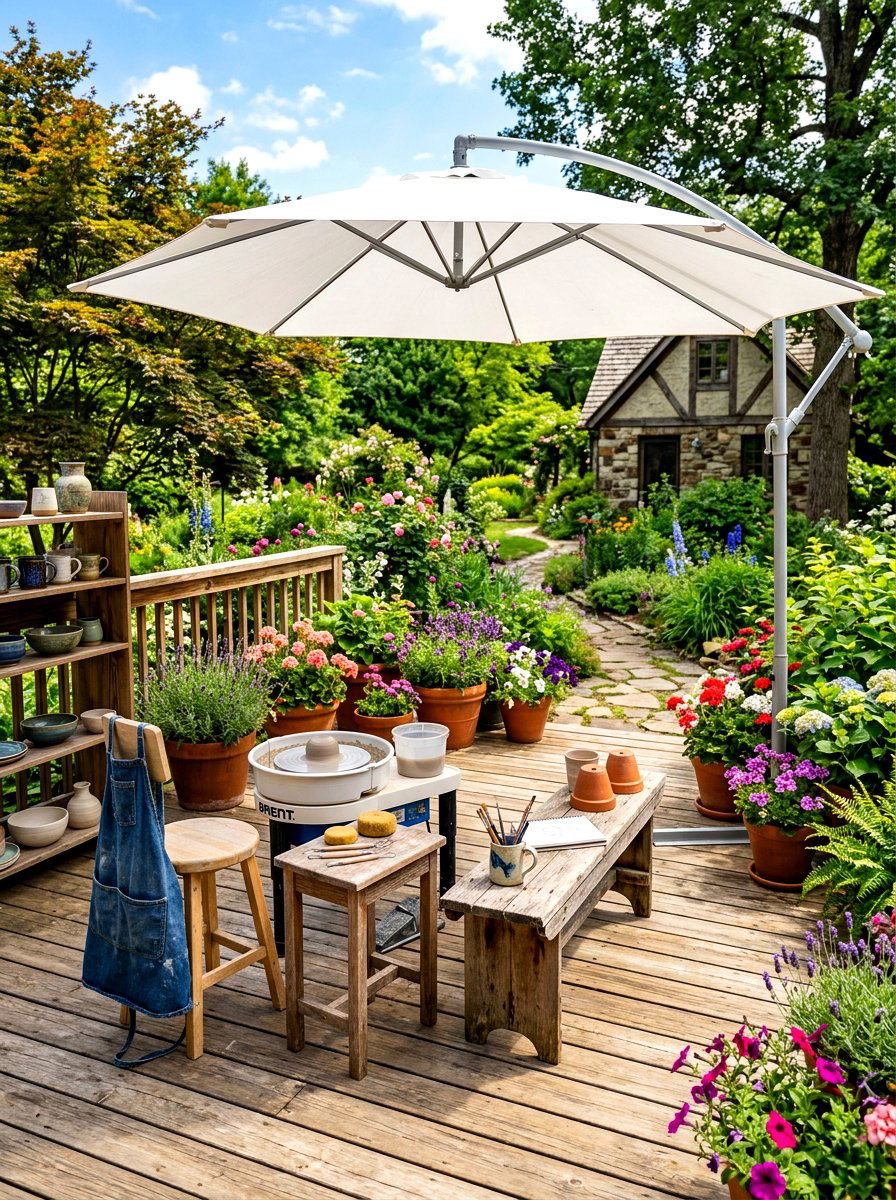
Why not take your creative practice into the fresh air by setting up an alfresco clay workstation? An outdoor pottery area is perfect for those who enjoy the messy freedom of hand-building or throwing without worrying about indoor dust. Build a sturdy wooden deck or a gravel patio to serve as a level foundation for your equipment. A large cantilever umbrella or a permanent pergola provides essential shade to keep your clay from drying out too fast under the sun. Store your tools in weather-proof plastic bins and cover your wheel with a heavy-duty tarp when not in use. This setup is ideal for seasonal projects and messy raku firings.
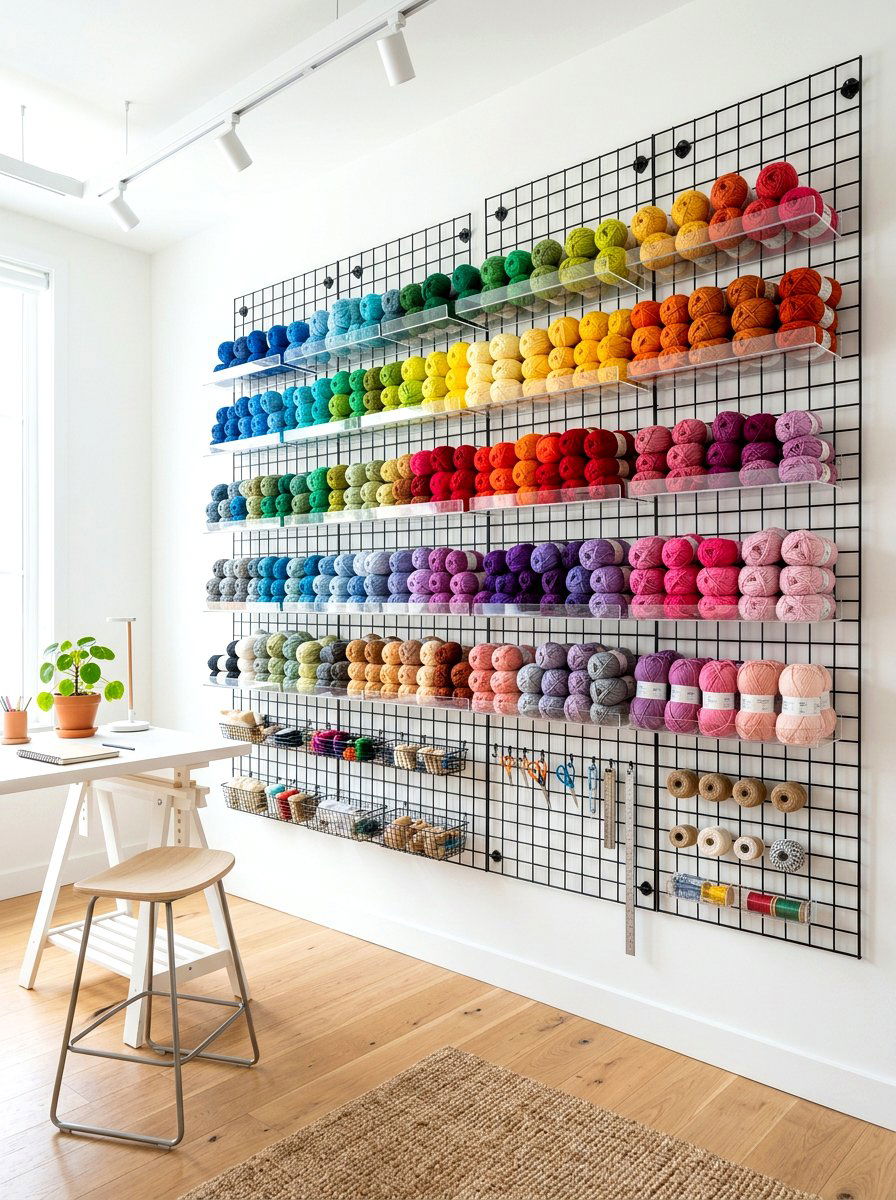
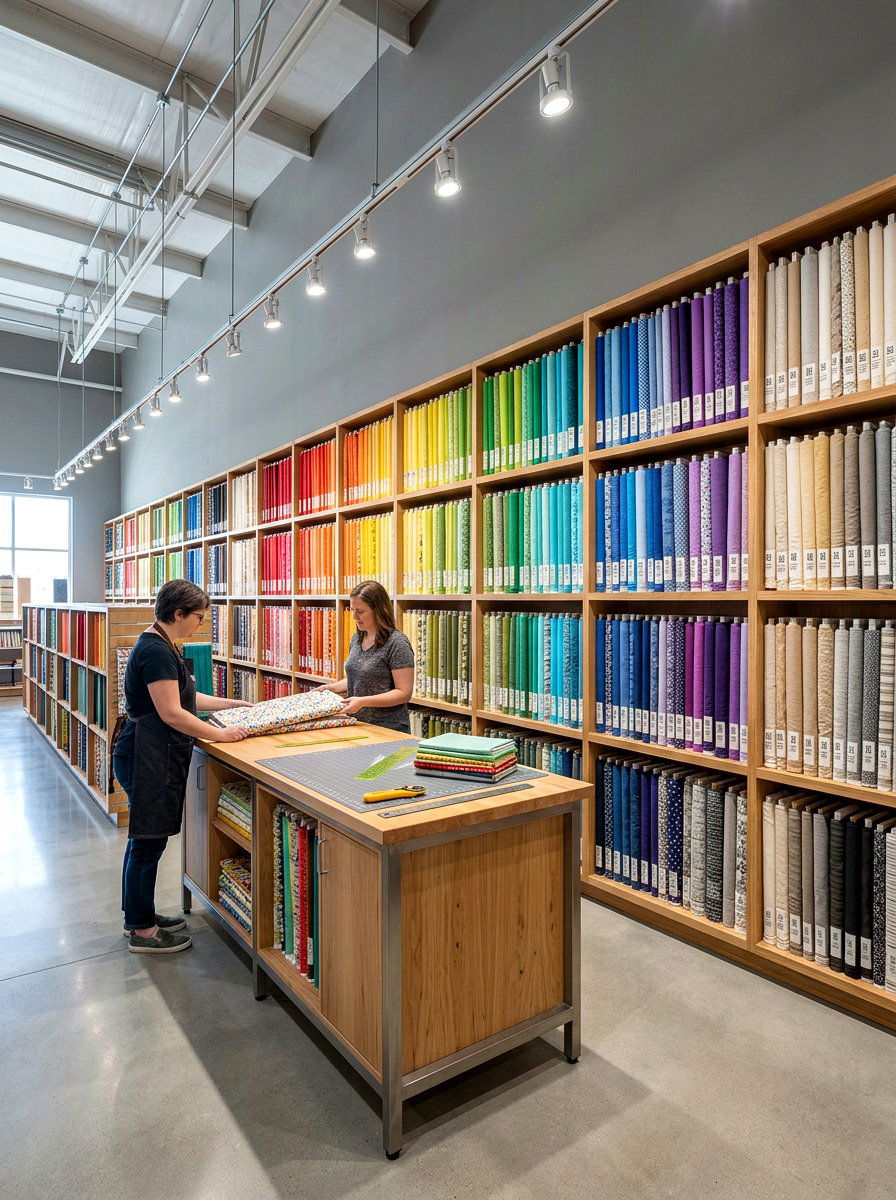
5. Pottery studio shelving
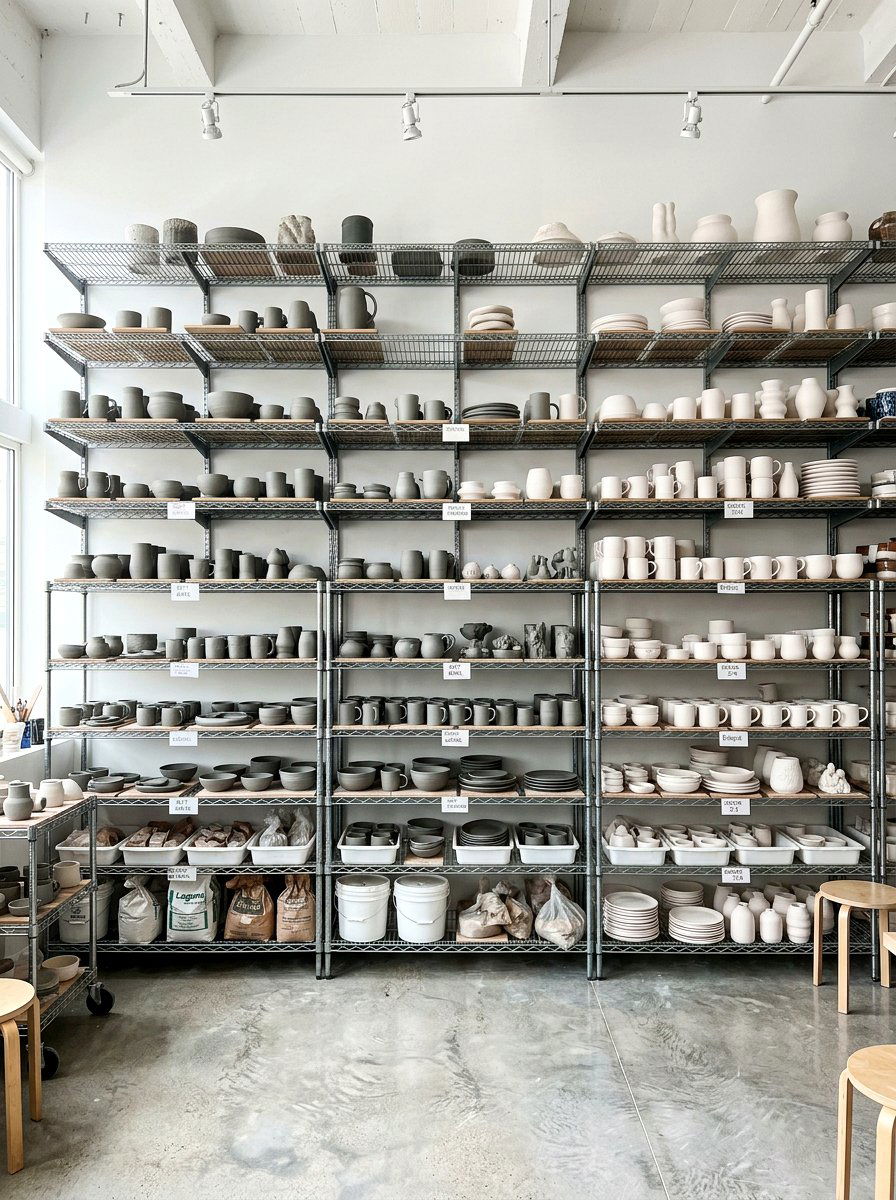
Vertical space is a potter's most valuable asset when it comes to managing the many stages of ceramic production. Open shelving made of moisture-resistant materials allows for consistent airflow around drying greenware, which is crucial for preventing uneven shrinkage. Consider using heavy-duty wire racks that prevent dust from accumulating and allow you to see your inventory from every angle. Label your shelves clearly to distinguish between drying pieces, bisque-fired items, and those ready for the final glaze firing. Adjust the height of your shelves to accommodate different sizes, from small mugs to tall vases, ensuring that every inch of your wall is used efficiently.
6. Pottery wheel corner
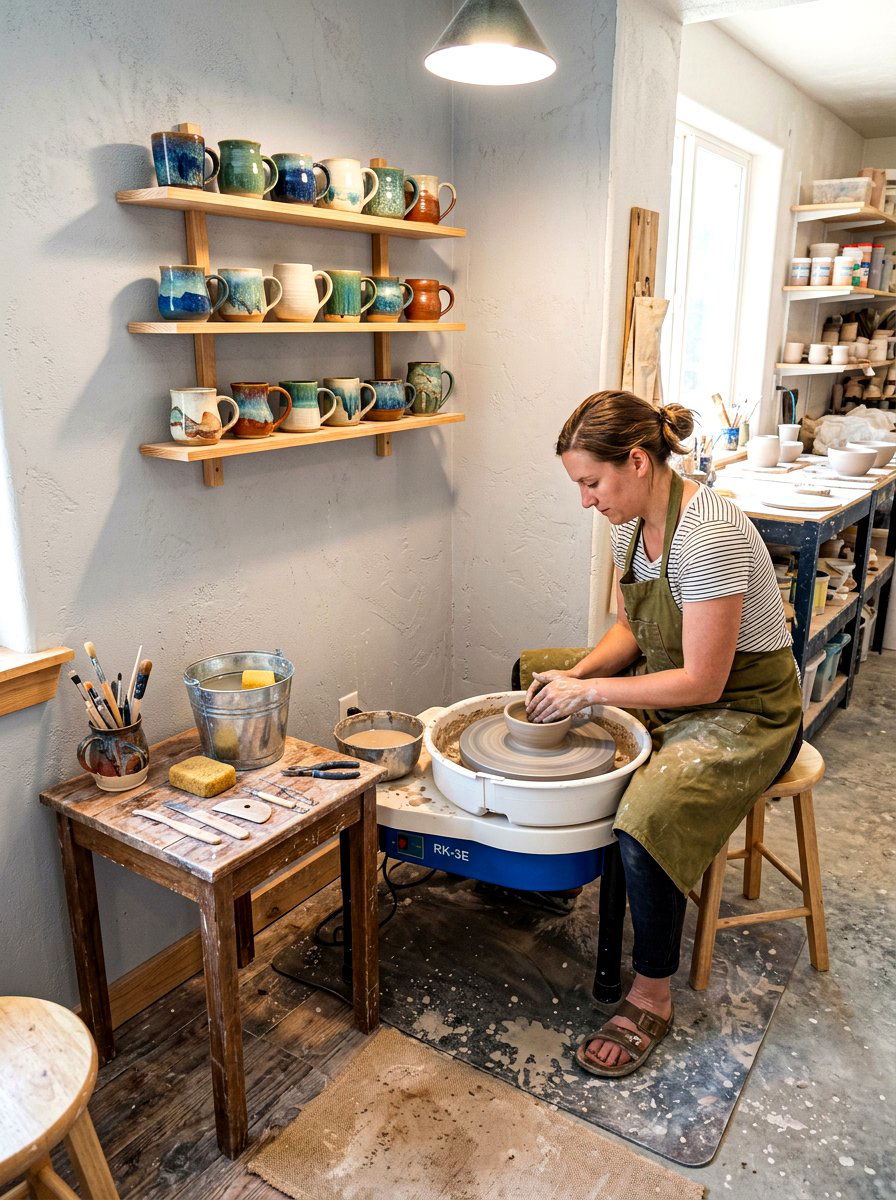
Is there anything more central to a ceramicist’s life than a perfectly positioned throwing station? Carving out a dedicated corner for your pottery wheel helps contain the inevitable splashes of slip and water. Place a small table or a set of narrow shelves within arm's reach to hold your ribs, sponges, and trimming tools. Ensure you have a comfortable, adjustable stool that supports your back during long sessions at the wheel. Keeping a large bucket of water and several clean towels nearby will streamline your process and minimize the need to walk across the room with messy hands. This focused area becomes the heartbeat of your creative daily routine.
7. Wedging table setup
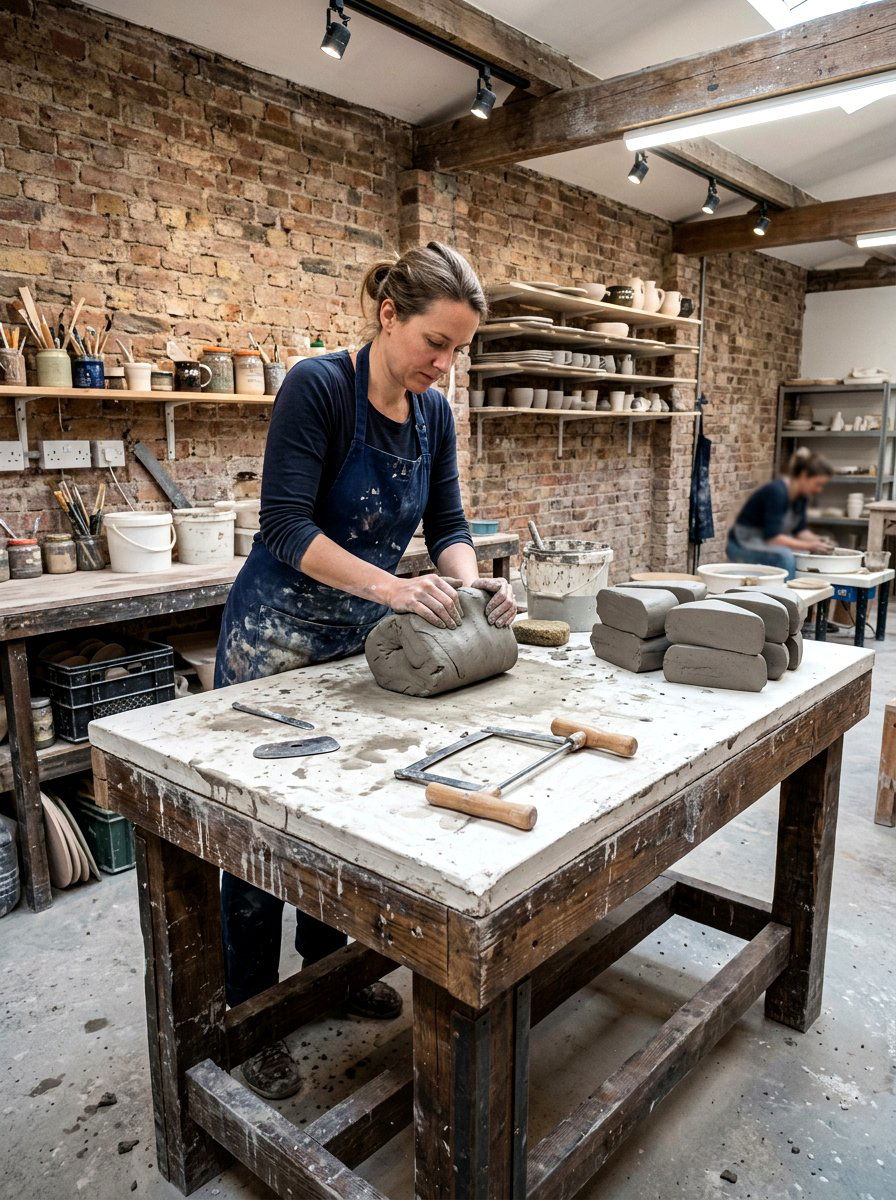
Have you considered how much a proper wedging station can improve the quality of your finished ceramic pieces? A dedicated table for preparing clay should be built at a comfortable waist height to allow you to put your full body weight into the process. Many potters prefer a thick plaster top or a canvas-covered surface to help absorb excess moisture and prevent the clay from sticking. This area should be exceptionally sturdy to withstand the repetitive force of wedging and slamming clay. Keep a wire cutter and a scale nearby so you can accurately portion out your clay for consistent production, making the start of every project seamless.
8. Pottery kiln room
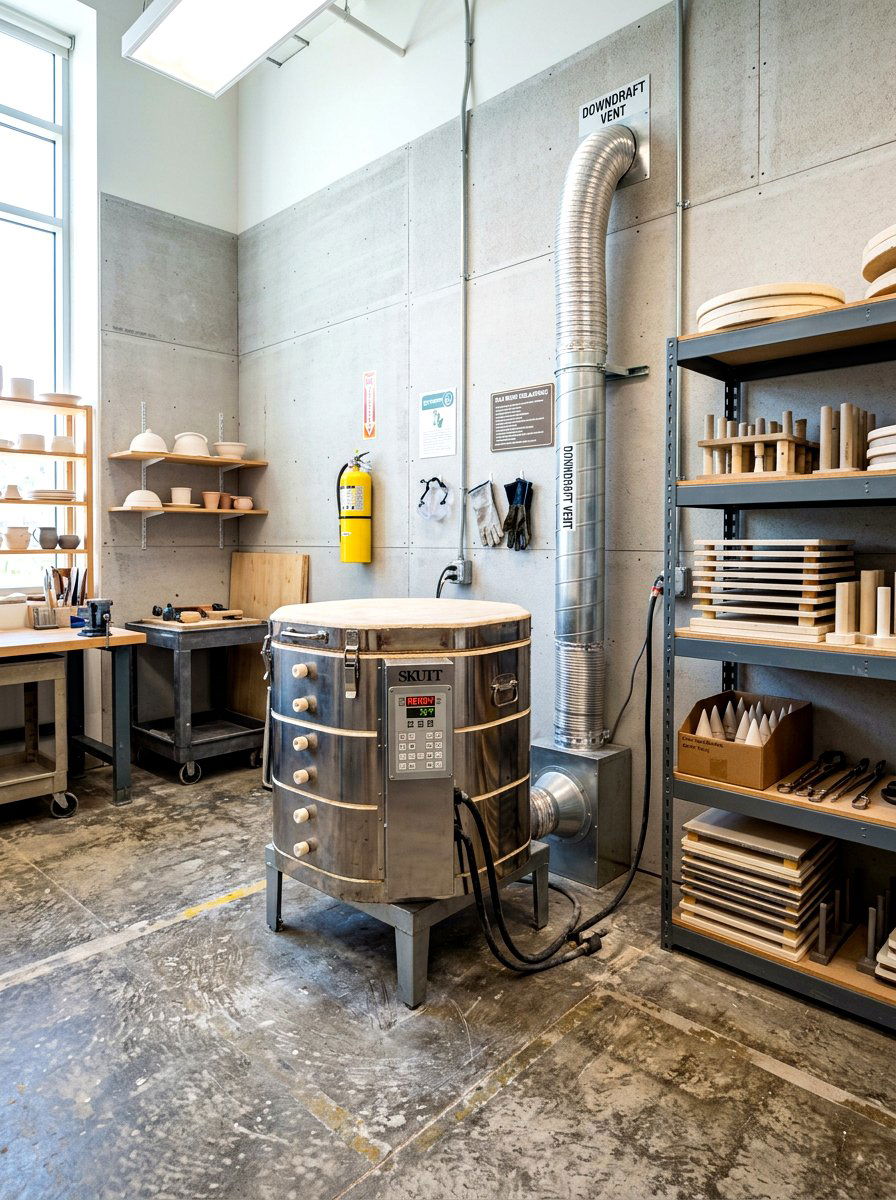
Safety and efficiency are the top priorities when designing a dedicated room for your ceramic kiln. This space must be equipped with non-combustible flooring, such as concrete or masonry tile, to handle the intense heat of a firing. Proper ventilation is non-negotiable; install a high-quality downdraft vent or an overhead hood to safely exhaust fumes and heat outside. Ensure there is at least eighteen inches of clearance between the kiln and any walls or stored materials to prevent fire hazards. Keeping the kiln in a separate, lockable room also protects curious children or pets from the extremely hot surfaces during the long cooling and firing cycles.
9. Pottery studio sink

Managing clay waste is one of the most challenging parts of running a home studio, making a specialized sink essential. You must install a clay trap or a multi-stage sediment system under the drain to prevent heavy particles from clogging your household plumbing. A deep utility sink with a high-neck faucet makes it much easier to clean large buckets, splash pans, and oversized bats. Keep a dedicated set of sponges and scrubbing brushes at the sink to ensure everything is wiped down thoroughly after each use. This station acts as the primary cleanup hub, keeping the rest of your pottery room pristine and safe from lingering clay dust.
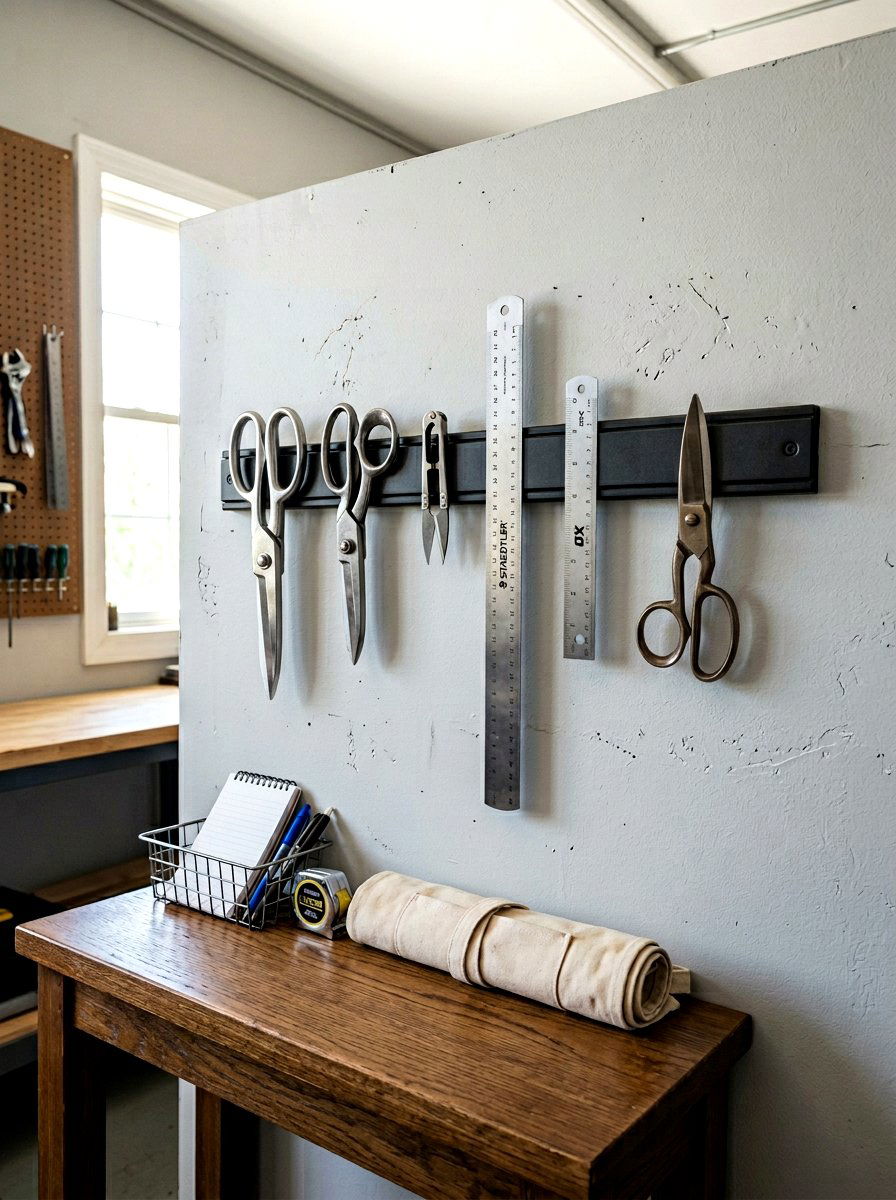
10. Wall mounted tool storage
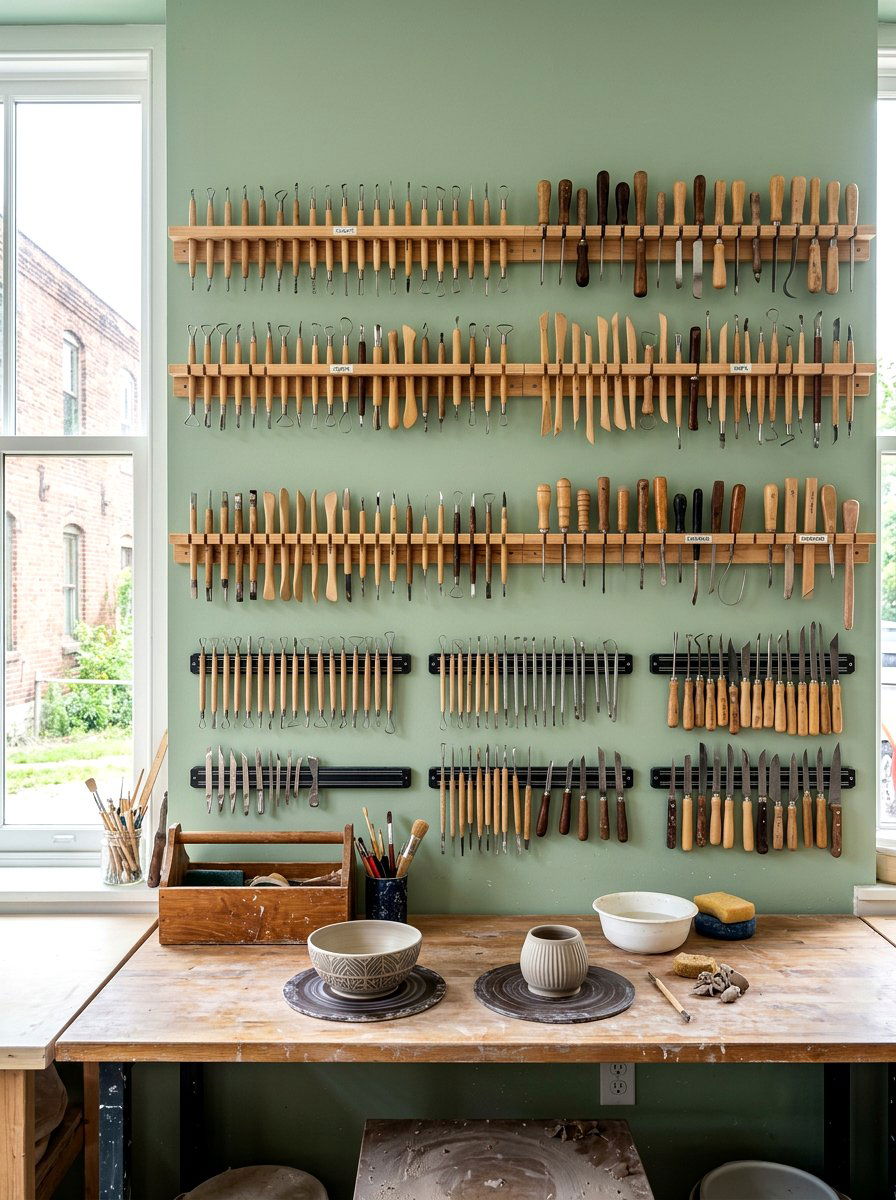
Are you tired of digging through messy drawers just to find your favorite carving loop or needle tool? Wall-mounted storage solutions, such as magnetic strips or narrow wooden ledges, keep your most-used items visible and within easy reach. Arrange your tools by function — keeping trimming items in one section and hand-building tools in another — to create a logical workflow. Using vertical space for storage frees up your limited countertop area for actual making and glazing tasks. Not only does this keep the studio organized, but it also allows your beautiful, handmade tools to serve as a decorative element that showcases your craft and artistic personality.
11. Pottery drying rack
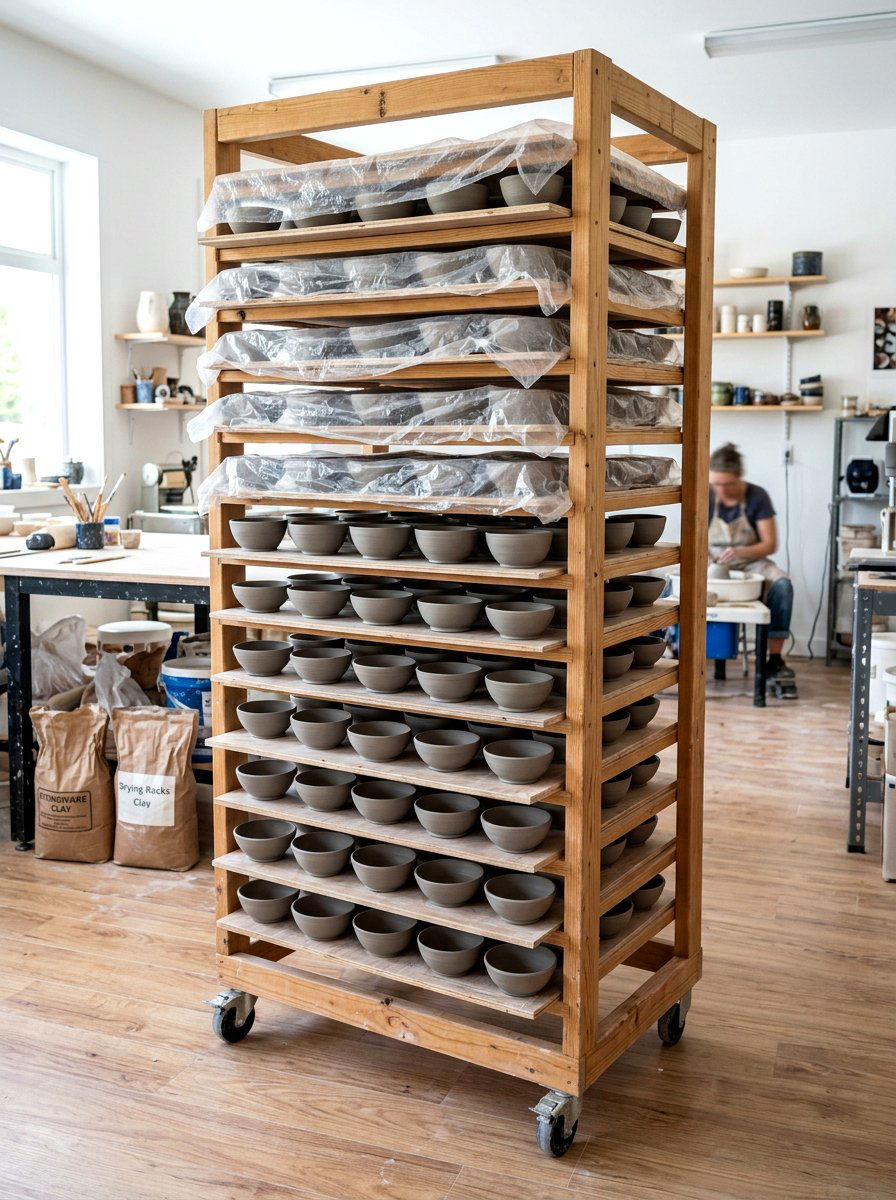
Consistent drying is the secret to preventing cracks and warps in your delicate ceramic work before it hits the kiln. A mobile drying rack with multiple levels allows you to move your greenware away from drafts or direct sunlight as needed. You can use plastic sheeting to wrap the entire rack, creating a "damp closet" environment that slows down the drying process for complex pieces. Make sure the boards you use on the rack are made of unfinished wood or marine-grade plywood to absorb moisture evenly from the base of your pots. This organized system ensures that every piece transitions safely from the wet stage to bone-dry.
12. Minimalist pottery studio
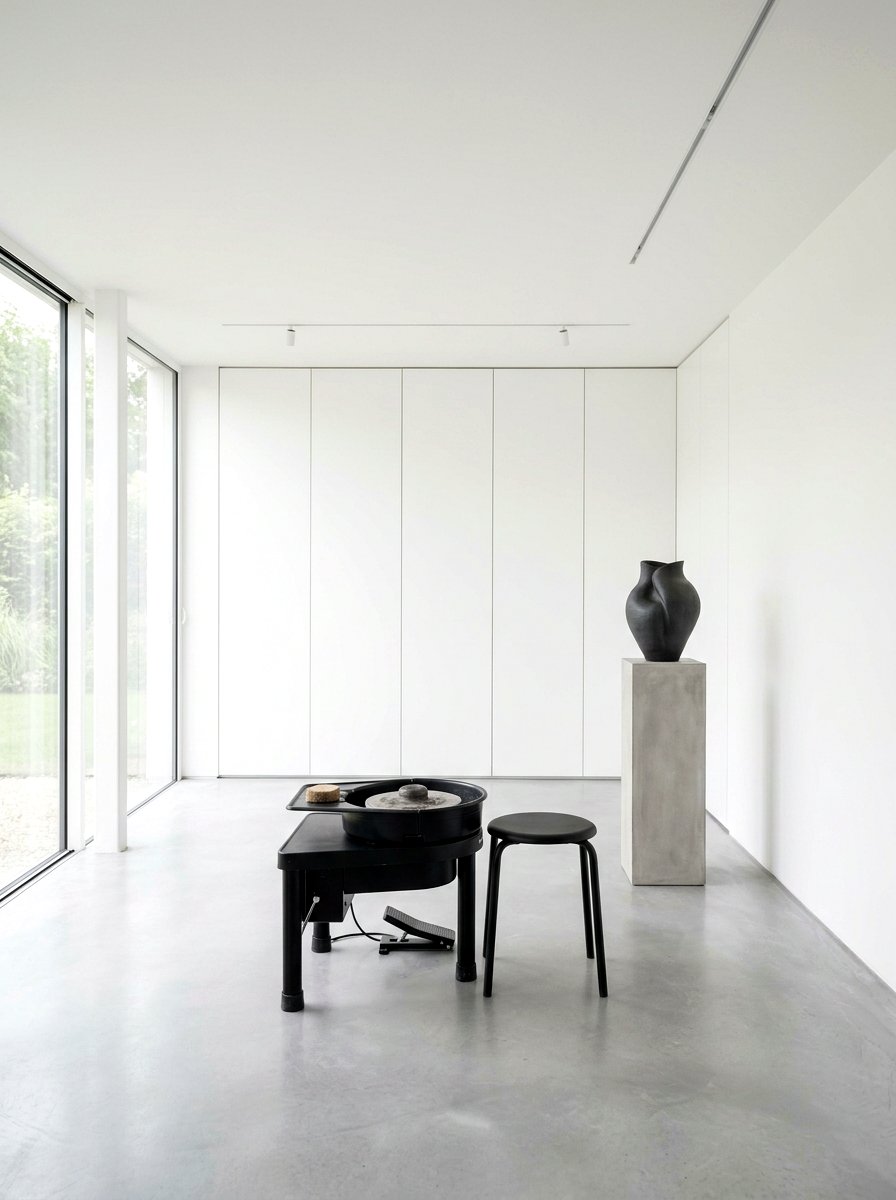
Can a clean, minimalist aesthetic actually work in a hobby that is known for being inherently messy? A minimalist pottery room focuses on high-quality essentials and hidden storage to maintain a calm, clutter-free environment. Choose a monochromatic color palette with white walls and light grey floors to make the space feel larger and more serene. Invest in sleek, closed cabinetry to hide bags of clay, glaze chemicals, and half-finished projects when they are not in use. By reducing visual noise, you can focus more deeply on the tactile sensation of the clay and the subtle curves of your designs, creating a truly meditative making experience.
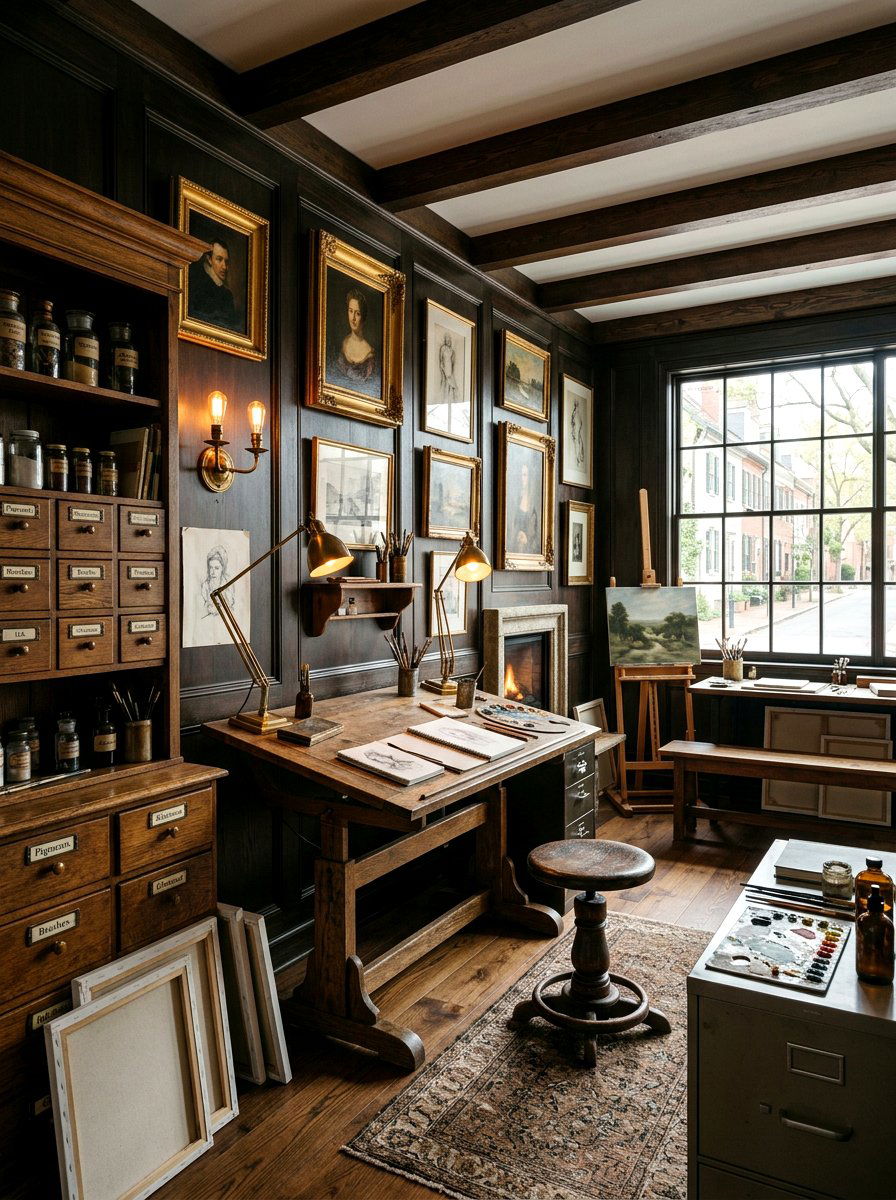
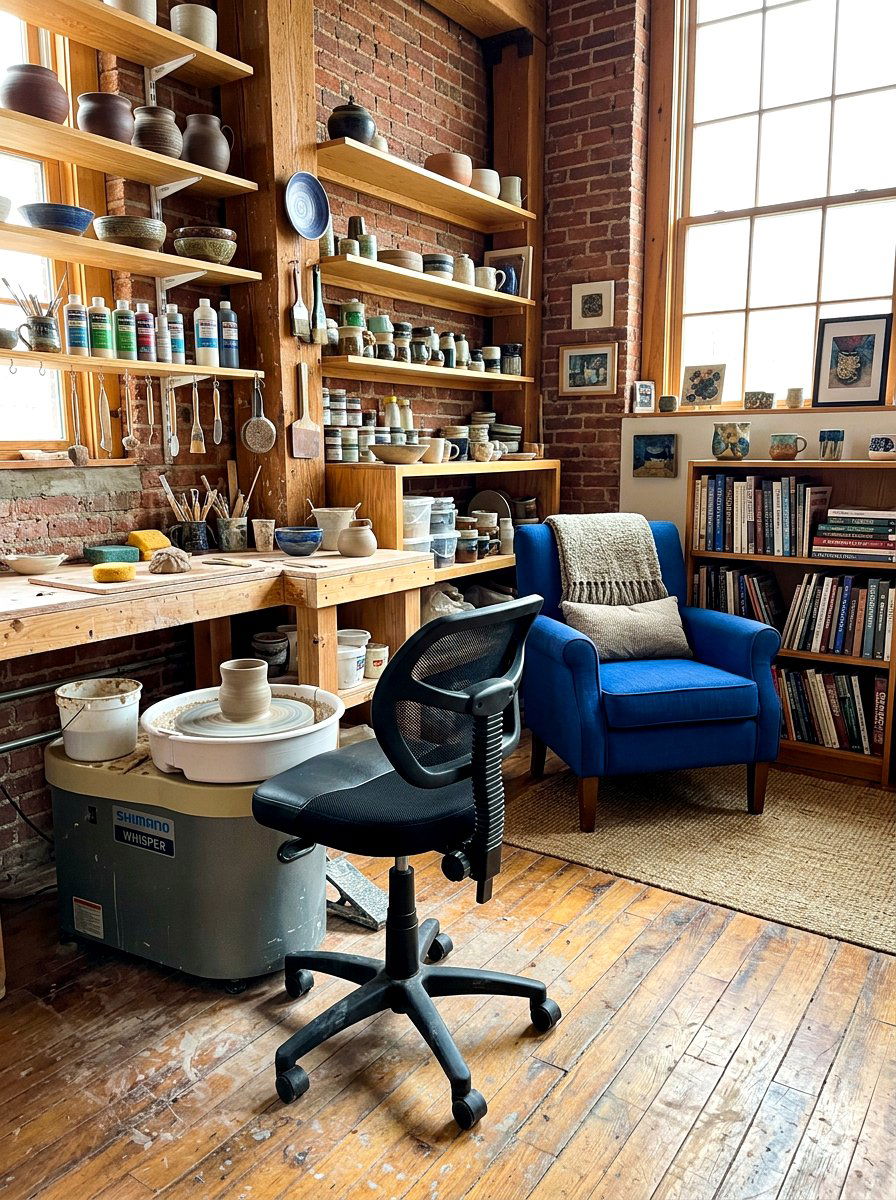
13. Rustic pottery studio
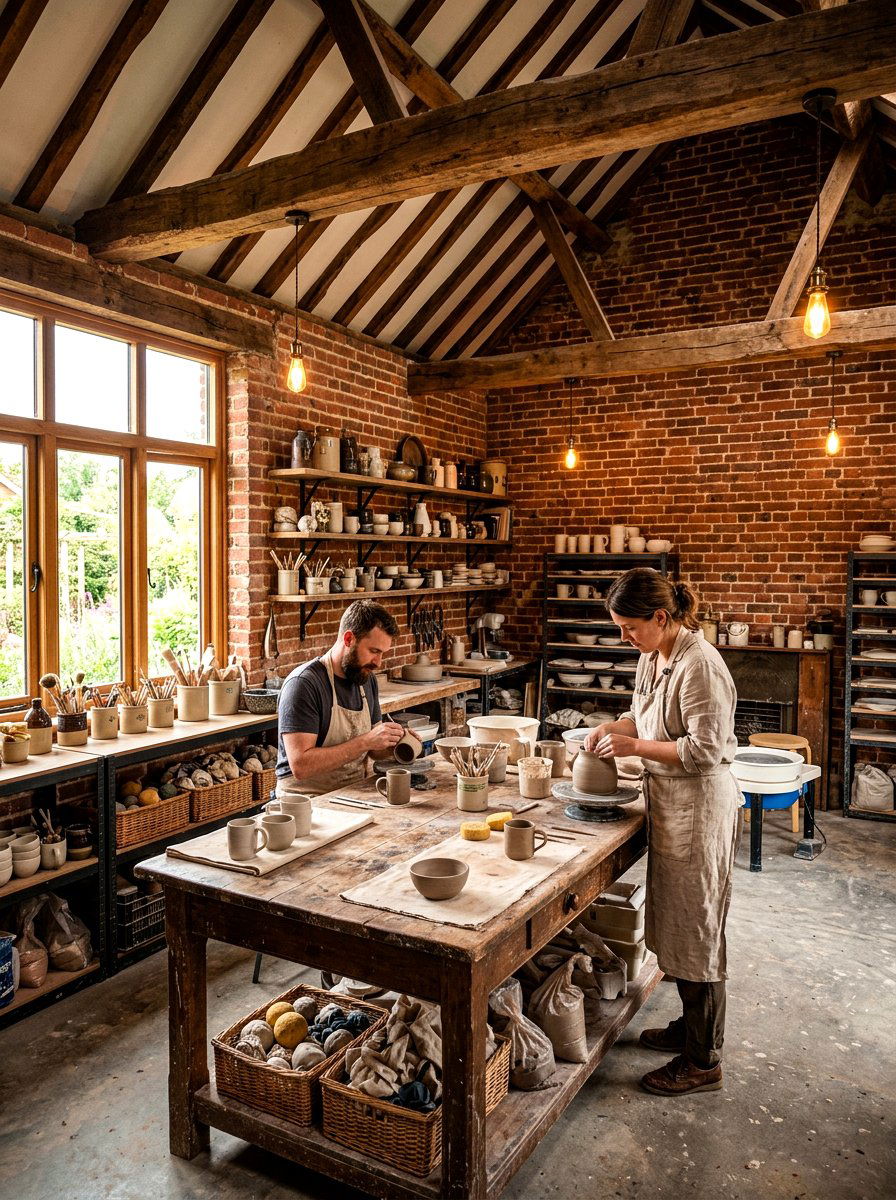
Does your creative soul crave a workspace that feels like an old-world workshop filled with character and history? A rustic pottery room uses natural materials like reclaimed wood shelving and antique workbenches to create a warm, inviting atmosphere. Incorporate vintage stoneware crocks for tool storage and woven baskets for holding sponges and rags to enhance the traditional feel. Exposed brick walls or textured plaster provide a beautiful backdrop for your handmade ceramics, making the studio feel like a part of the art itself. This style celebrates the raw, earthy origins of clay and provides a cozy environment that feels grounded and deeply connected to the craft.
14. Modern pottery studio
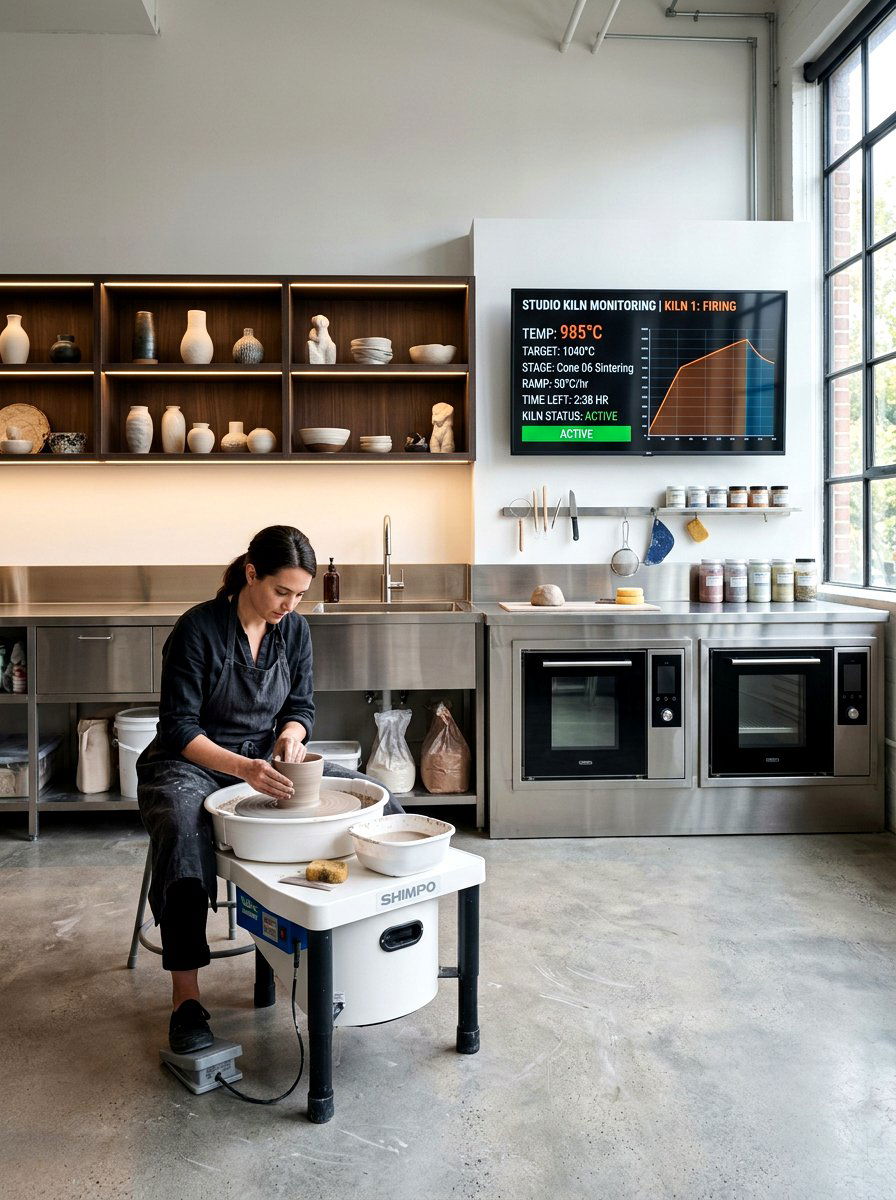
How do you integrate high-tech ceramic equipment into a sleek, contemporary home design without it looking out of place? A modern pottery studio features clean lines, integrated LED lighting, and high-performance materials like stainless steel and polished concrete. Use modular furniture systems that can be reconfigured as your needs change, and choose equipment with a minimal, professional silhouette. Incorporate smart technology, such as Wi-Fi-enabled kiln controllers, so you can monitor your firings from your smartphone. This polished approach treats the studio as a high-end design feature of the home, proving that a functional workspace can be just as stylish as any living area or kitchen.

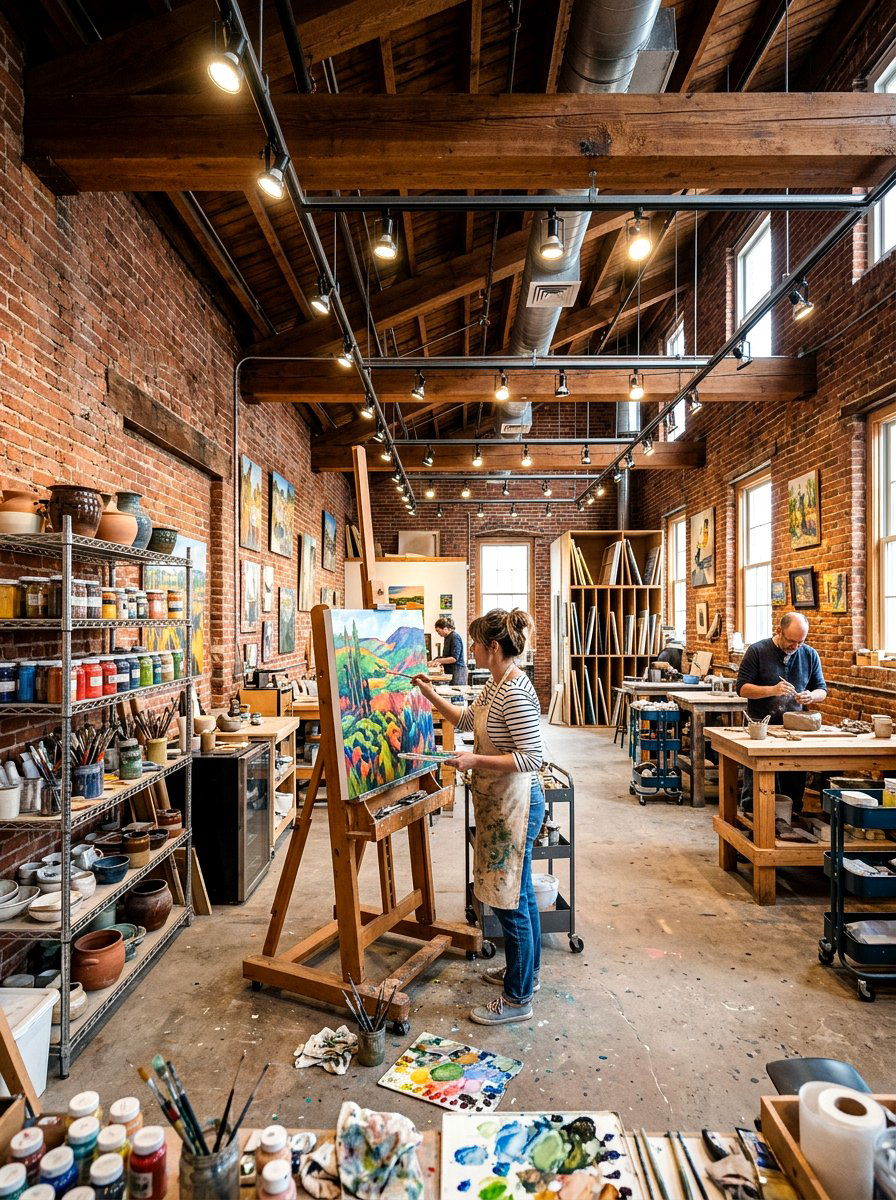
15. Industrial pottery studio
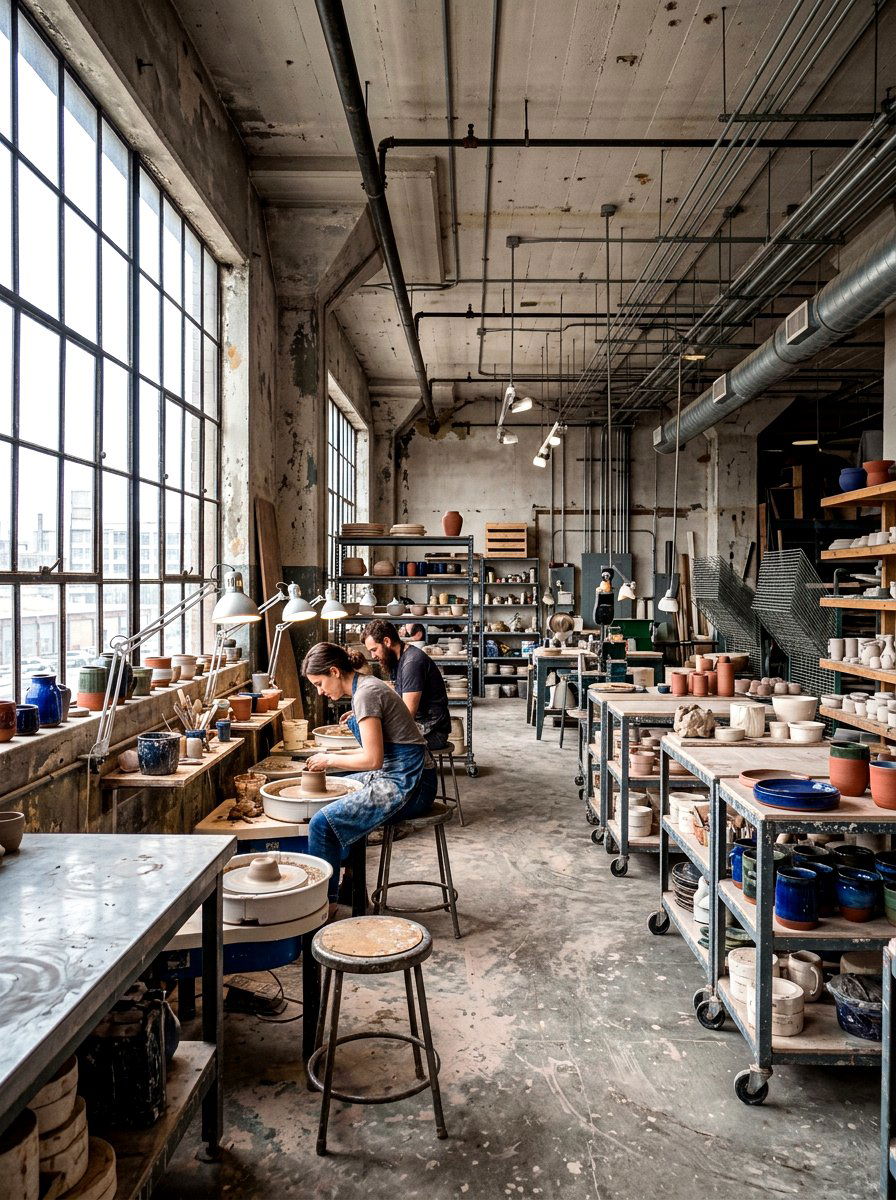
Are you inspired by the raw, functional beauty of professional factories and old warehouse conversion spaces? An industrial pottery room embraces exposed pipes, metal beams, and rugged finishes that can stand up to the heavy wear of clay work. Use salvaged factory carts as mobile workbenches and install large, articulating arm lamps over your wheel for targeted task lighting. The combination of cold metal and warm clay creates a striking visual contrast that feels both productive and artistic. This "no-nonsense" design style is incredibly practical, as every element is chosen for its durability and ease of maintenance in a high-traffic, messy environment.
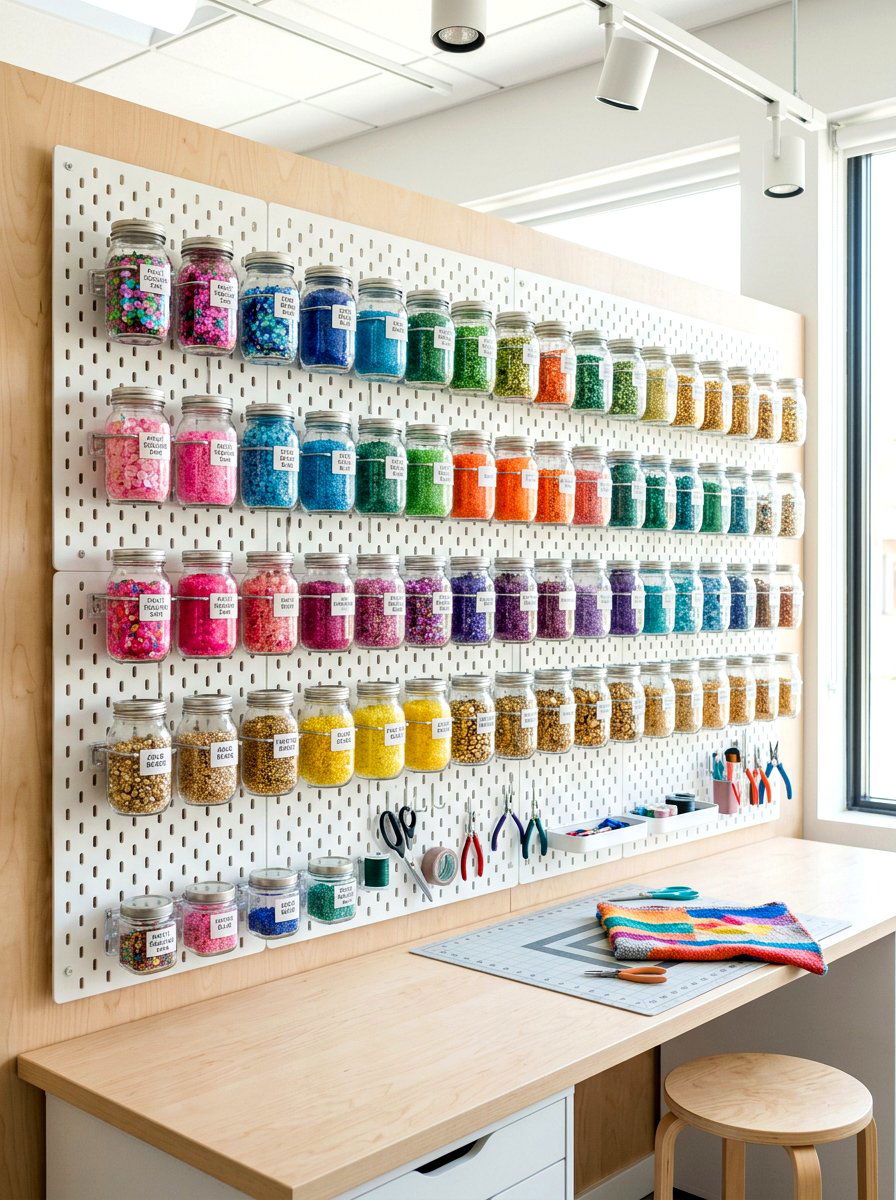
16. Pottery studio pegboard
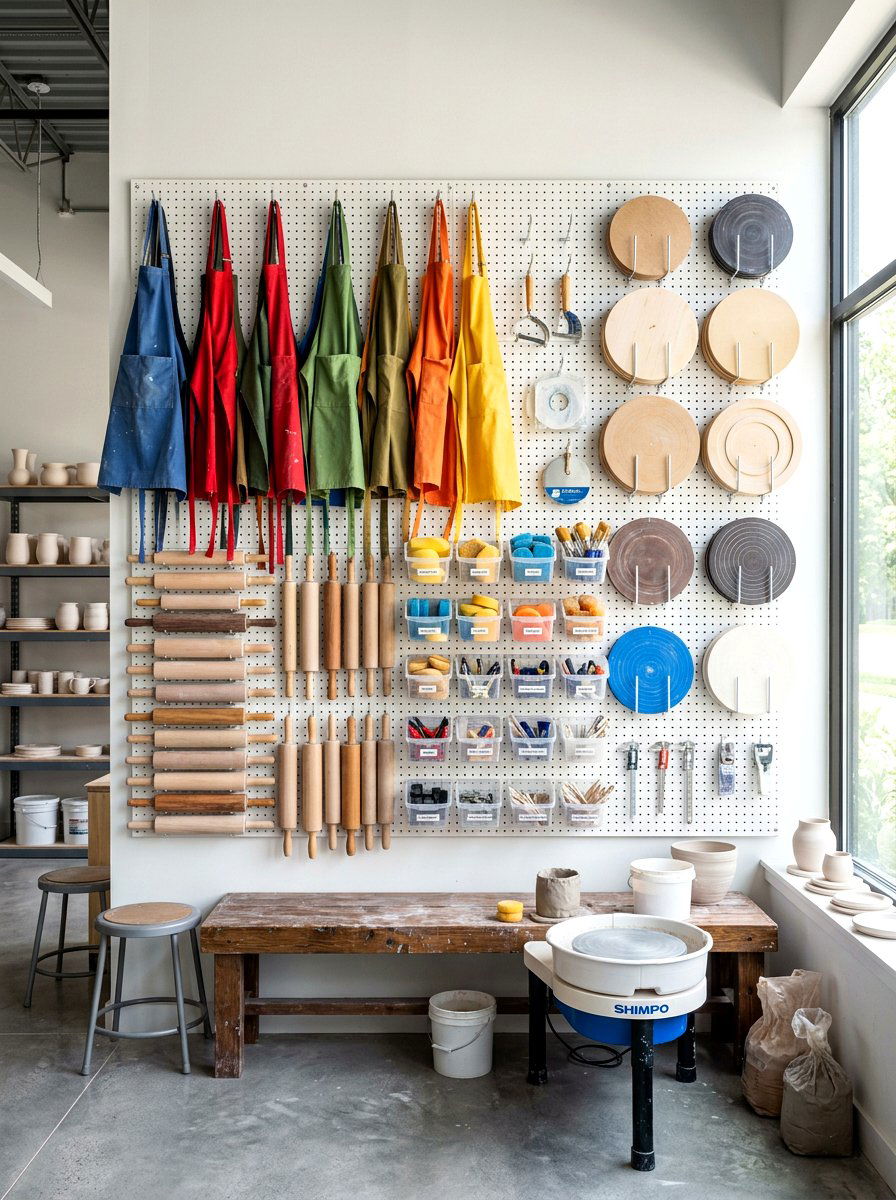
Is there a more versatile way to organize a wide variety of small items than the classic studio pegboard? This customizable wall system allows you to hang everything from ribs and wire cutters to aprons and rolling pins right where you need them. You can easily move hooks and bins around as your tool collection grows, ensuring that the layout always fits your current projects. Paint the pegboard a bold color to make it a focal point, or keep it white for a clean, professional look. By keeping your tools off the table, you create a safer, more organized environment where every item has a specific and visible home.
17. Glaze mixing station
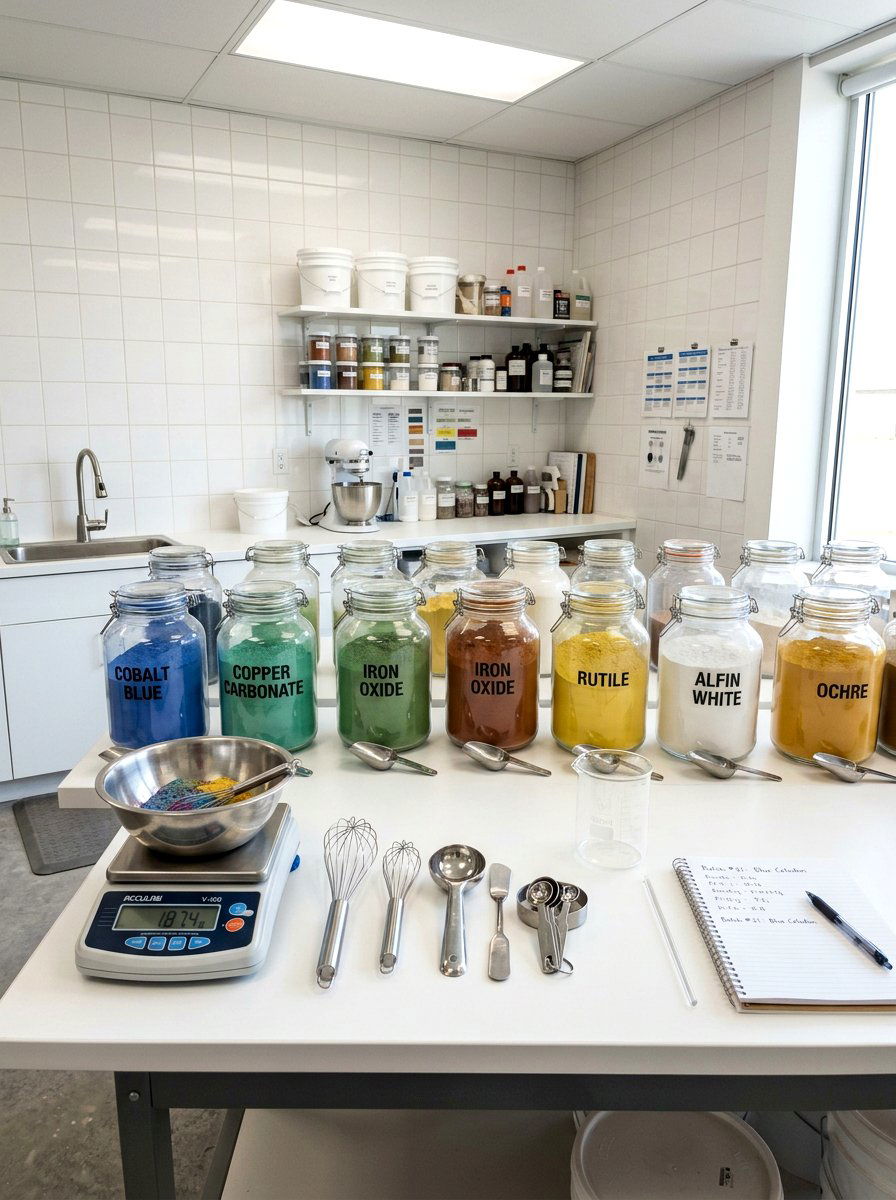
Mixing your own glazes is a rewarding but messy process that requires a dedicated and highly organized workspace. Your glaze station should feature a smooth, non-porous countertop that can be wiped completely clean to prevent cross-contamination between different batches. Store raw materials in airtight, labeled plastic bins or glass jars arranged on sturdy shelves above the mixing area. A precise digital scale and a set of graduated cylinders are essential for accurate recipes, so keep them in a protected drawer when not in use. Ensure this area has excellent lighting and a nearby water source to make the process of creating custom finishes both safe and efficient.
18. Pottery gallery display
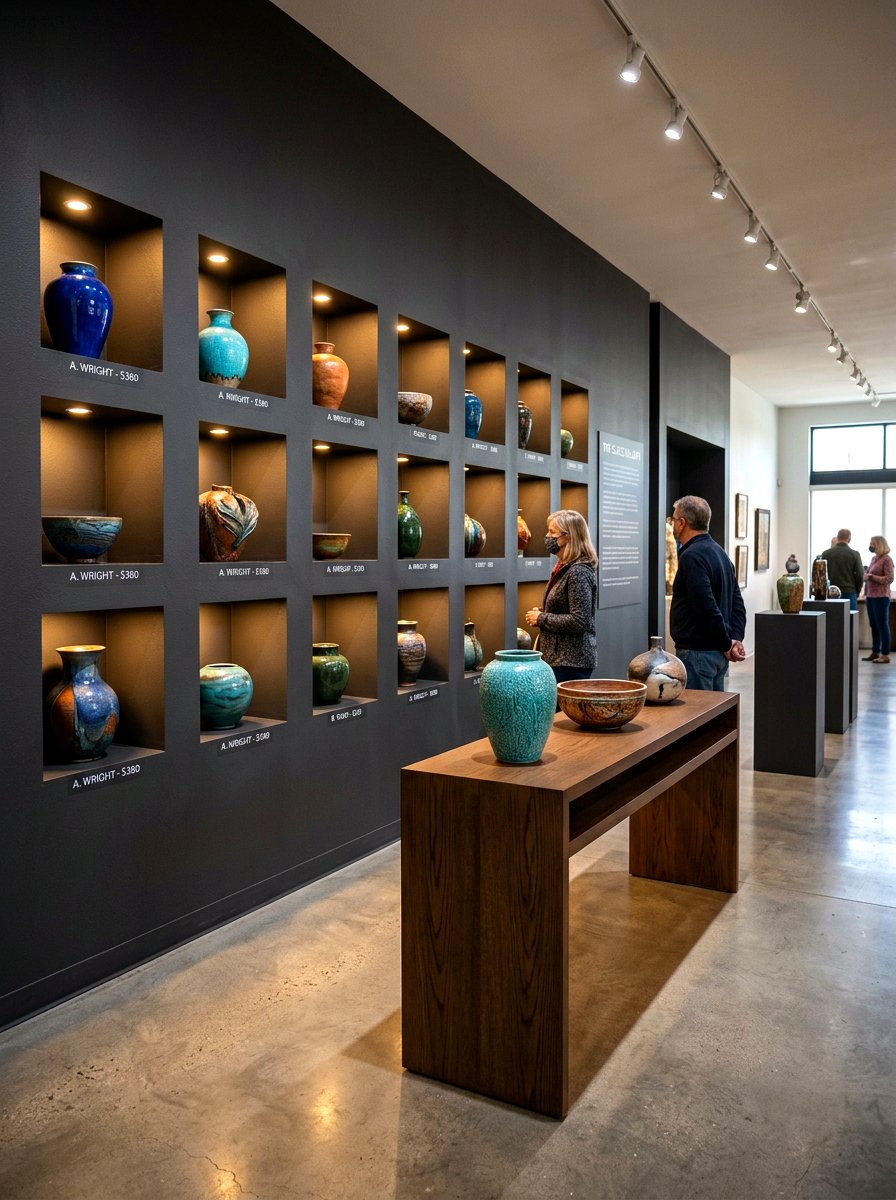
Once your beautiful ceramic pieces are finished, don't they deserve a dedicated space where they can be properly admired? A pottery gallery area within your studio serves as a rotating exhibition of your best work and a great source of daily inspiration. Use floating wooden shelves or recessed niches with integrated puck lighting to highlight the textures and colors of your glazes. This area should be kept separate from the dusty production zone to ensure your finished pots stay pristine and ready for sale or gifting. Having a professional display area also makes it easier to photograph your work for social media or online portfolios.
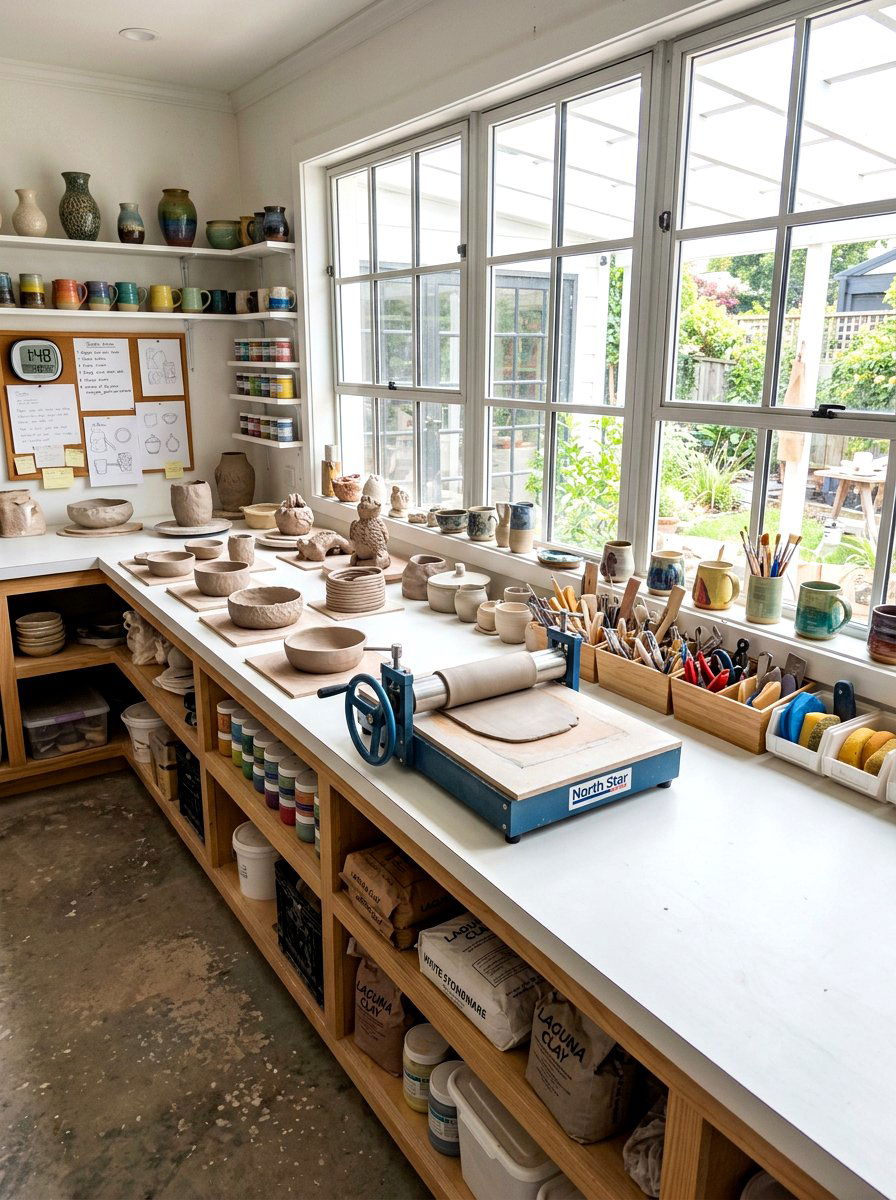
19. Natural light pottery studio

Why is natural light considered the gold standard for artists working with subtle colors and intricate surface textures? A studio flooded with sunlight allows you to see the true hue of your glazes and the fine details of your carving work without artificial distortion. If possible, position your primary worktable under a large window or a skylight to capture the best rays throughout the day. North-facing light is particularly prized by potters because it provides a consistent, indirect glow that doesn't create harsh shadows or dry out clay unevenly. This bright environment boosts your mood and energy levels, making the creative process feel more vibrant and connected.

20. Compact pottery studio desk
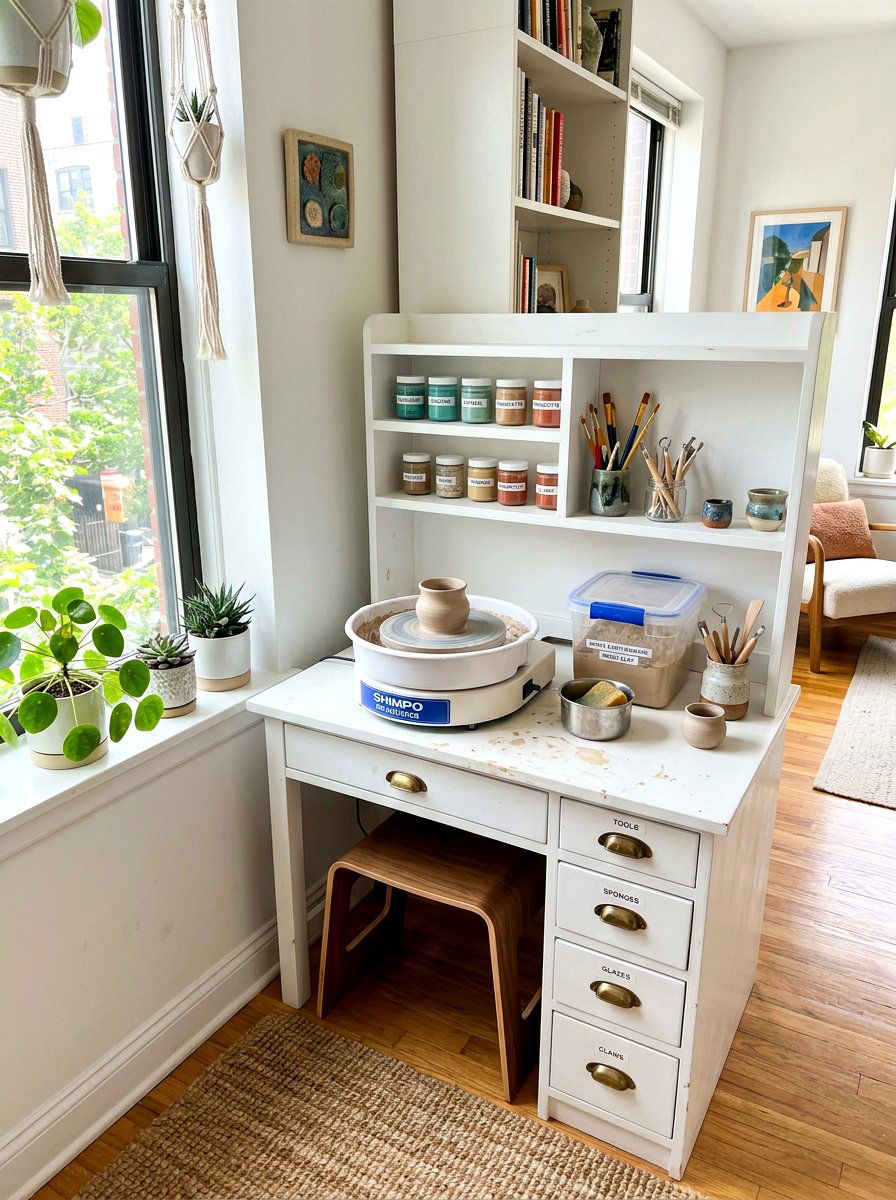
Can you still pursue your love for ceramics if you only have a tiny apartment corner or a small closet? A compact pottery desk proves that you don't need a huge room to be productive, especially if you focus on hand-building or small-scale throwing. Look for a desk with built-in storage drawers or a hutch to keep all your supplies contained in one small footprint. A tabletop pottery wheel can be tucked away when not in use, and a lidded bin can serve as a miniature "damp box" for your works-in-progress. This efficient setup is all about maximizing every square inch through clever organization and a focused creative intent.
21. Pottery studio floor tiles
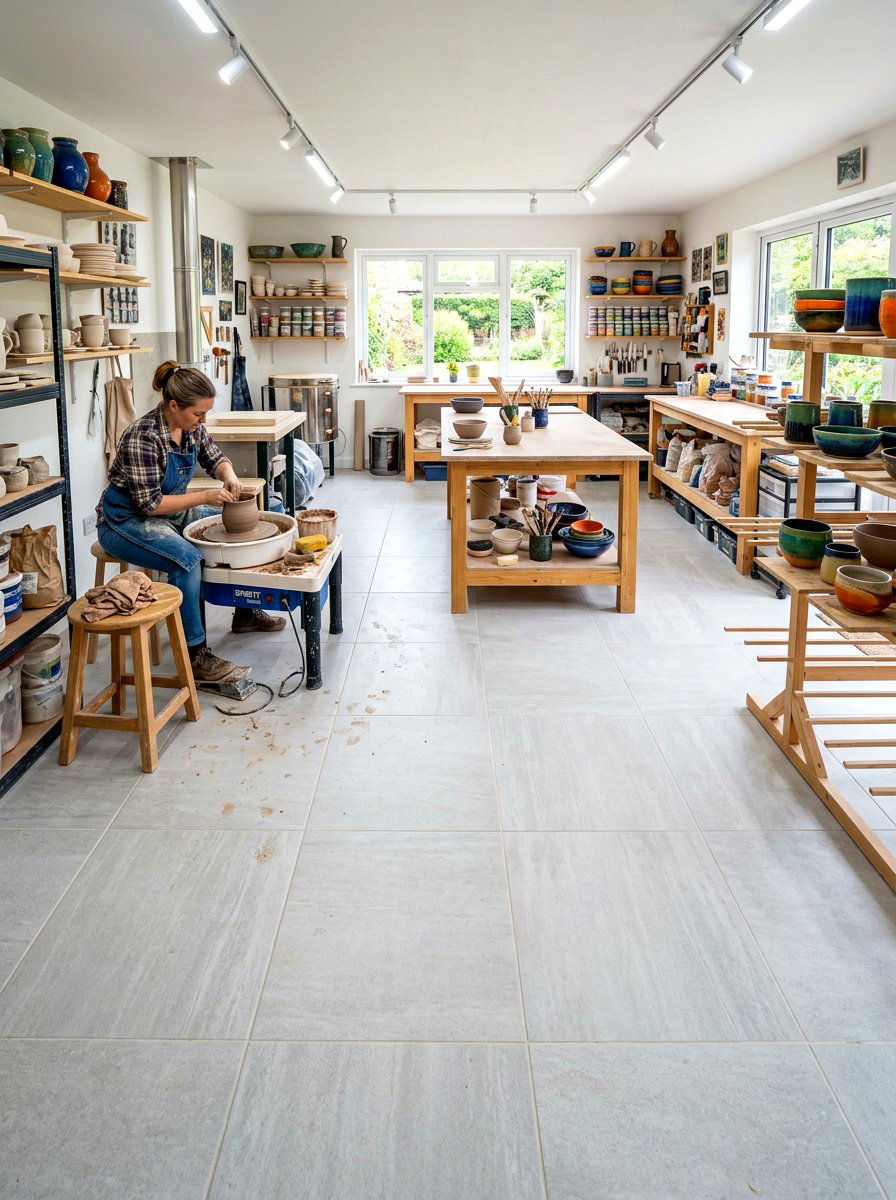
When it comes to the messiest hobby on earth, choosing the right flooring is a decision that affects your daily cleaning routine. Large-format porcelain or ceramic tiles are an excellent choice for a pottery room because they are non-porous and extremely easy to mop. Choose a textured finish that provides slip resistance when the floor inevitably gets wet with slip or glaze drips. Avoid dark grout, which can show white clay dust, and instead opt for a medium grey that masks common studio stains. A tiled floor not only looks professional but also provides a durable, fire-resistant surface that can handle the weight of heavy kilns and wheels.
22. Mobile pottery workstation

Are you looking for a way to make your studio more flexible so it can adapt to different projects throughout the week? Mobile workstations on locking casters allow you to roll your wheel, wedging table, or glazing station exactly where you need it. This is particularly helpful in multi-use spaces where you might need to clear the floor for a large-scale sculpture or a cleaning session. You can build your own carts using sturdy plywood and heavy-duty wheels, or repurpose industrial metal kitchen carts for a professional look. This modular approach ensures that your studio layout can grow and change alongside your evolving artistic style and needs.
23. Pottery studio apron storage
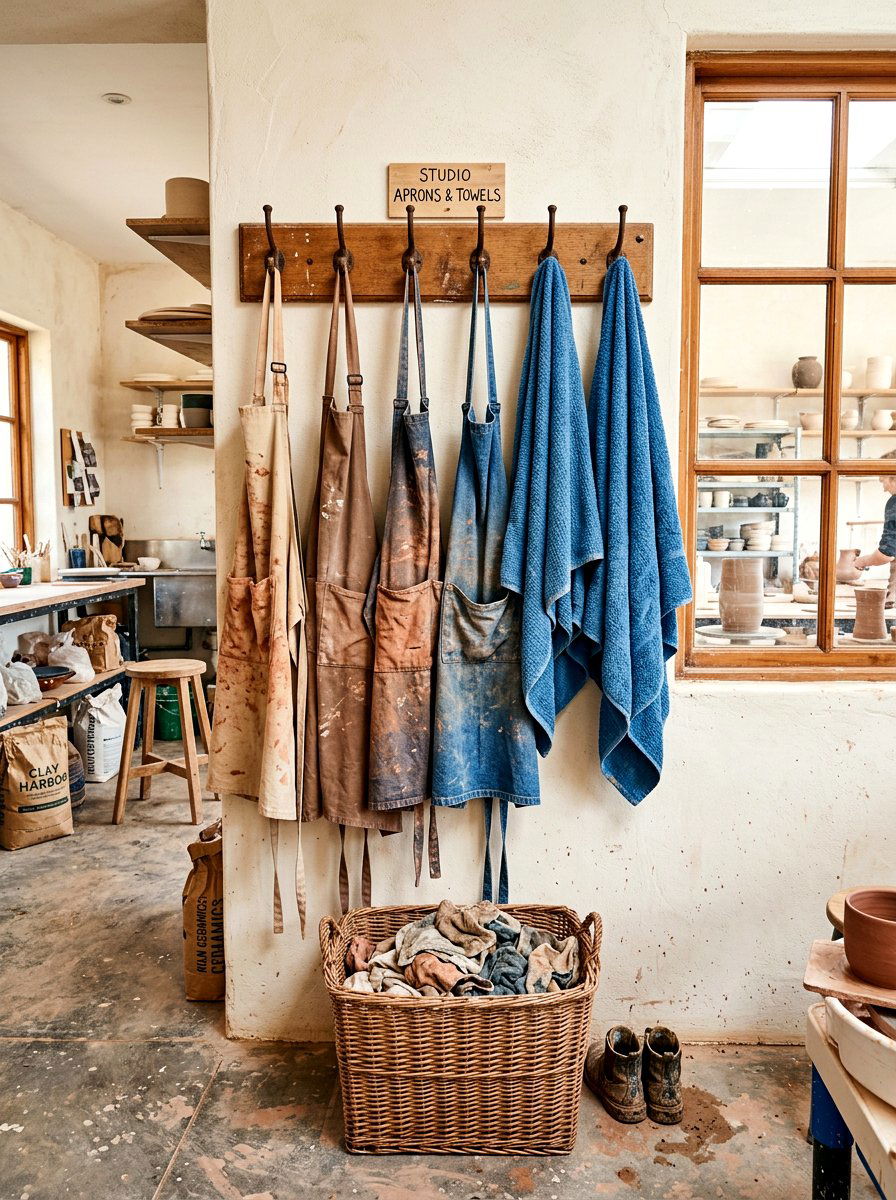
Every potter knows that a good apron is the first line of defense against a constant coating of dried clay and glaze. A dedicated storage area for your aprons, towels, and work shirts keeps the "dirty" textiles organized and away from your clean living spaces. Install a row of sturdy wall hooks or a vintage coat rack near the entrance of the studio for easy access as you come and go. Consider keeping a small laundry hamper nearby specifically for your studio rags and towels to prevent clay dust from entering your regular wash. This small detail helps maintain a professional boundary between your messy creative life and your home.
24. Ceiling mounted pottery lighting
How can you eliminate frustrating shadows that make it difficult to see the symmetry of your pots as they spin on the wheel? Ceiling-mounted track lighting allows you to position multiple spotlights at different angles, ensuring your workspace is perfectly illuminated from every side. Choose high-CRI (Color Rendering Index) LED bulbs to ensure the colors of your clay and glazes appear accurate and vibrant. For hand-building or glazing, adjustable pendant lights can be lowered to provide intense task lighting right where you need it most. Proper overhead lighting is essential for safety and precision, helping you catch tiny imperfections before your pieces go into the first firing.

25. Attic pottery studio
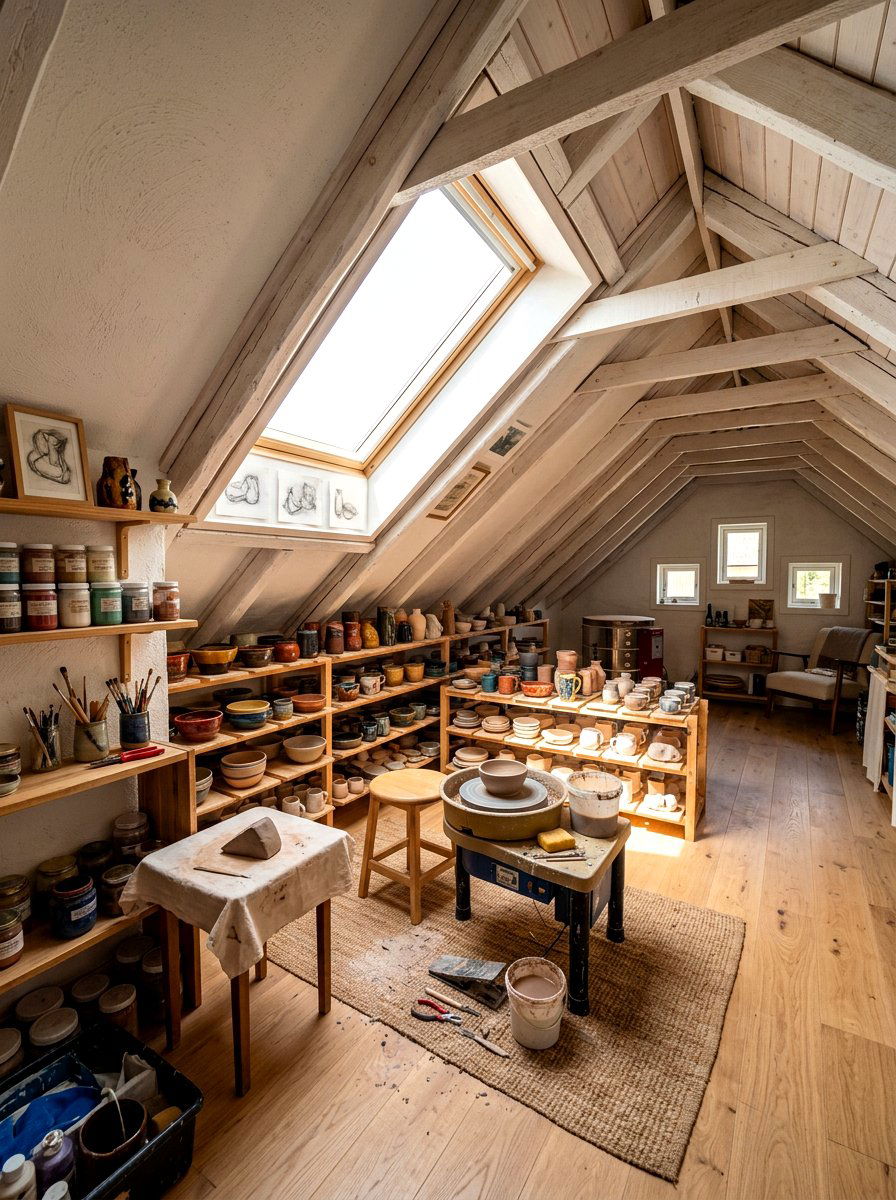
Have you thought about converting your quiet, secluded attic into an artist’s loft dedicated to the craft of pottery? The top floor of a home often provides the privacy and peace needed for deep creative focus away from the distractions of daily life. Ensure the floor joists are reinforced to handle the significant weight of clay bags and a pottery wheel. Install a skylight to bring in natural light and provide much-needed ventilation for the warm summer months. This elevated perspective gives the studio a "secret hideaway" feel, making every trip upstairs feel like a special escape into your own private world of ceramic creation.
26. Garden shed pottery studio

Is there anything more charming than a dedicated "potting shed" that has been reimagined as a fully functional ceramic workshop? A garden shed provides a separate, detached space that keeps the noise and dust of pottery completely away from your main living area. You can finish the interior with insulation and drywall to make it a year-round retreat, or keep it rustic with exposed wood studs and shelving. Being surrounded by the garden provides endless organic inspiration for your textures and forms. This standalone studio is a dream for many potters, offering a perfect balance of professional isolation and a beautiful, nature-filled environment for artistic growth.
27. Pottery studio counter space
In a busy pottery room, you can truly never have too much flat surface area for hand-building, glazing, and organizing ware. Long, continuous countertops allow you to set up different "zones" for specific tasks, such as a clean area for sketching and a messy area for slip-trailing. Choose a durable material like laminate or sealed wood that can withstand the moisture and abrasion of working with raw clay. If you have the room, a large central island provides a collaborative space where you can work with friends or handle oversized sculptural projects. Keeping these surfaces clear of clutter is the key to maintaining a functional and inviting studio environment.
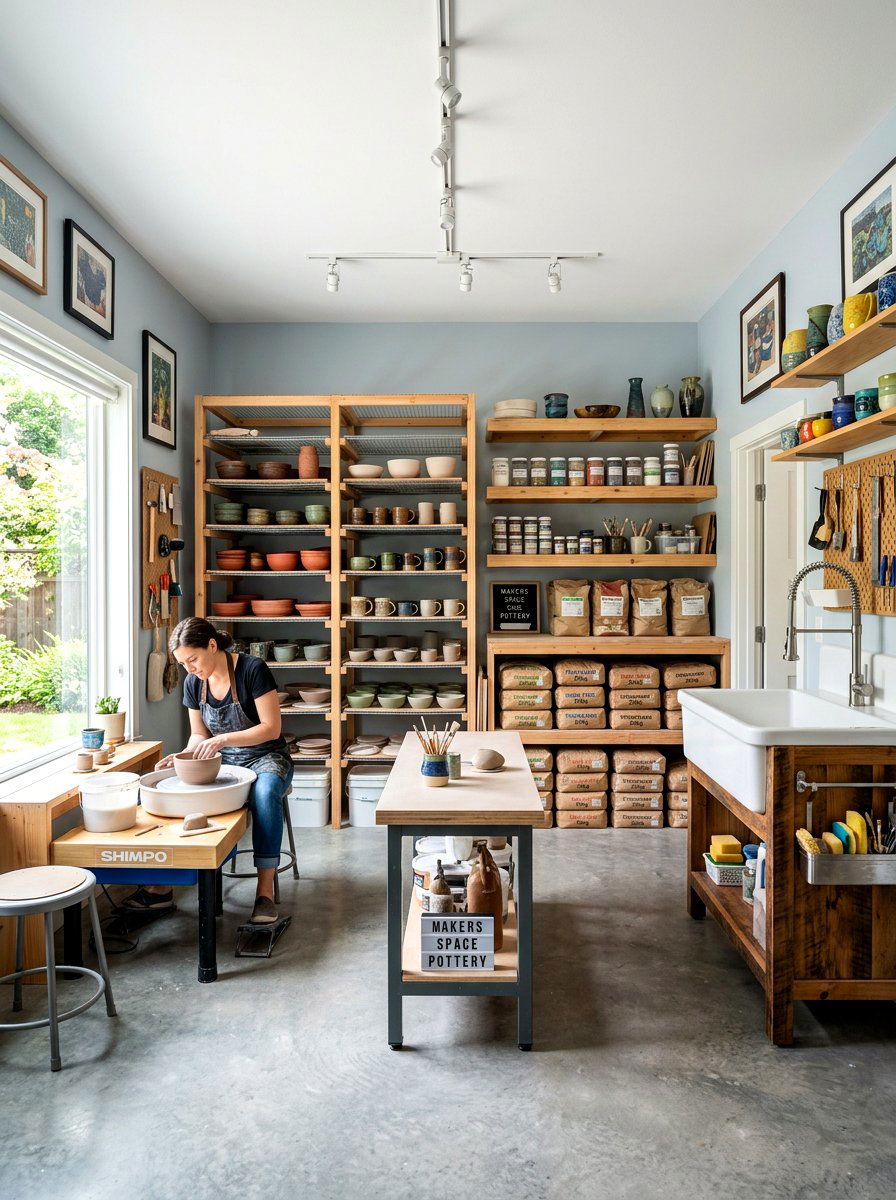
28. Large ceramic studio layout
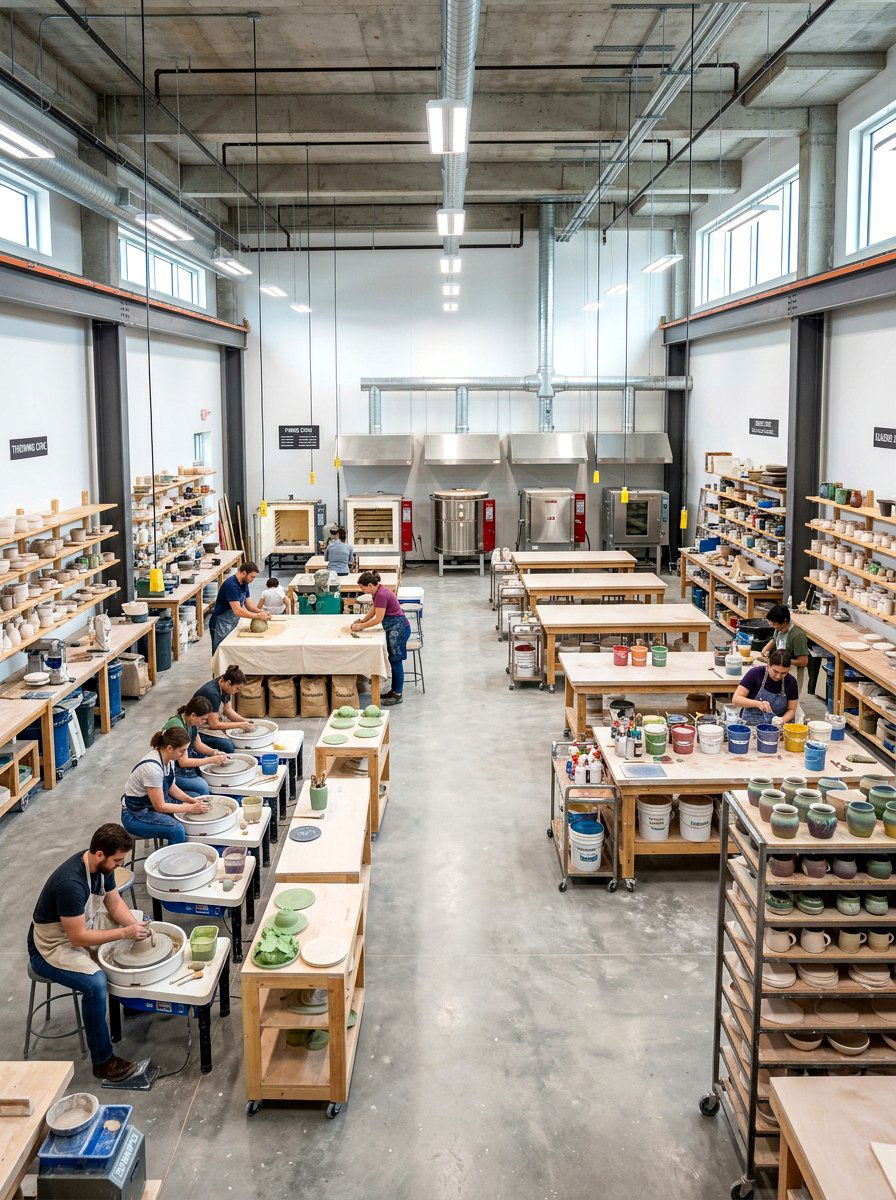
If you are lucky enough to have a large room, how do you organize it to ensure a smooth and logical workflow? A successful large studio layout follows the "life of a pot, " moving logically from clay storage to the wheel, then to drying racks, and finally to the kiln. Create wide aisles between stations to allow for the safe movement of heavy ware carts and large batches of glaze. Dedicate a specific corner for a photography station and a packing area to streamline the business side of your ceramic practice. This organized, professional approach ensures that even the busiest production schedule feels manageable and efficient within the expansive space.
29. Pottery studio reclaimed wood
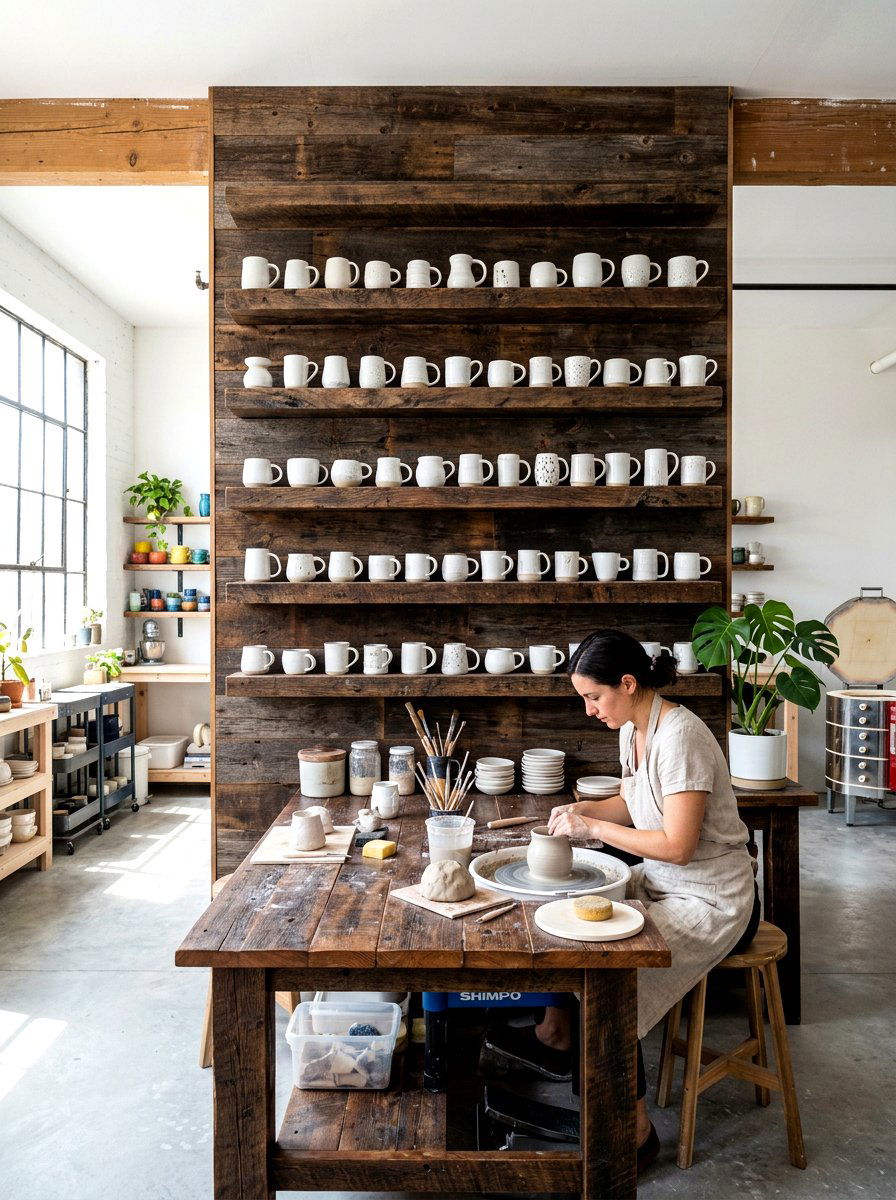
Using reclaimed wood throughout your pottery room adds a layer of soulful, organic warmth that perfectly complements the handmade nature of ceramics. You can build chunky open shelves from old barn beams or use weathered planks to create a unique accent wall behind your display gallery. The natural imperfections, knots, and textures of the wood provide a beautiful contrast to the smooth, glassy finishes of your fired pottery. Reclaimed wood is also a sustainable choice, aligning your creative practice with eco-friendly design principles. This material choice creates a space that feels timeless and deeply connected to the natural elements of earth, water, and fire.
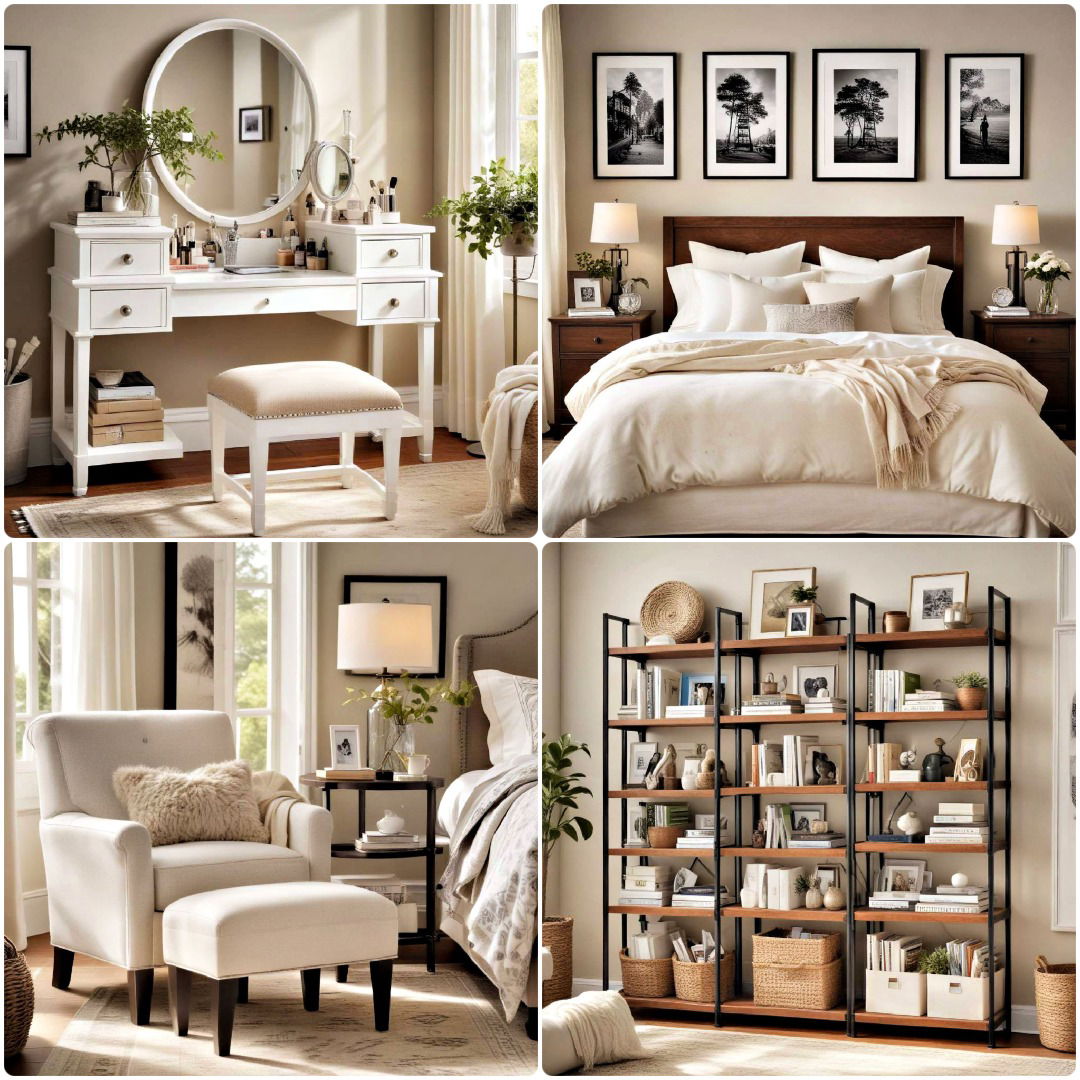
30. Pottery studio seating
Pottery is a labor-intensive craft that often requires hours of sitting at the wheel or standing at a glazing table, making ergonomic seating vital. Invest in a high-quality, height-adjustable stool that allows your knees to stay level with your hips while you throw, preventing strain on your lower back. For your hand-building or sketching station, a comfortable chair with good lumbar support will help you stay focused during intricate carving sessions. You might even include a small upholstered armchair in a clean corner for reading pottery books or taking a well-deserved break between firings. Prioritizing your physical comfort ensures that your pottery practice remains sustainable and enjoyable for years.
Conclusion:
Designing the perfect pottery room is an ongoing process of refining your workspace to match your evolving creative needs and personal style. By prioritizing organization, safety, and a logical workflow, you create an environment that removes obstacles and allows your artistic vision to flourish. Whether you prefer the sleek lines of a modern studio or the cozy warmth of a rustic garden shed, the key is to build a space that truly feels like home for your hands and heart. As you fill your shelves with drying greenware and vibrant glazes, your studio becomes a living testament to your passion for the timeless craft of ceramics.
Related posts: